How to create an RPA flow using Outlook Email activities
Business Problem
You need to create a basic flow using some of the Outlook automation activities to read mail and store attachments.
We will build an RPA flow which first reads emails from an outlook account. Then for each email, the email text body will be written into the .txt file including the attachments one by one.
Components
- RPA Management
- RPA Studio
- Microsoft Outlook application
Requirements
- Before you can start building the flow, you’ll need to install RPA Studio on your machine and set up a connection between the RPA Studio and RPA Management meaning. Check the Infor RPA Studio User Guide for the steps on how to do so.
- You may also need to create a few artifacts:
- Create a folder to store the .txt file where the mail body will be read into e.g. “C:\RPA”
- Create a .txt file within this folder “C:\RPA\rpa.txt”
Tutorial
Difficulty: Medium
Estimated completion time: 25 Minutes
1 – Open RPA Studio on your machine. If you are not signed in already into the tenant, you will be asked to sign in before proceeding to RPA flow designer screens.
2 – On the Home page of RPA Studio click Create New Project and specify the following properties in the pop-up window:
(a) Name: OutlookMails
(b) ProjectLocation: <default>
(c) Description: Read Outlook Mails.
(d) Language: VB <selected by default>
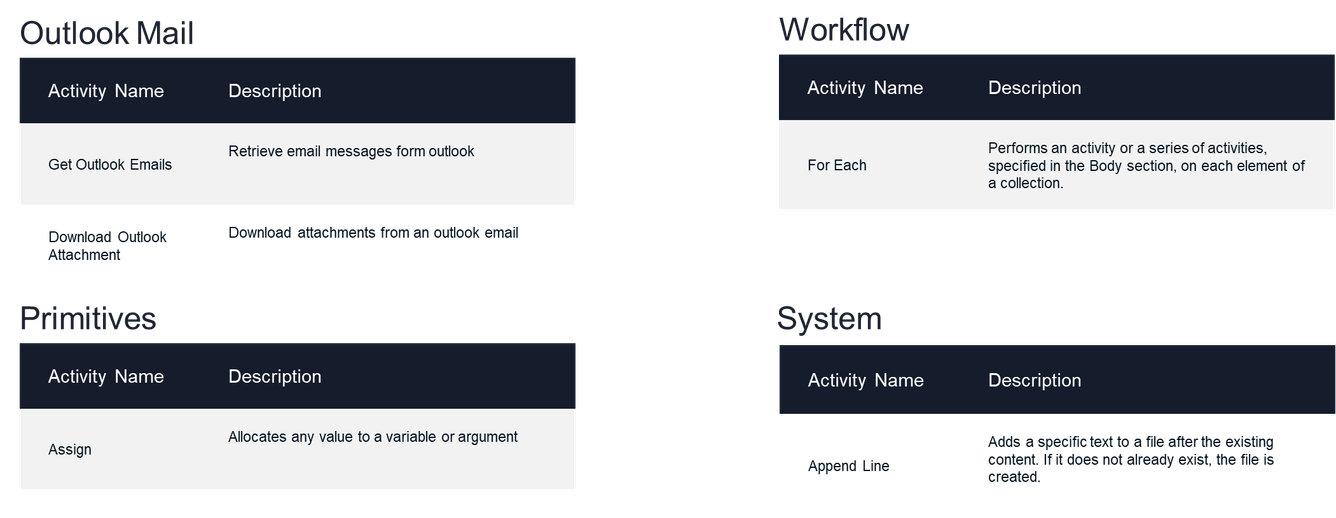
3 – Let’s first focus on reading the mails from Outlook account. For that we need Get Outlook E-mailsactivity and specify the following properties:
- Account – which is the email address from which the email is read. Specify the argument:
- mailaccount of type string and default value for your email account
- Mail Folder – the exact email folder within selected account. Specify the argument:
- mailfolder of type string and default value for your email account
- Optional: Filter – use this property to filter the emails which should be read
- e.g. “[Subject] = Test”
- Note: more examples of the filters can be found in the Infor RPA user guide.
- Mark As Read – check if you don’t wish to read the same email
- Only unread mails – only unread email would be read it is an explicit filter. Please check this checkbox
- Top Number of email which should be read in one go – it is an integer value e.g. 2
- For Output property Emails we need to create the variables
- called emaillist which will store the list of mails of type List <Mail>
- To find List <Mail> data type, expand the Variable Type and select Browse for type. In the Type Name cell type List and select List under the System.Collection.Generic domain. Once selected, below the System.Collection.Generic.List from the dropdown select Browse for type and in the new dialog window in the Type Name cell type Mail and select Mail under Infor.Activities.Email.
- called emaillist which will store the list of mails of type List <Mail>


4 – Now let’s start reading the mails one by one. For that let’s look for an automation activity called For eachand define
- for Type property as Mail which is same as a single object type from the emaillist variable
- for value property define emaillist.
- In the activity on Design Canvas, you will see the following text “Foreach item in emaillist” the item signifies the single object in this example mail within the list of object, here list of mails

5 – Add the Sequence activity to specify the flow for reading each mail body and writing to the file
6 – Within the Sequence add activity Assign which will allow as to assign the mail body to a variable of type string
- For To property – create a variable called body of type string – in this variable we will store the text of the mail body
- For Value property – here specify the VB expression for transforming the read the mail body into string data type by typing: item.body.tostring

7 – Next add Append Line activity which will be allow RPA flow to write the mail body into txt file and specify its properties:
- For Line property – input the variable storing the body of the mail which in this case it body
- For Source Filepath property – it should be the path of the .txt file where we will write the mail body e.g. “C://RPA/rpa.txt” or you can create a variable call filepath of type string with default values

8 – In addition you can also specify the activity to download the attachments if any were sent by adding Download Outlook Attachment activity and specify the following values:
- For Email property specify Item as in For Each activity
- For Path which is a path of the directory where the attachment should be stored, create variable:
- called attachementpath of type string and default value “C:\RPA”
- For File Path output property create a variable
- called attachemenfilepath of type List <String>
- To find List <String> data type, expand the Variable Type and select Browse for type. In the Type name cell type List and select List under the System.Collection.Generic domain. Once selected, below the System.Collection.Generic.List from the dropdown select the String and click ok.
- called attachemenfilepath of type List <String>


Now we can run this flow to see if all if working as expected. In case of any errors check the Output panel to see where the error may have occurred.
Activity List
