Widget for importing a file
Business Problem
Your employees need an easy way to upload files to the Infor Cloud that automatically get processed in the background and routed into the right applications or storage. You decide a Workspace widget would be a good user experience for the file upload to the browser.
This tutorial will show you how to build a widget that allows a user to upload a BOD / Custom XML / JSON to a Document Flow, Datalake Flow, Workflow, Alert or Monitor via IMS.
Components
- System Integration : Data Flows
- System Integration : Data Catalog
- System Integration : Api Gateway
Requirements
- Access to an Infor Cloud Suite
- User privileges to ION Desk
- User privileges to IONAPI
Tutorial
1. Download the Source Code
2. Configure the widget into the Workspaces using SDK.
Extract the source and copy the folder “tenant.ims.ai.fileupload” into samples folder of Workspaces SDK.
3. Configure the widget to Run from Local System
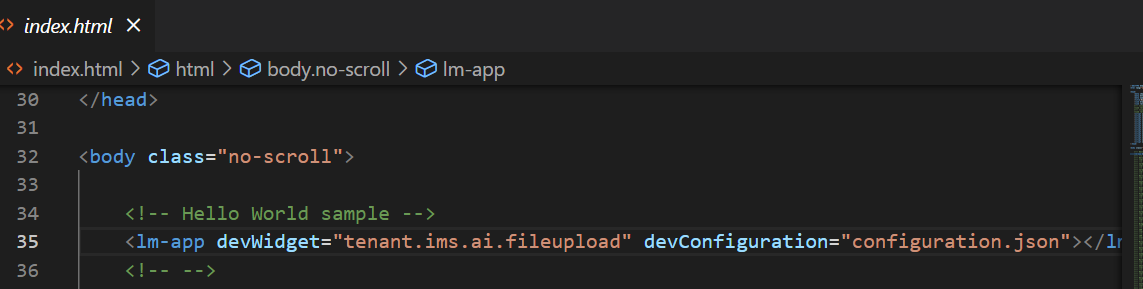
Open Index.html and write up the below code
<lm-app devWidget=”tenant.ims.ai.fileupload” devConfiguration=”configuration.json”></lm-app>
4. Configure Access Token
When we run this widget in the local widget needs Access Token to call the ION API, Access Token Generation can be done using the following documentation
Access token needs to be configured in the “Configuration.json” file and the access token can be generated from the guide
Resources for getting the Access Token from postman
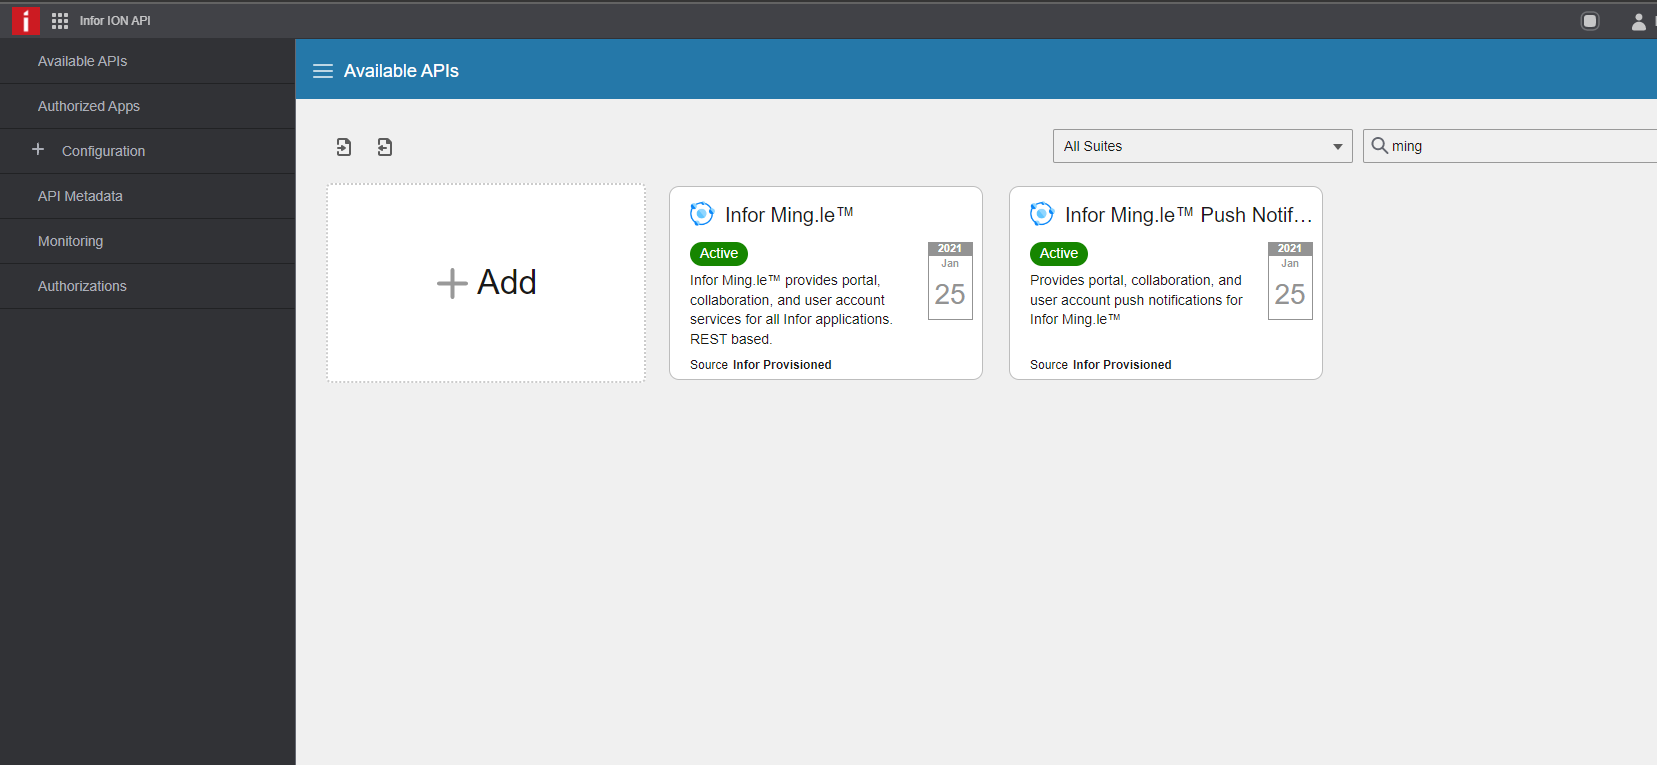
Get the base URL of the tenant which we want to call for this login into the tenant and open “Ion API”, it will display the list of suites as shown in the image
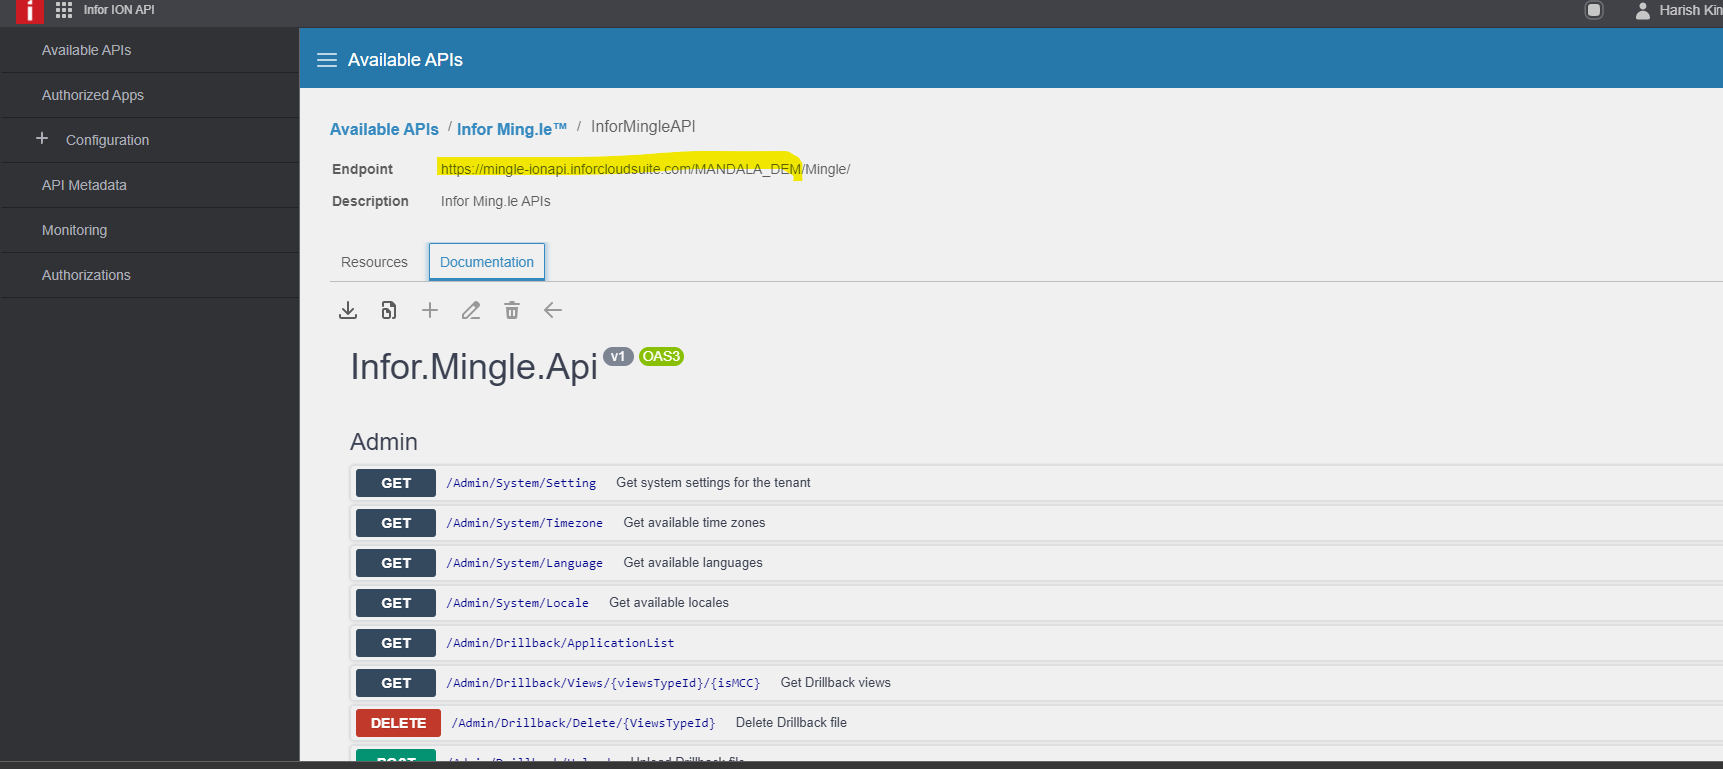
Now select the suite and in the suite and click on “Documentation” and copy the “Endpoint” up to tenant name as highlighted in below image
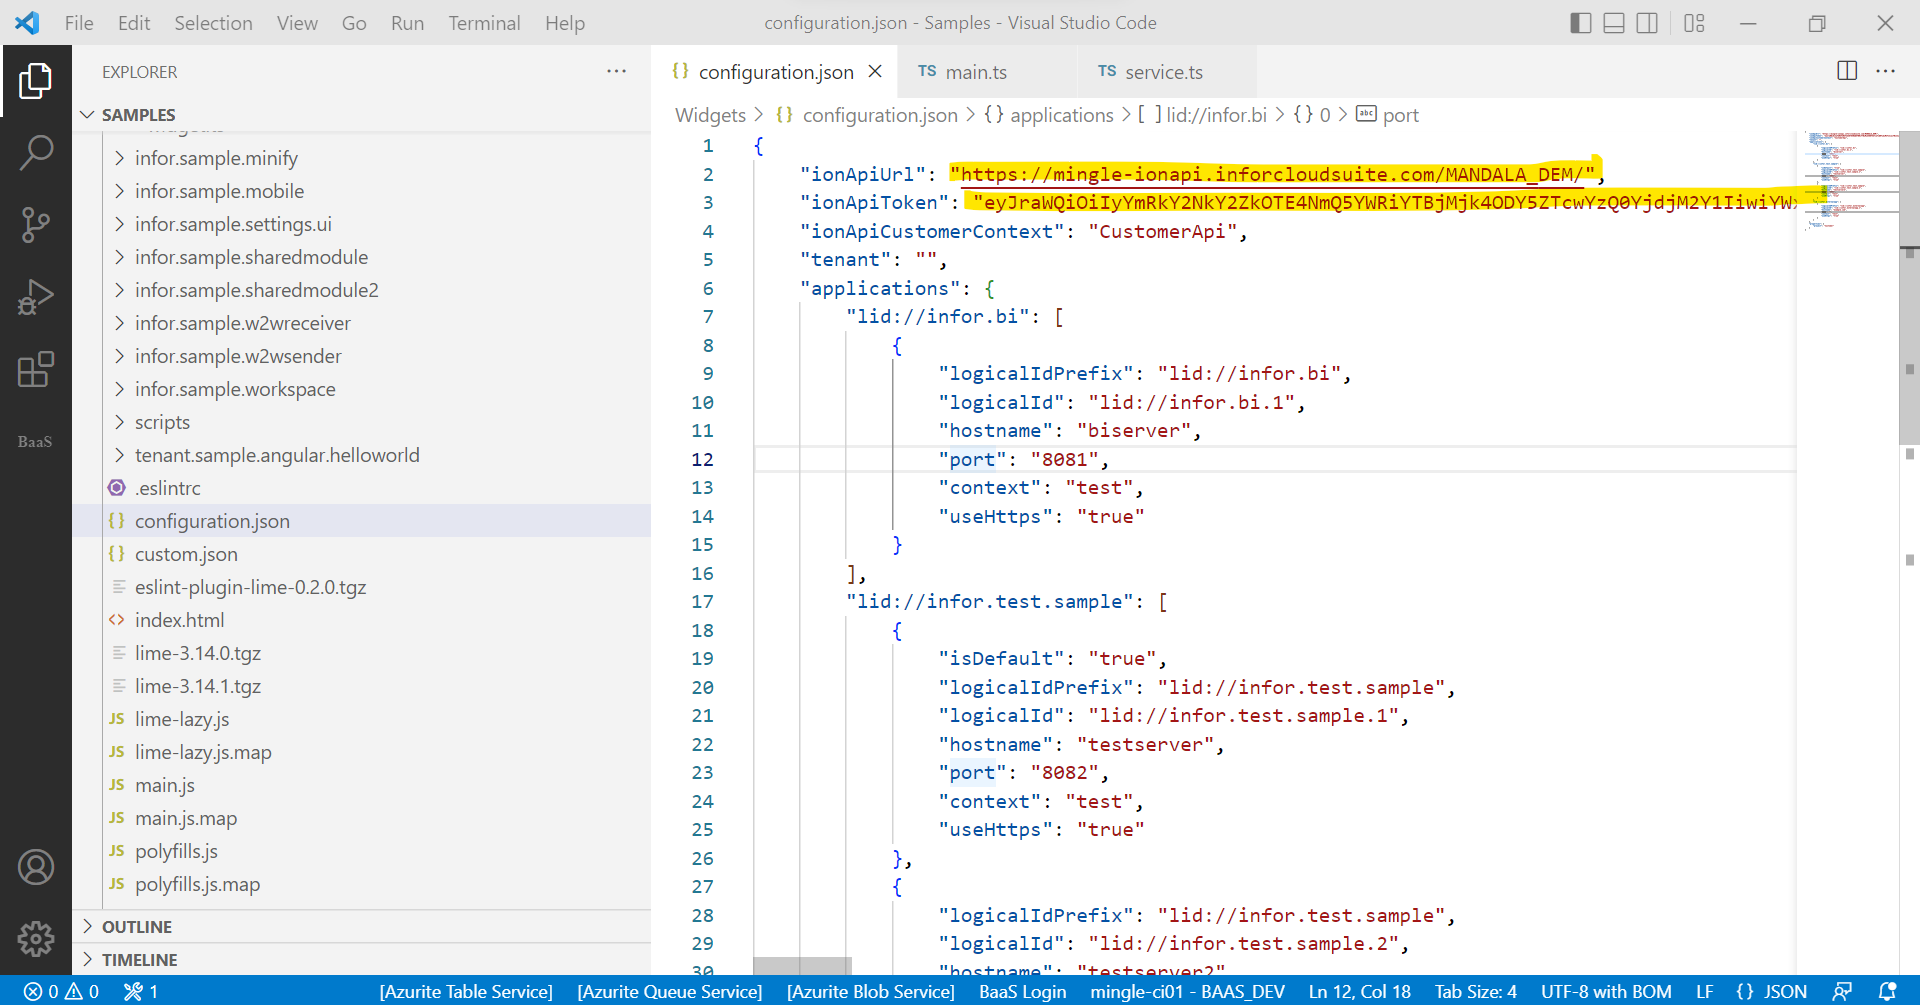
Once the token is generated open the “Configuration.json” and update the following attributes
- ionApiUrl with the end point
- ionApiToken with the generated token from the postman
Run the Project
Before running the project we need to disable the CORS in browser so that IONAPI calls to be success
For disabling the CORS do the following steps in WINDOWS
- Open Command Prompt as administrator
- Run the command “C:\Program Files\Google\Chrome\Application\chrome.exe” –disable-web-security –disable-gpu –user-data-dir=~/chromeTemp (Only applicable to Chrome for different browsers get from the CORSDisable )
- which will automatically open a chrome window in which CORS is disabled
For disabling the CORS do the following steps in MAC
- Open Terminal as administrator
- Run the command open -n -a /Applications/Google\ Chrome.app/Contents/MacOS/Google\ Chrome –args –user-data-dir=”/tmp/chrome_dev_test” –disable-web-security (Only applicable to Chrome for different browsers get from the CORSDisable )
- which will automatically open a chrome window in which CORS is disabled
Build
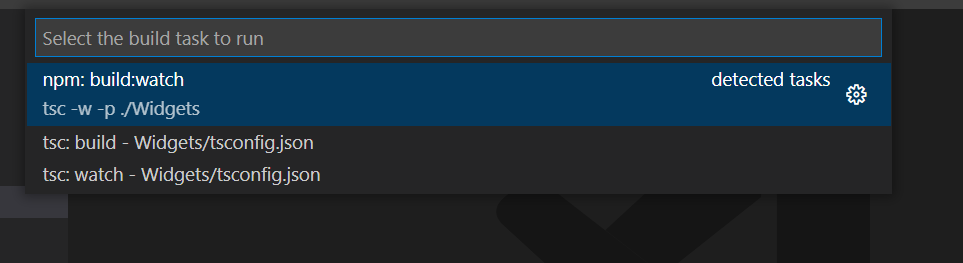
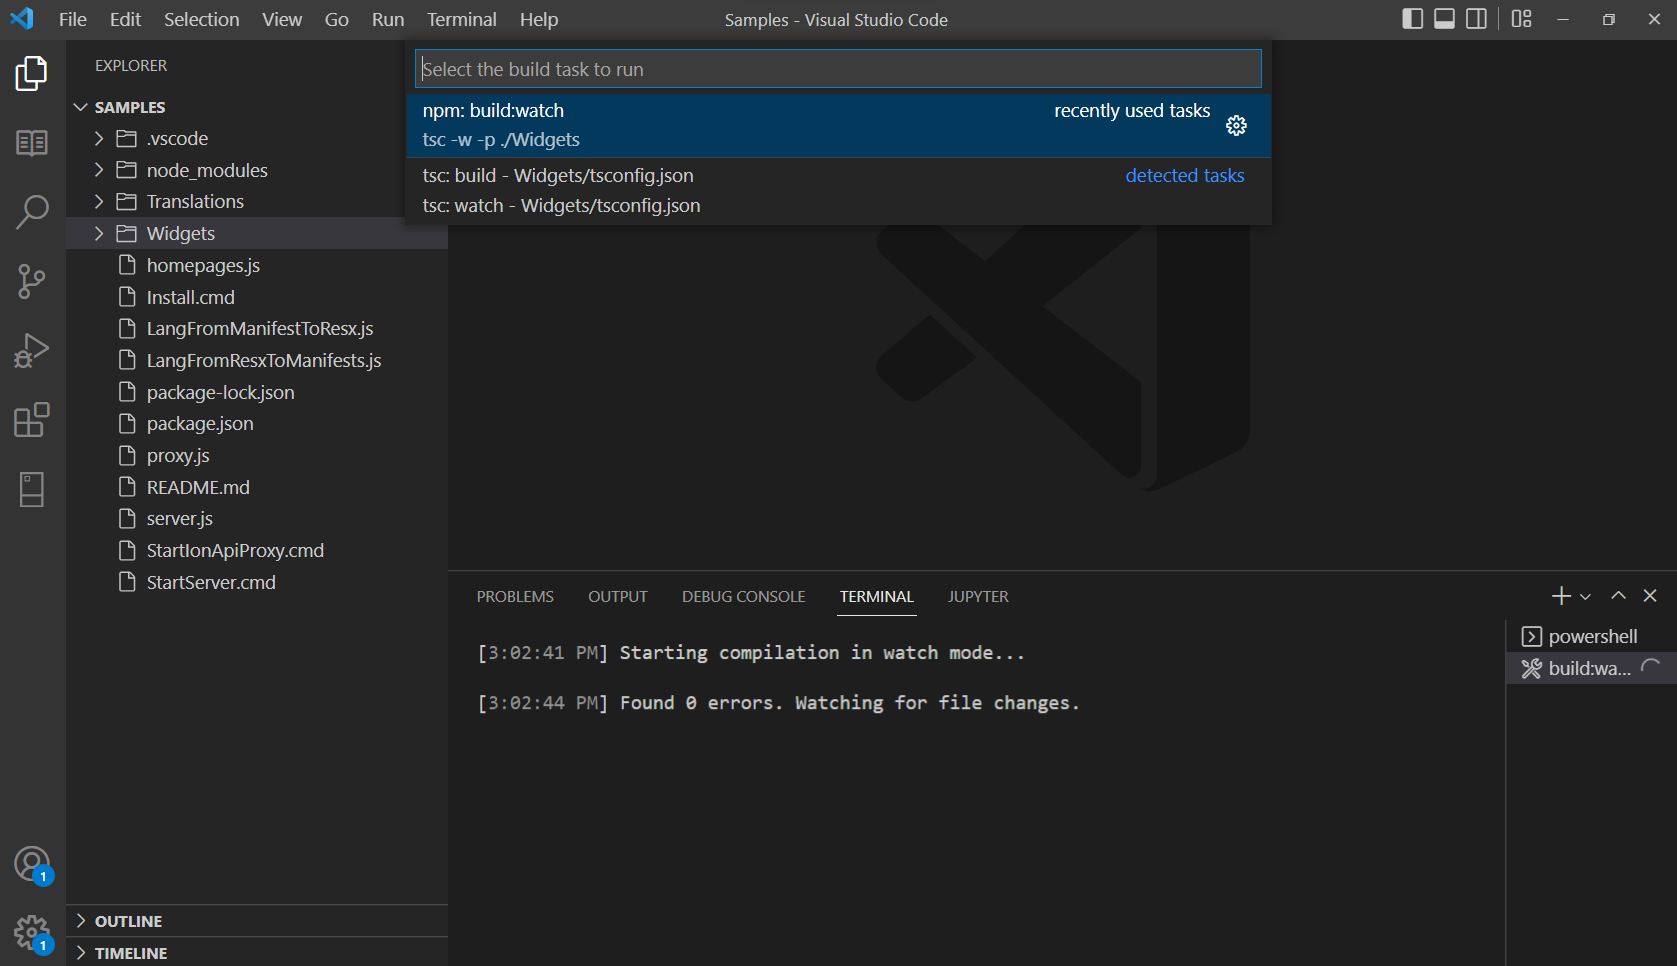
First step in the Visual Studio code is to Watch build. Once the developer is in Visual studio press Ctrl + Shift+ B which will show the “Select the build task to run“. Then type build and then select npm:build:watch
After performing this task the Terminal should show as per below. “Found 0 errors. Watching for file changes”.
Start the Server
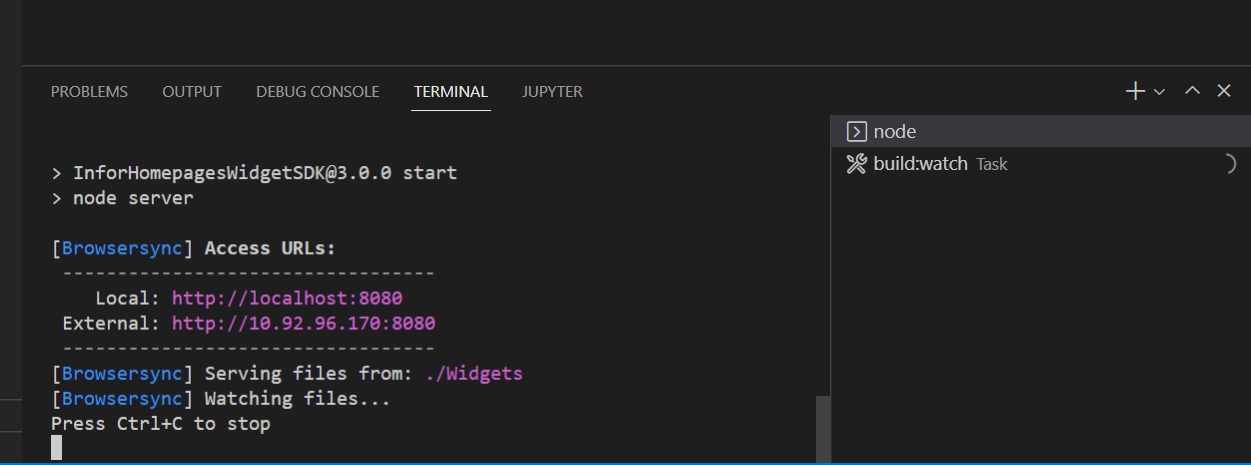
Within the visual Studio one the the Build:Watch is performed, developer will now click on the PowerShell and start the server using the command npm start . Click on Allow Access if prompted by Windows Security. The server should start without any issues as per the below screenshot.
Open the URL in the chrome where CORS is disabled to see the widget in local browser
Configure the widget to Run in the MT Cloud
Create Build
For Creating the build run the following command in visual studio code command line
node homepages pack “<widget folder name>“
Example : node homepages pack “tenant.ims.ai.fileupload”
once this command is executed successfully we can see the build in the Builds folder with name as “tenant.ims.ai.fileupload-3.2.20220617-124509.zip”
Import the build into MT Cloud
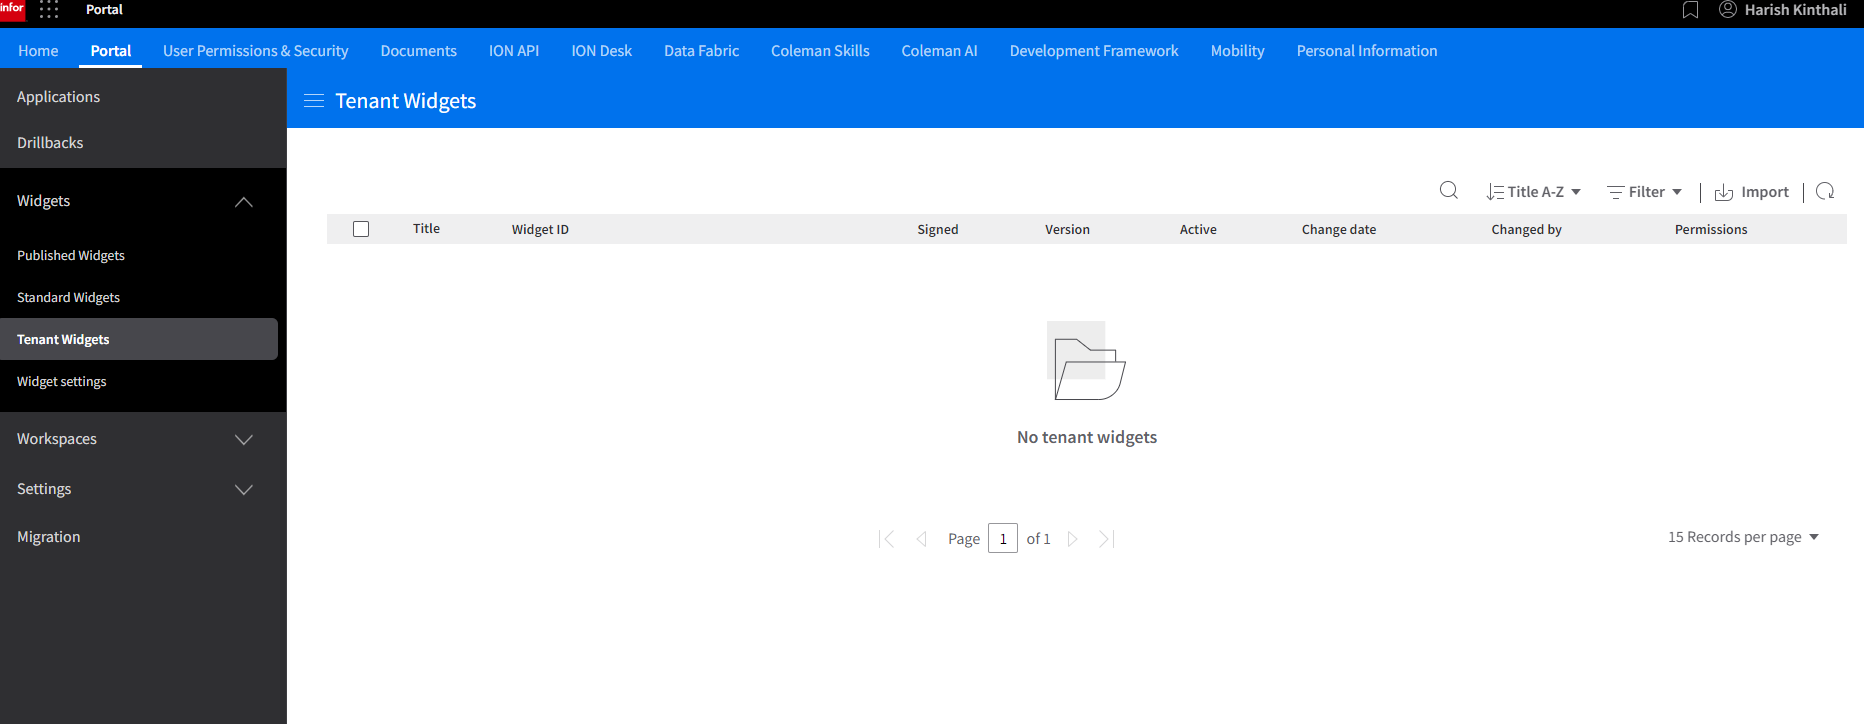
Login into MT Cloud Tenant , In Menu Click on Portal in side Menu click on Widgets and then Tenant Widgets and click on Import to browse the build file to upload into the tenant.
Use Case Examples
- Import a file from local system to ION using the widget without file connector or enterprise connector
- From ION to file can be transferred to another application using document flow