How to create an RPA flow using an OCR activity
Business Problem
Data extraction is an essential benefit of the RPA platform, especially for OCR(Optical Character Recognition) activities. This tutorial will show you how to create a flow allowing to extract the key values such as Customer # (Customer Number) and Order # (Order Number) from a financial document called Pick Ticket and write those values into the excel spreadsheet.
Components
- RPA Management
- RPA Studio
- Microsoft Excel application
Requirements
- Before you can start building the flow, you’ll need to install RPA Studio on your machine and set up a connection between the RPA Studio and RPA Management. Check the Infor RPA Studio User Guide for the steps on how to do it.
- Also, you’ll need a few artifacts to set up your RPA flow:
- Create Excel spreadsheet with the path example “C:\RPA\OCR.xlsx”
- Save the Pick Ticket image below representing the following path “C:\RPA\signedpickticket.png”
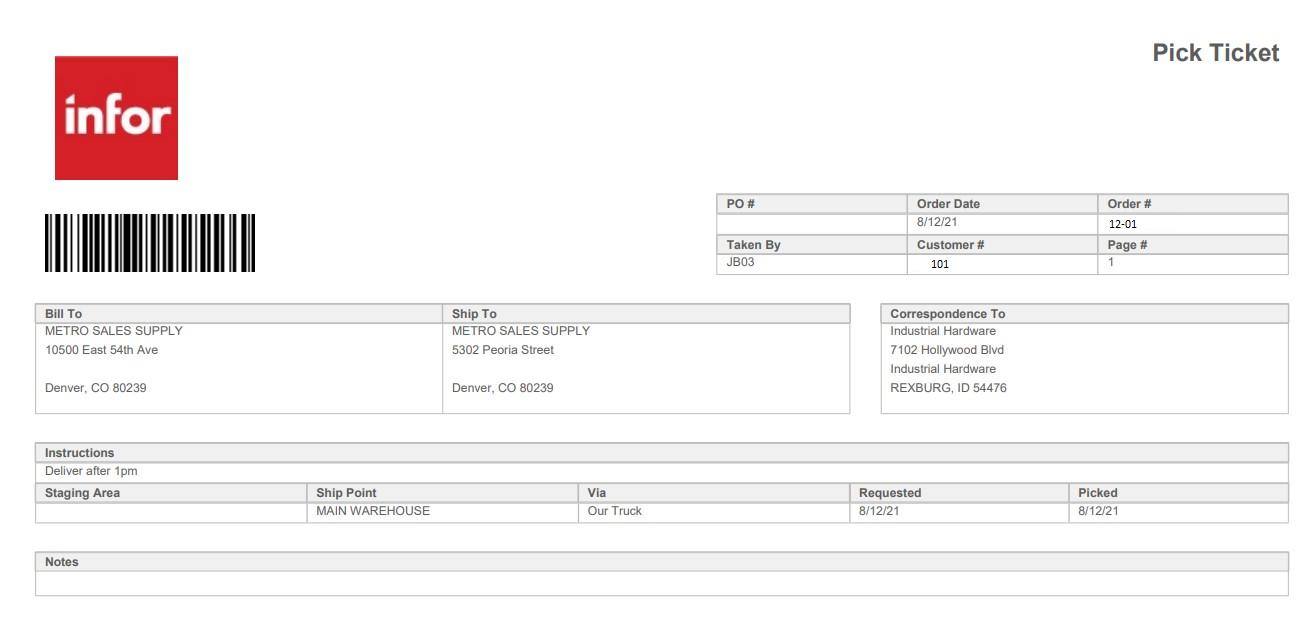
Tutorial
Difficulty: Medium
Estimated completion time: 25 Minutes
1 – Open RPA Studio on your machine. If you are not signed in already into the tenant, you would be asked to sign in before proceeding to RPA flow designer screens.
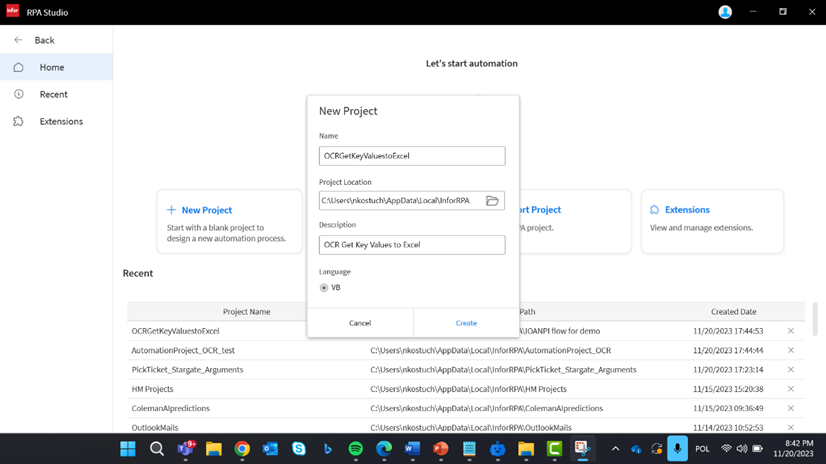
2 – On the Home page of RPA Studio click Create New Project and specify the following properties in the pop-up window:
- Name: OCRGetKeyValuestoExcel
- Project Location: <default>
- Description: OCR Get Key Values to Excel
- Language: VB <selected by default>
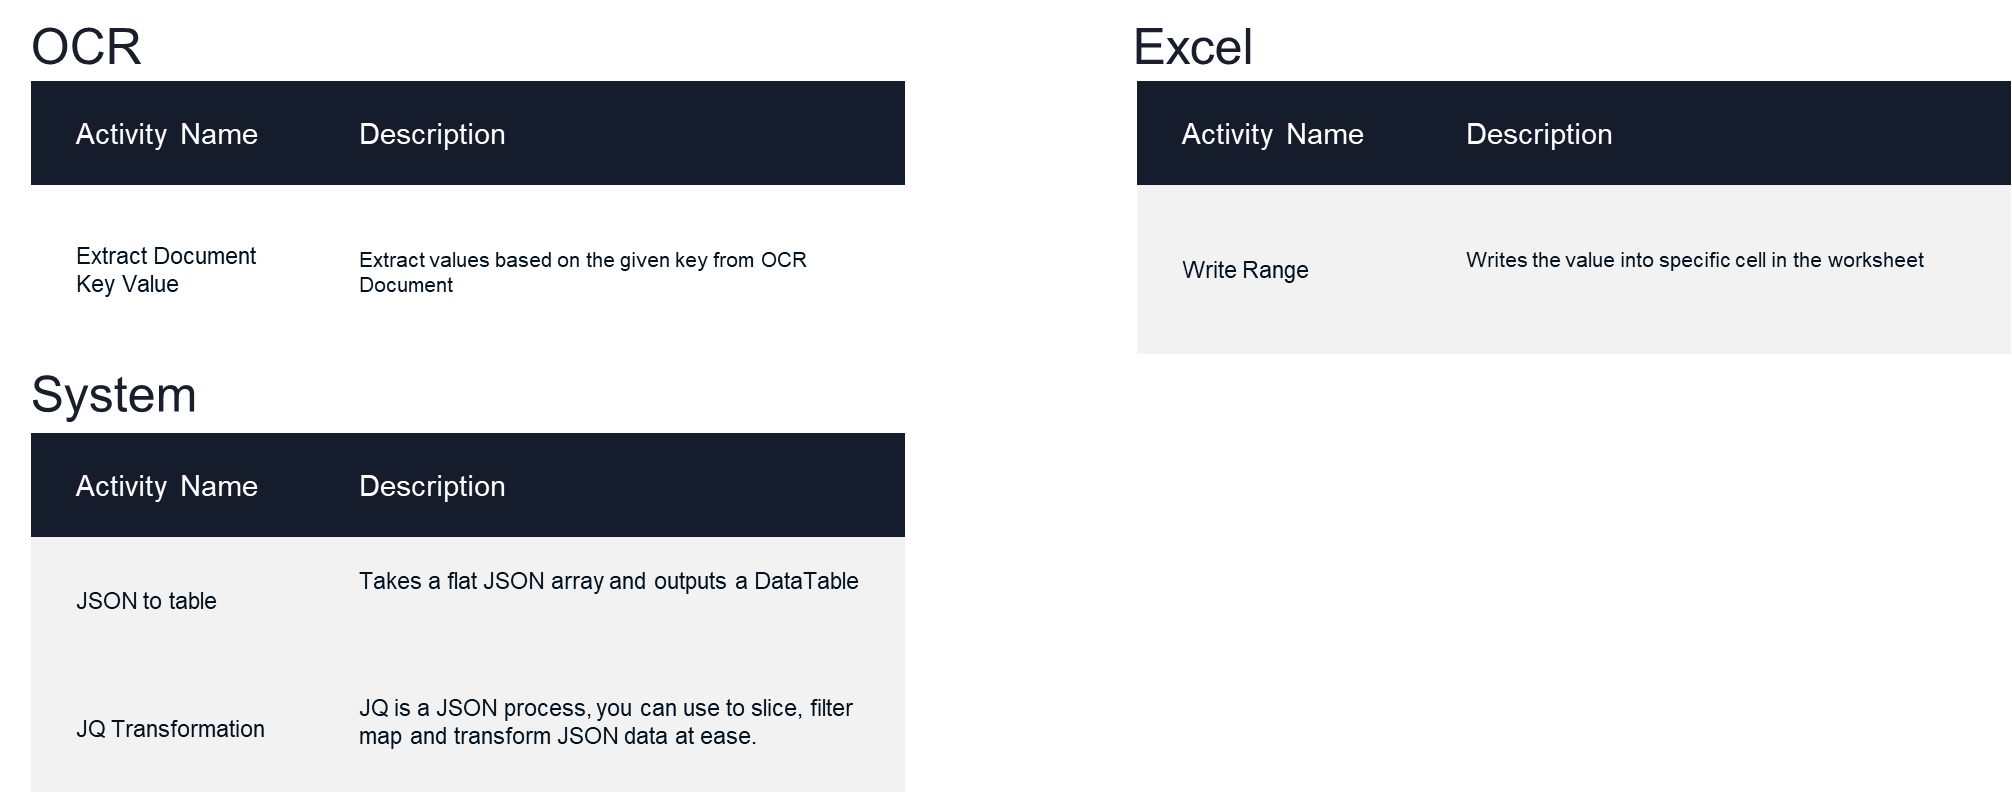
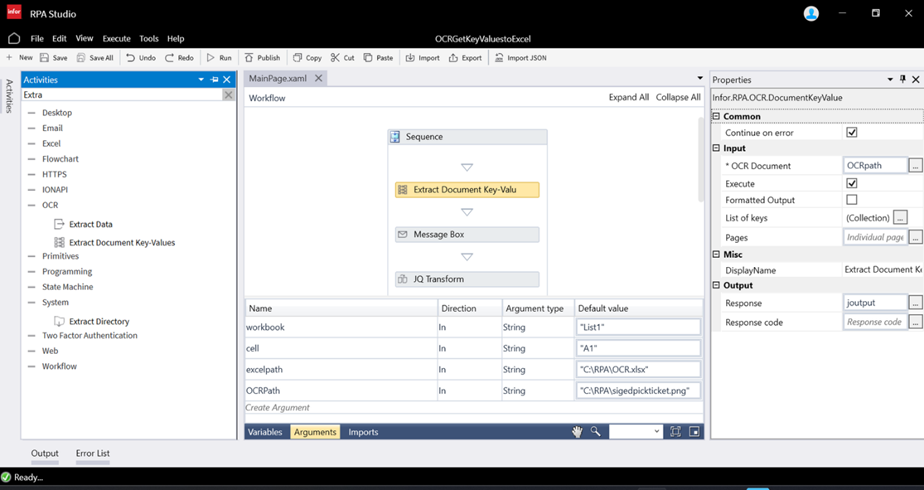
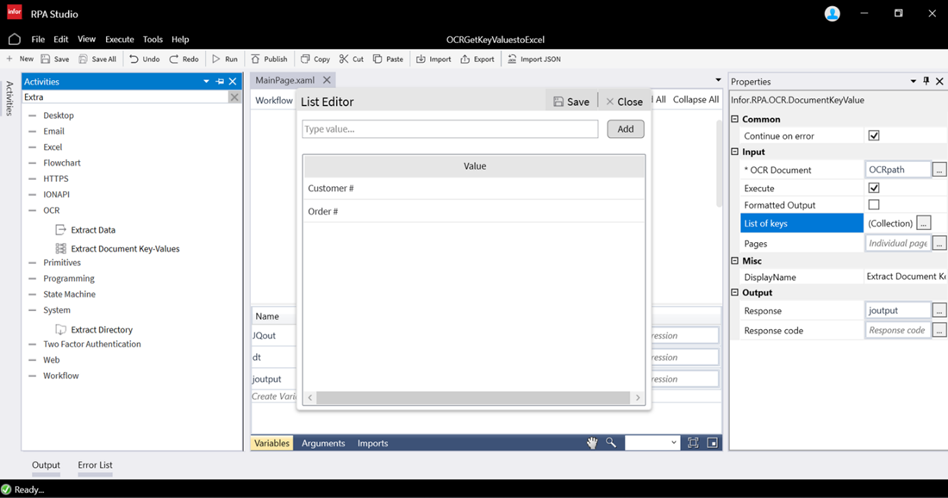
3 – First, we will add the activity Extract Document Key-Value which will allow us to extract the values based on the provided key. The activity can be access in Activities panel under OCR category. Drag and drop the activity on the deign canvas and click on it. The properties of the selected activity will appear in the properties panel. Let’s configure its properties in a following way:
- for OCR Document, which is the path of a specific document from which we would like to extract the data, let’s create an Argument:
- called OCRpath of type string and default value of the OCR document path “C:\RPA\sigedpickticket.png”
- for List of keys, which the list of keys for which we would like to extract the values, in List Editor create the following keys:
- Customer #
- Order #
- and save the list.
- for Response, which will be storing the extracted values in JSON format, let’s create the variable
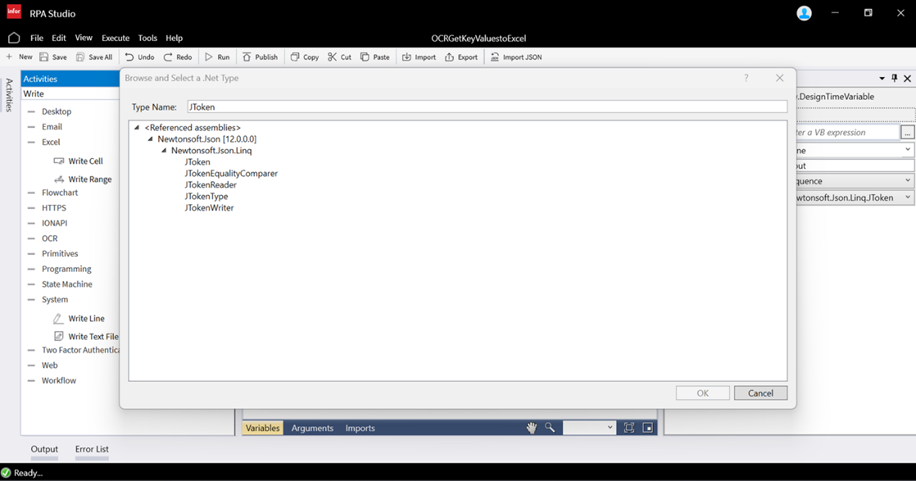
- called joutput of type JToken (Newtonsoft.Json.Linq.Jtoken)
- to find JToken data type expand the Variable Type and select Browse for type. In the Type name cell type JTokenand select JToken under the Newtonsoft.Json.Linq domain.
- called joutput of type JToken (Newtonsoft.Json.Linq.Jtoken)
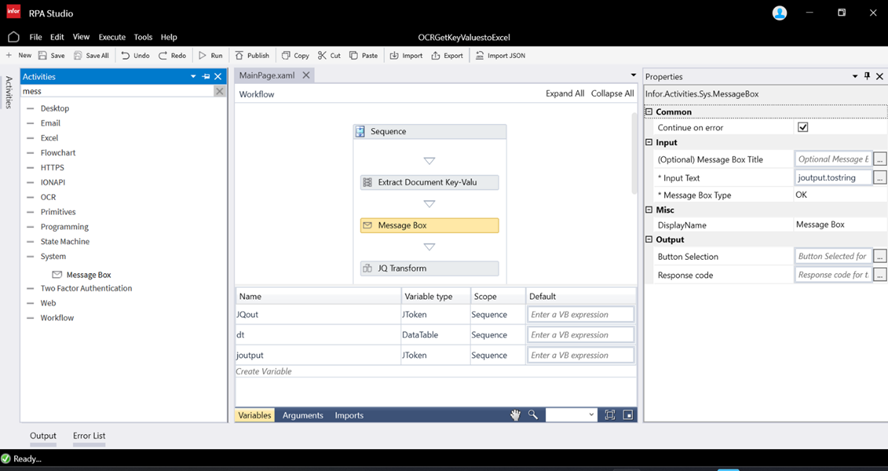
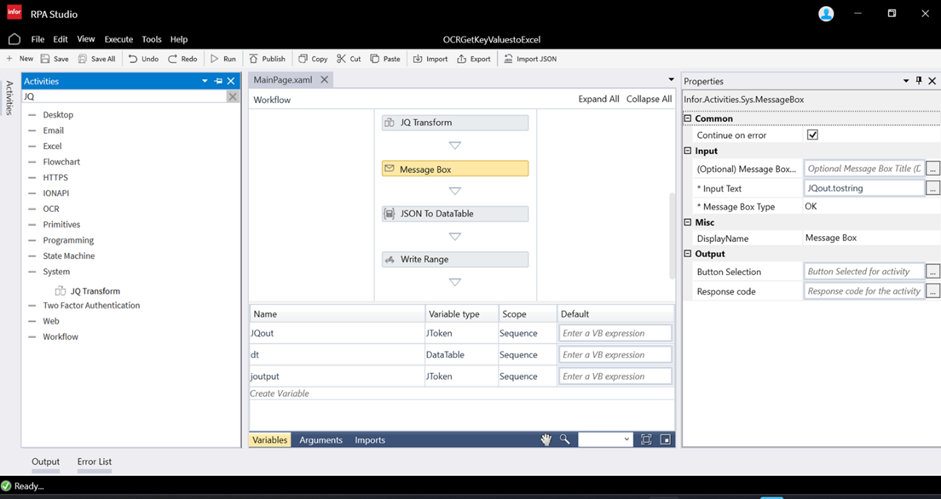
4 – Optionally JUST FOR TROUBLESHOOTING RESONS you can add Message Box activity which would allow you to check if we retrieved the desired values from document which will be in JSON format. For that let’s define the following properties:
- for Input Text define the following VB expression joutput.tostring which allows to read the provided JSON and transform it to String data type. It is done because Input Text property allow only values of data type string
- Message Box Title, Button Selection, Response Code can stay empty.
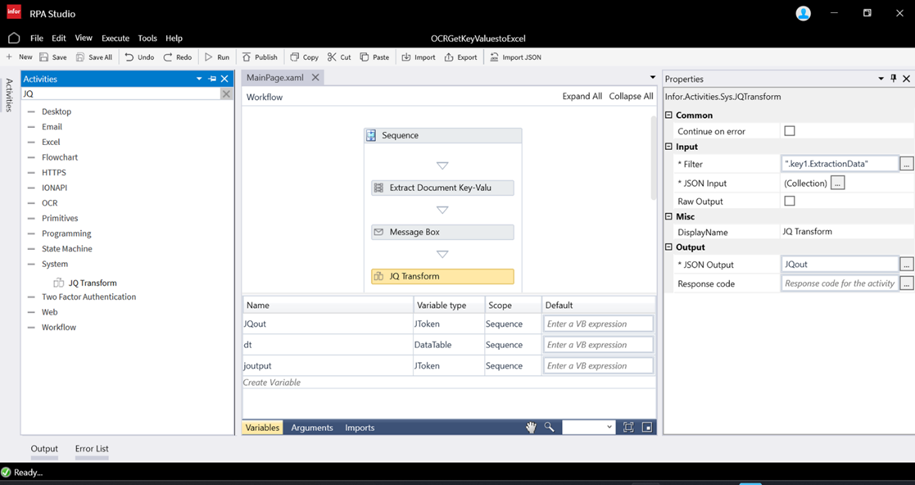
5 – Now it is time to filter out the provided JSON response from API Endpoint to get just the list of the applications which is one of the retrieved properties. For that we will use the activity JQ Transformation and define its properties as followed:
- for JSON Input create a collection of a single item key: key1 and value: JQ
- for Filter we need to create a JSON payload filter in order to get specific value from JSON output – the list of the application. In order to do it you should start from the JSON Input defined key1 following by payload filter which would look like: “.key1.ExtractionData”
- Note: the Filter property data type is string so the provided filter should be within the ““ (quotation mark)
- for JSON Output, which will store the values filtered out from JSON payload, let’s create the variable:
- called JQout of type JToken
- To find JToken data type, expand the Variable Type and select Browse for type. In the Type name cell type JToken andselect JToken under the Newtonsoft.Json.Linq domain.
- called JQout of type JToken
6 – Optionally JUST FOR TROUBLESHOOTING RESONS you can add Message Box activity which would allow you to check if we retrieved the desired values from JSON payload. For that let’s define the following properties:
- for Input Text define the following VB expression JQout.tostring which allows to read the provided JSON and transform it to String data type. It is done because Input Text property allow only values of data type string.
- Message Box Title, Button Selection, Response Code can stay empty.
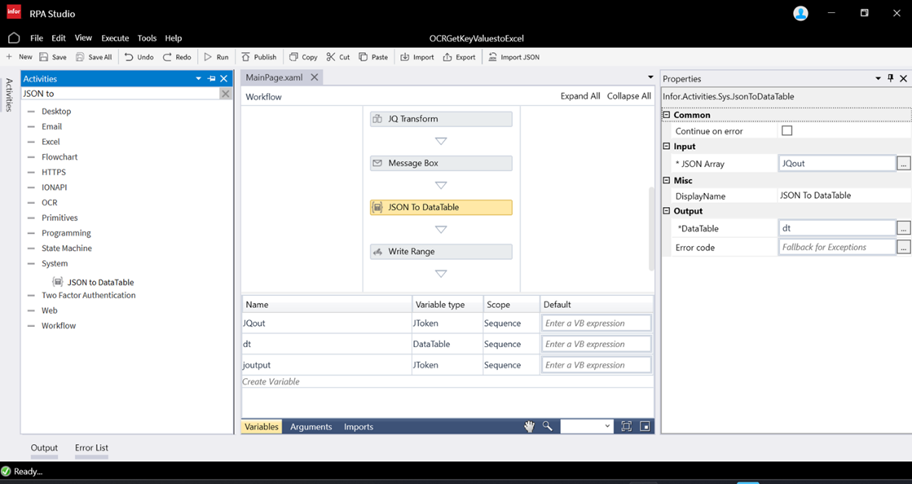
7 – Let’s add JSON for DataTable activity part of system activities which allows to transform the JSON array into data tabel.Let’s configure its properties in a following way:
- for JSON array, which is the input value for this activity, define JQout
- for DataTable, which will store the data table with values from JSON array, let’s create the variable:
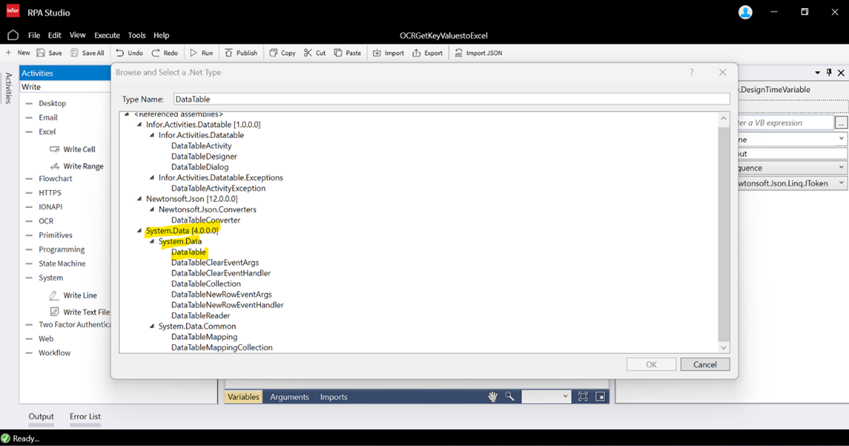
- called dt of type DataTable (System.Data.DataTable)
- to find DataTable data type expand the Variable Type and select Browse for type. In the Type name cell type DataTable and select DataTable under the System.Data domain.
- called dt of type DataTable (System.Data.DataTable)
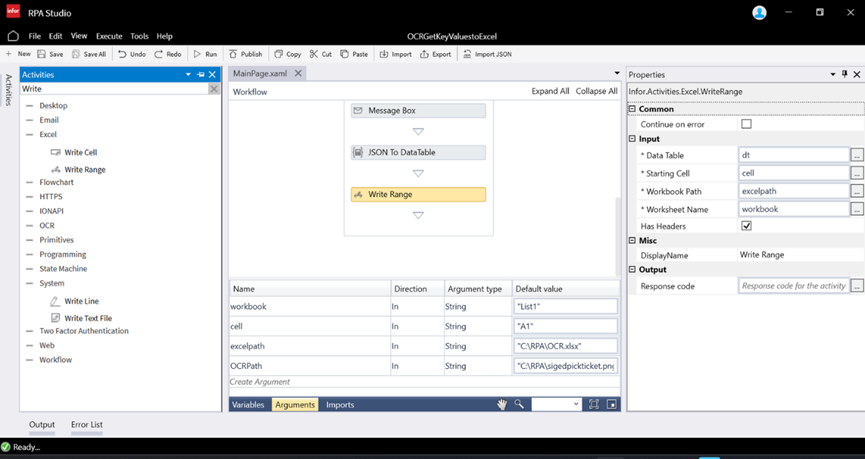
8 – Now we will write datatable the into .xls spreadsheet. For that we will use the activity Write Range activity part of Excel activities categoryand define the following values:
- for Data Table provide the exact data table which should be written into it, specify dt.
- for Stating Cell provide the exact cell address from where to input the data table for instance “A1” or you can create the argument:
- called cell of type string and default value for instance “A1”
- Note: the Cell Address property data type is string so the provided cell address should be within the “” (quotation mark)
- for Workbook path, which is the exact .xls file where the values will be written specify the following argument:
- called excelpath of type string and default value with .xlsx workbook created as part of the pre-requisites “C:\RPA\OCR.xlsx“
- for Worksheet Name, which is the name of the workbook within the .xlsx file, for that let’s create the argument:
- called workbook of type string and default value e.g. “List1“
- Note: the exact name of the workbook of the part of the .xlsx file create the workbook default name maybe different depending on the used language on your working station.
- called workbook of type string and default value e.g. “List1“
The flow will write the extracted values as well as extra properties into the excel spreadsheet.
Activity List