How to use IDM’s APIs
Business Problem
A 3rd party application requires the use of Infor Document Management (IDM) APIs to search its repository for documents. The application may need to retrieve an item for use as well.
Components
Requirements
- JSON/XML basics
- Access to IDM and ION
- Roles Needed: IDM-Administrator and IONDeskAdmin
- (Optional) Postman downloaded
Tutorial
1. Navigating to the APIs
There are two ways to go through this tutorial: The API Gateway or the API Specification page on the Dev Portal.
For the API Gateway in your environment, navigate to Infor ION API and search for “Infor Document Management”.
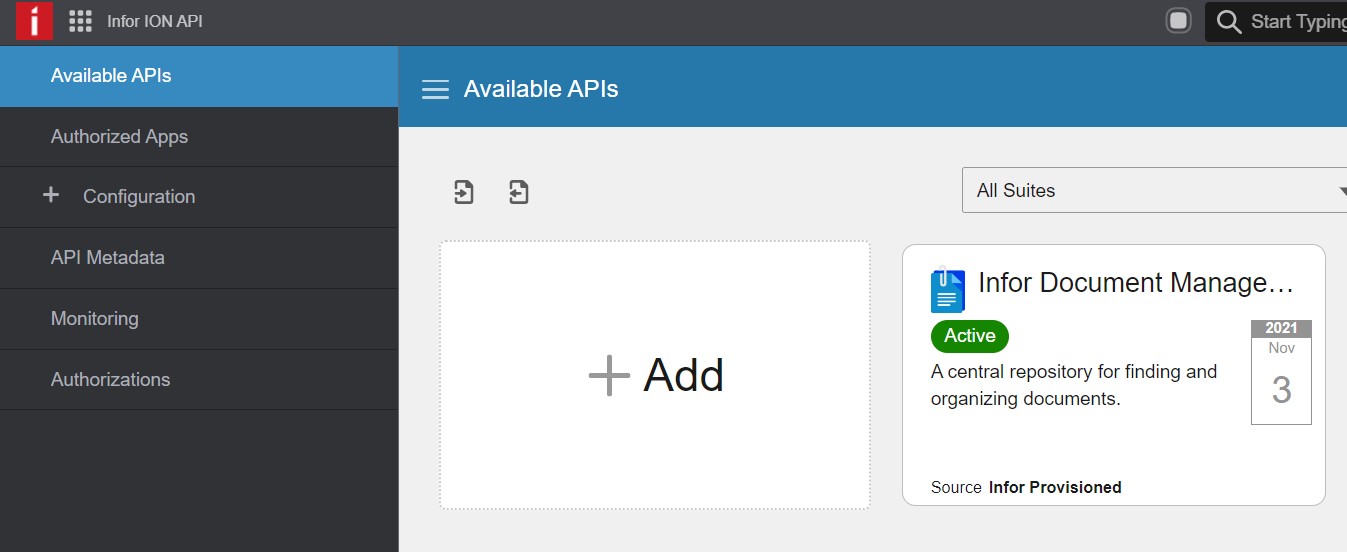
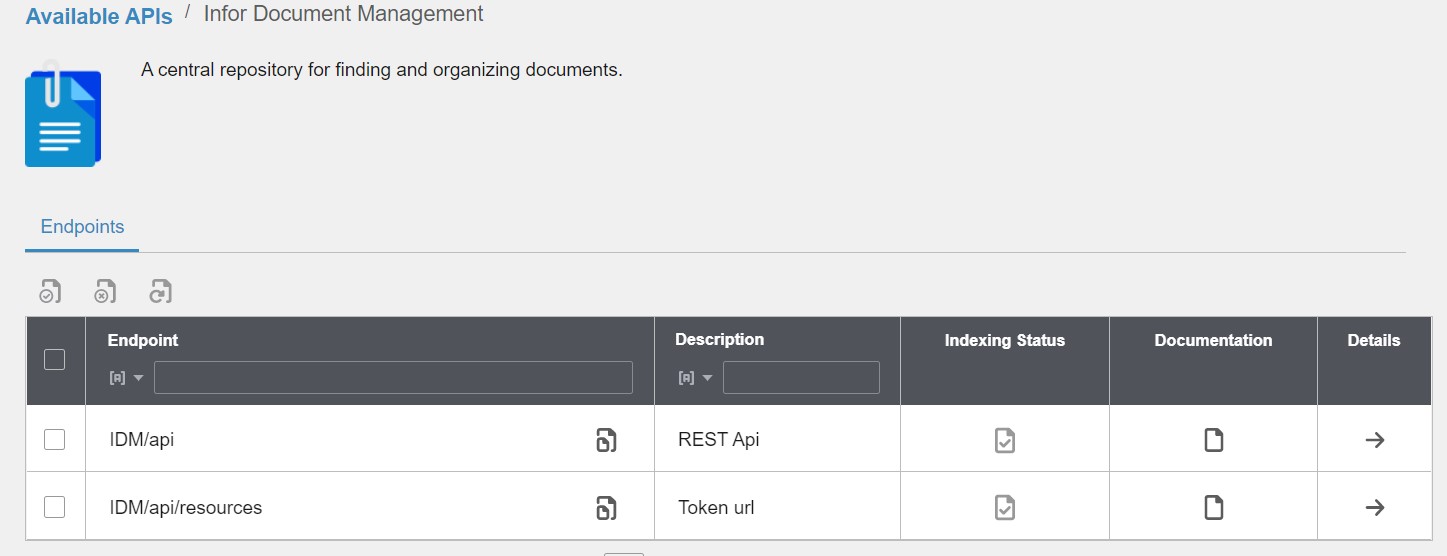
Click on it, then click on the Documentation icon in the IDM/api row.
2. Items APIs
For this section, we’ll focus on the Items section. Specifically, GET /items/search “Search for items (by string)”. This returns a document containing the items matching the query.
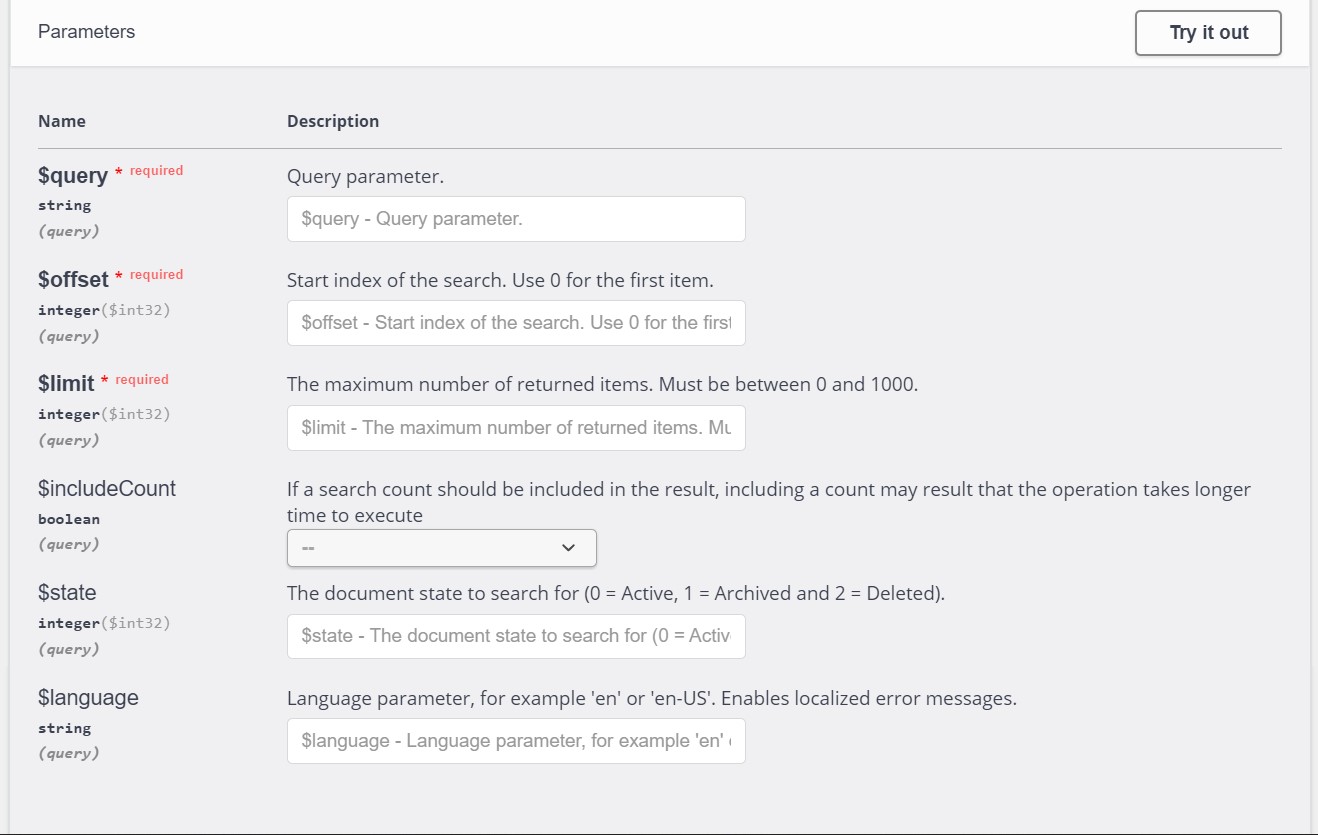
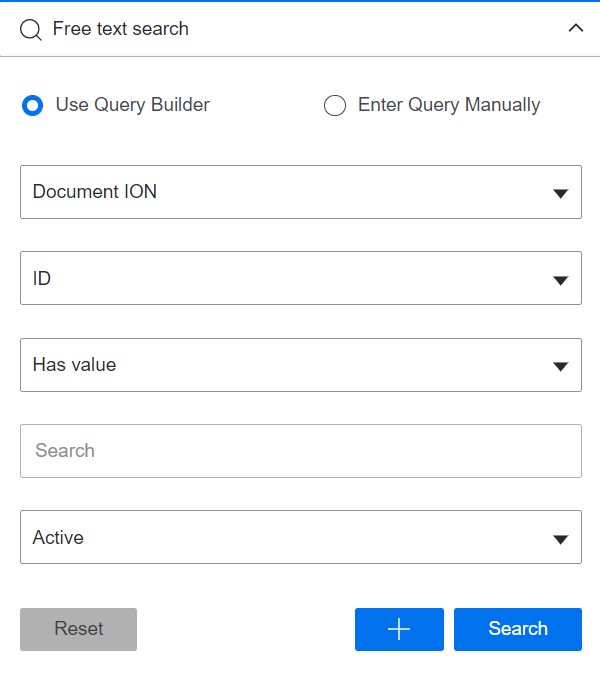
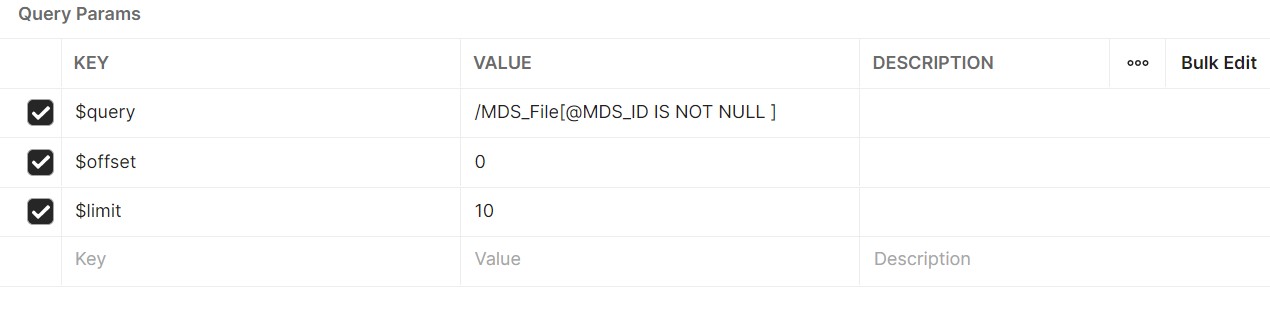
Only 3 of the parameters are required, and each includes a descriptor. Query parameter refers to the XQueries that IDM uses in order to search for documents. At the top right you can click “Try it out” to use the API.
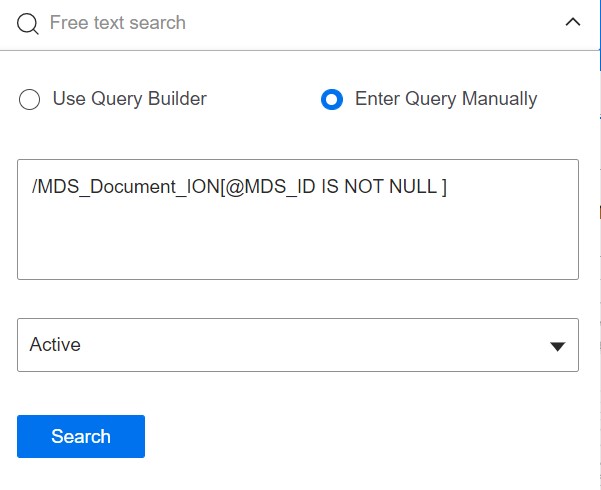
The API Specifications page has some example queries you can use. “/MDS_Document_ION[@MDS_ID IS NOT NULL ]”
3. (Optional)Generating an XQuery
For those unfamiliar with XQueries, an easy way to build one is through the IDM XQuery Builder.
Alternatively, check out this video for an in-depth tutorial on building XQueries.
Put in the criteria you are searching for and then at the top click “Enter Query Manually” and it will give you the XQuery you can copy and paste into Batch Update.
4. Navigating Results
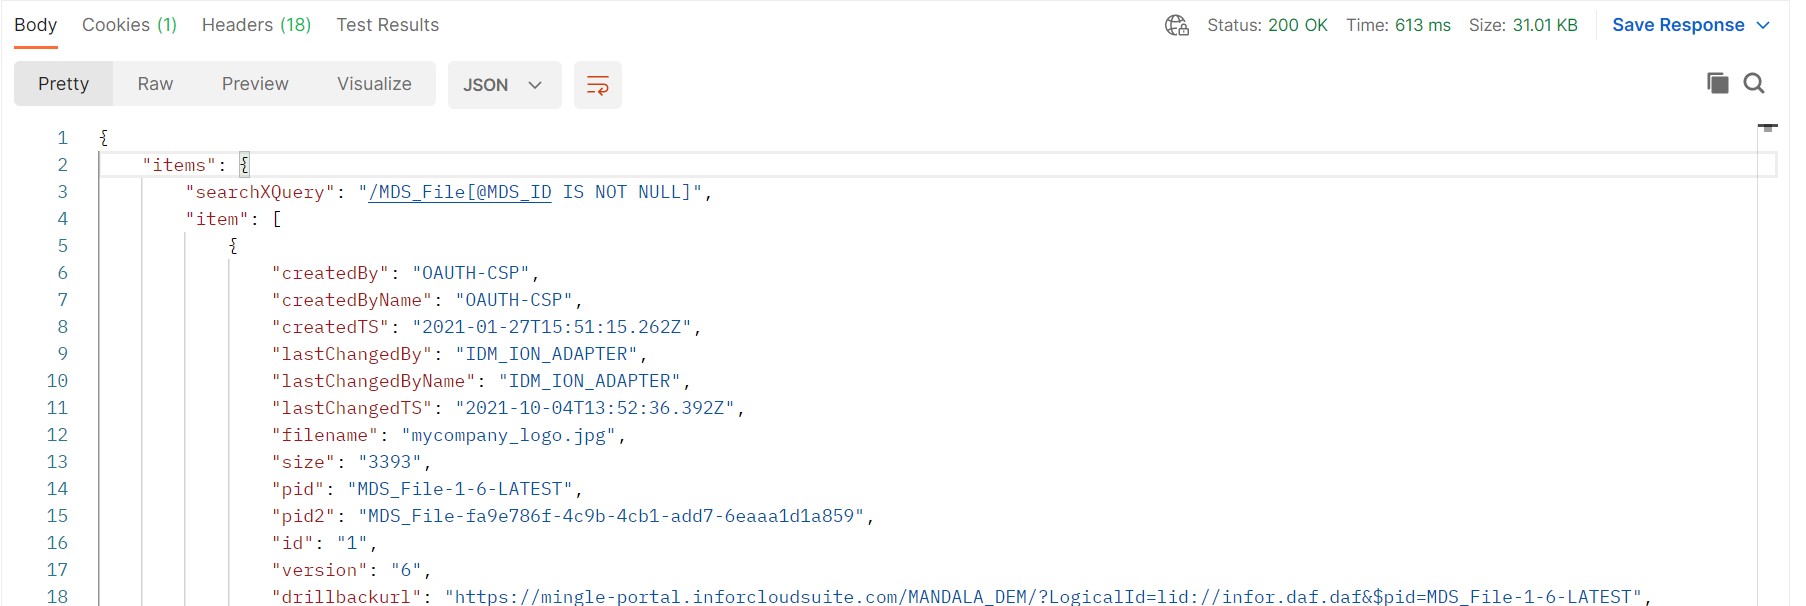
When you have input the parameters, at the bottom you can decide between XML or JSON. The API Specifications page only has JSON currently.
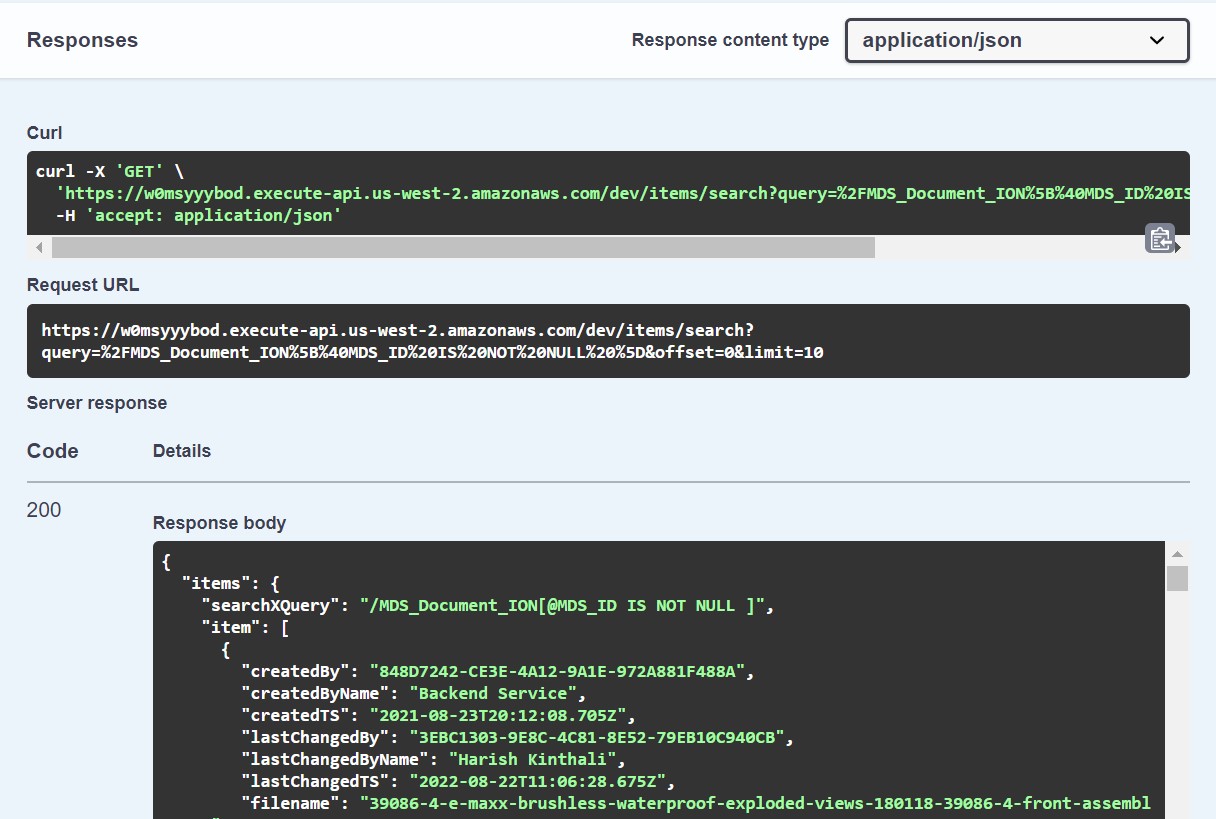
If you look at the results here, you’ll see curl or custom URL. For an explanation on that, please go here.
In the Request URL section, you can see the inputted parameters showing in formatted URL. This will be useful if you want to externally access these APIs via service such as Postman.
In the Response body itself, you’ll note that all documents are within the JSON array “item” which is composed of numerous smaller key-value pairs.
Each document is represented by all of the metadata/attributes assigned to that document such as filename, ACLs, pid, etc.
5. Accessing the APIs from a third party application
Now that you understand how the IDM APIs function we will use the free Postman application to externally access them.
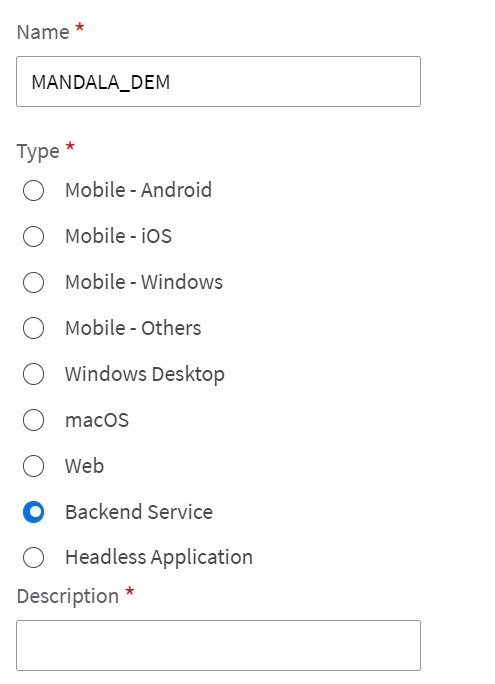
First, you must authorize the external application to use the APIs. Go to the API Gateway -> Authorized Apps and create a new Authorized App for IDM. Make sure to select “Backend Service”.
We select Backend Service here as it’s for service to service communication. An example of when you’d want this option would be for running jobs or batches overnight, without needing human input. For more on ION API, check out the documentation here.
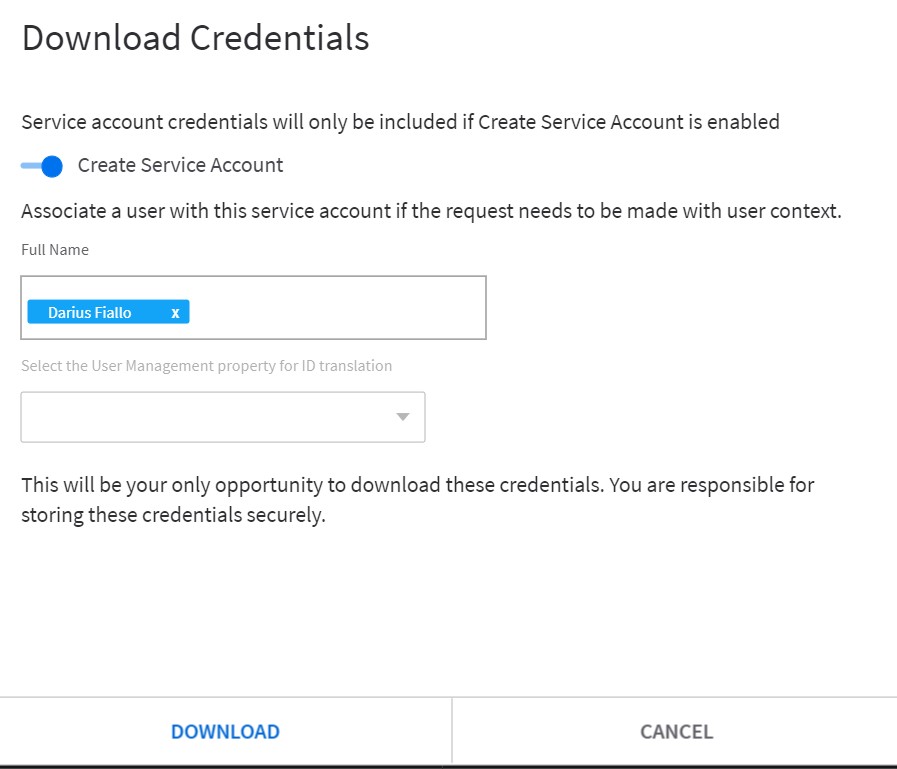
After saving this, scroll down and click “Download Credentials”, input your name for the Service Account section and hit Download.
6. Postman – Starting a GET Request
At the top of Postman, hit the + to start a new GET request.
In the address bar that pops up, paste this “{{ionapi_base_url}}/{{tenant_id}}/IDM/api/items/search”
{{ionapi_base_url}} and {{tenant_id}} are variables in Postman that we will be setting up later.
7. Setting up Variables in Postman
In the Params section, you’ll enter the parameters that the API takes. We’re still doing the same API from earlier so it’ll be the same ones. You need at least the required ones. This API also has some optional parameters but we won’t be implementing those.
8. Setting up Authorization
Click on the Authorization tab, and for the left section select “OAuth 2.0” for the Type and “Request Headers” for the Add authorization data to section
For the Configuration Options tab, type in these variables. You can choose the names as you like but I decided to just name them the same as the section they’ll be going into.

9. Setting up the Environment
Now at the top right, you’ll see an icon that looks like a page with an eye on it. Hovering over it will show “Environment Quick Look”. Click on that and click Edit. You’ll be setting up the environment now and this will be where you put in the values for your variables.
IMPORTANT: This is sensitive data. Someone can use these credentials to access your environment under your name so keep this data private.
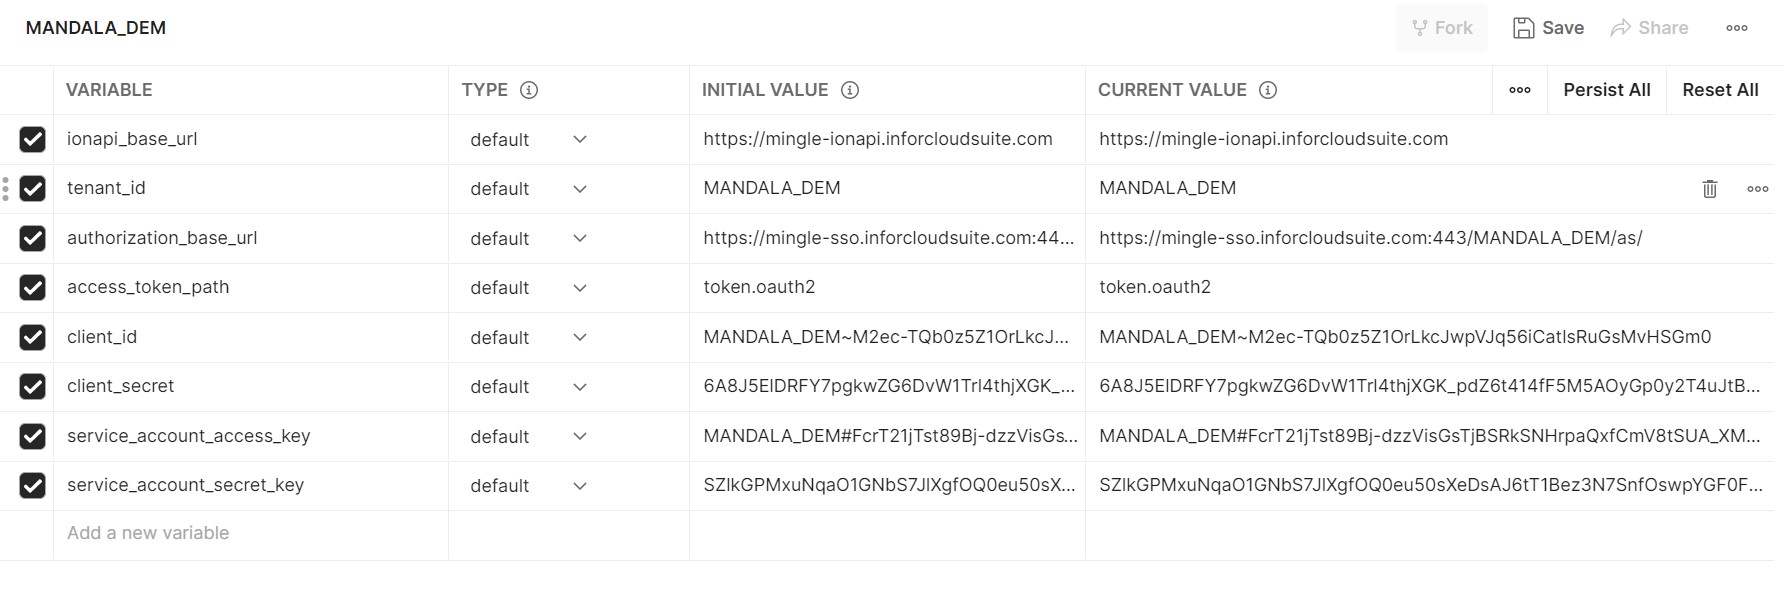
You will get these values from your IONAPI file. Open that up in a text editor and format it to JSON.
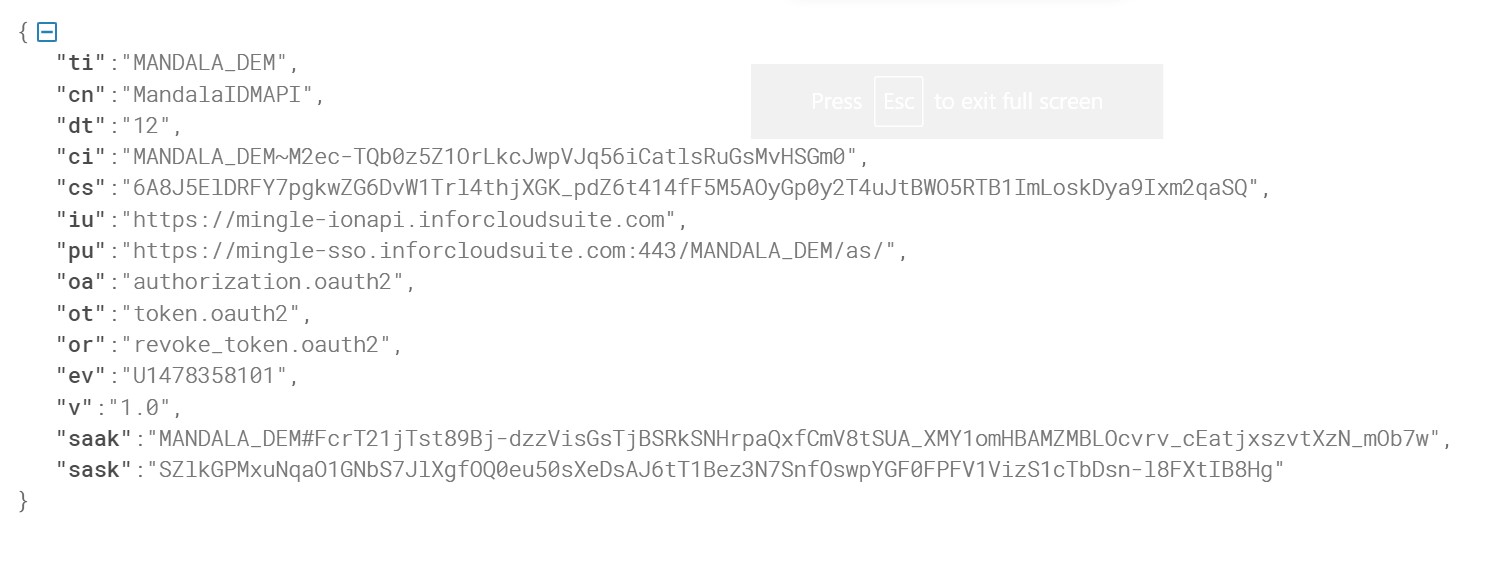
Below I will show which IONAPI value goes with which variable.
| IONAPI | Environment Variable |
| iu | ionapi_base_url |
| ti | tenant_id |
| pu | authorization_base_url |
| ot | access_token_path |
| ci | client_id |
| cs | client_secret |
| saak | service_account_access_key |
| sask | service_account_secret_key |
After this, hit Save.
At the bottom of the Authorization tab, click “Get New Access Token” and apply it. You’ll have to create a new token every 2 hours as that is when it’ll expire.
10. Configuring Headers
This part is only if you’d like the API response to be in JSON, as by default it’ll be in XML. Only some APIs have this capability, the one we are demonstrating does.
Under headers, create a key called “accept” and for the value, type in “application/json;charset=utf-8”.

11. Send the API request
Now all that’s left is hitting inputting the values for the Params and hitting Send for the request. At the bottom, the Body window will show the outputted results.