Retrieve a Customer Credit Profile
Business Problem
A recurring challenge within your business lies in your employees’ frequent need to retrieve customers’ credit profiles to facilitate credit decisions during the customer order approval process. By integrating a specialized skill into the Infor Digital Assistant, your team can swiftly assess customer credit histories, enabling faster and more informed decision-making.
This skill, initially developed using Infor SXe, can seamlessly be tailored to integrate with your specific ERP system.
Components
- Digital Assistant
- System Integration: API Gateway
Requirements
- Access to an Infor CloudSuite
- Coleman DA Security Roles:
- COLEMANDA-User
- COLEMANDA-Advanced
Tutorial
Accessing Application
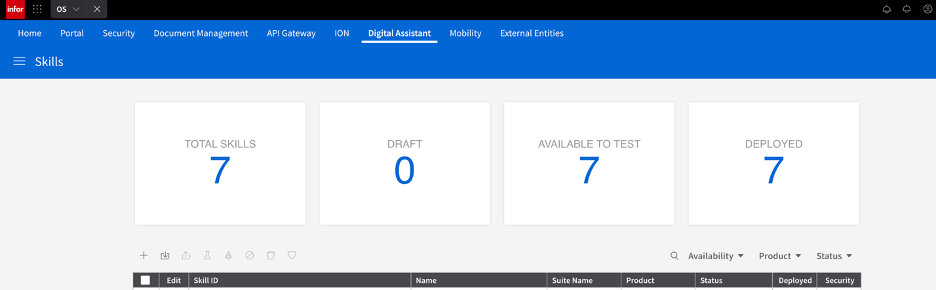
- From the Navigation Menu in Infor OS Portal, go to OS then select Digital Assistant.
- Locate and select the ‘+’ symbol positioned above the data grid containing the list of skills in order to proceed with the ‘Add Skill’ operation.
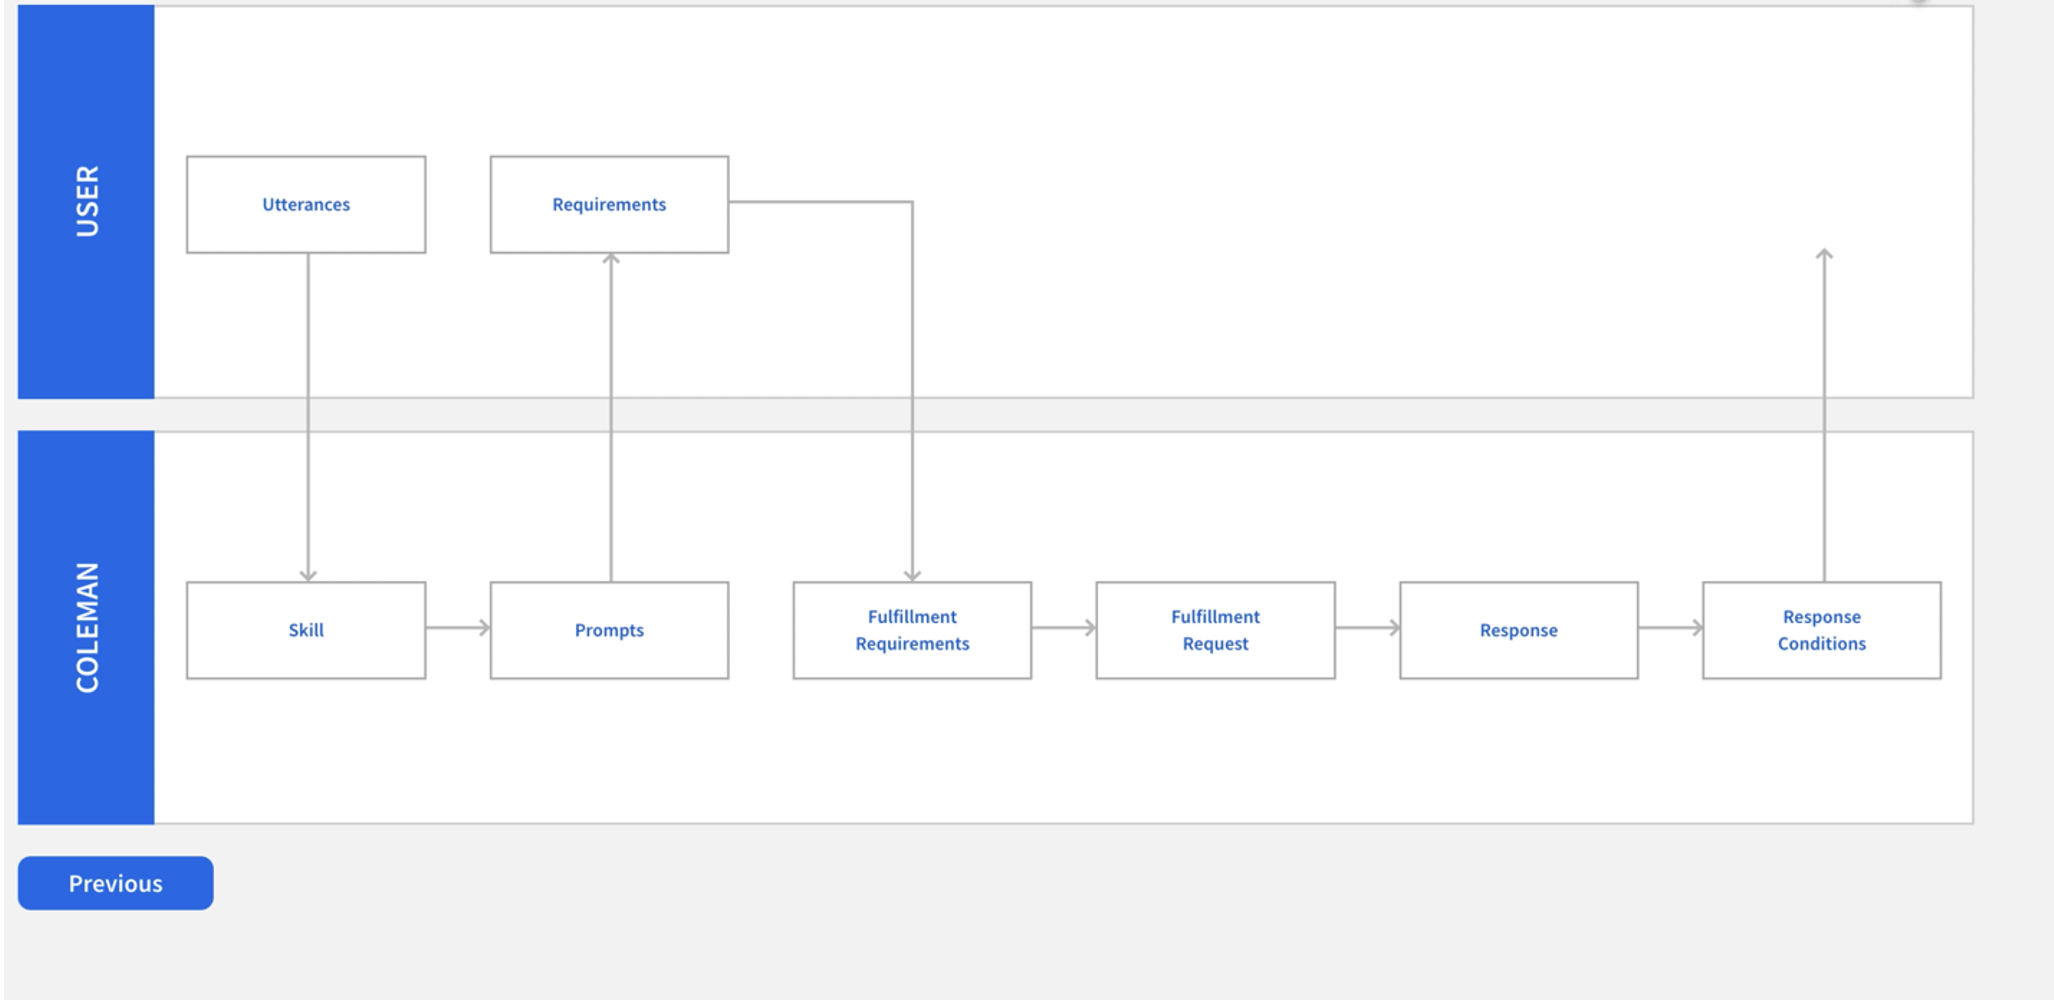
Building Skill
Each of the section below represent the wizard steps on the UI.
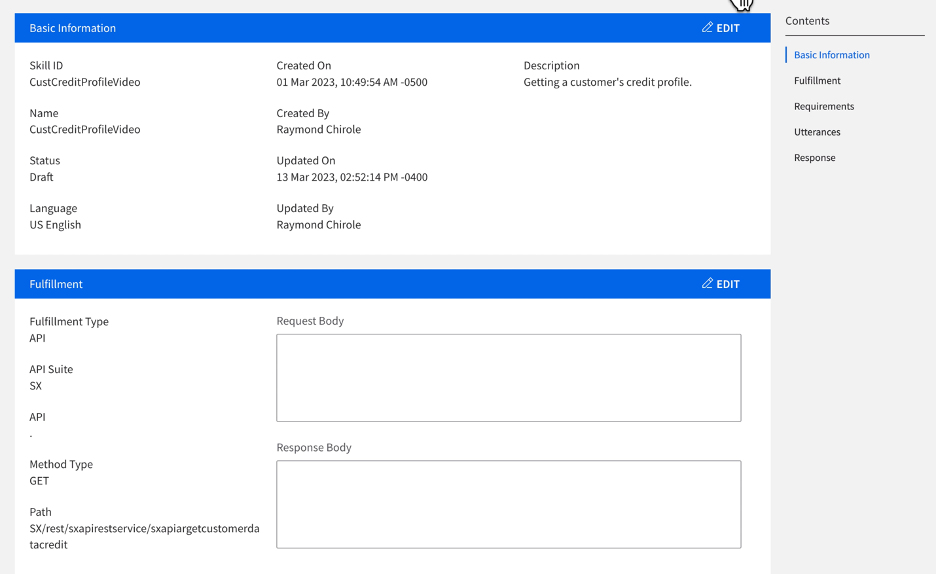
Basic Information
- Specify the basic information:
- Skill ID: CustCreditProfile
- Name: CustCreditProfile
- Description: This skill will return the customer’s credit profile
- Language: English.
Click “Next” button
Fulfillment
- Fulfillment Type: API
- API Suite: SX
- Product: Infor Distribution SX.e
- API: Search for and select: sxapiargetcustomerbalance
- Method: Post
- Path: /sxapiargetcustomerbalance
- API: Search for and select: sxapiargetcustomerbalance
- Path: This field is populated by the previous step.
- Path: SX/rest/sxapirestservice/sxapiargetcustomerdatacredit
- Method Type: GET
- Parameters Name: This field is defined based on the API selected. Ensure that the following query parameters are defined:
| companyNumber | Query String |
| operatorInit | Query String |
| customerNumber | Query String |
6. Response Body: This field is generated automatically defined based on the API and fields selected above.
7. Click “Next” button
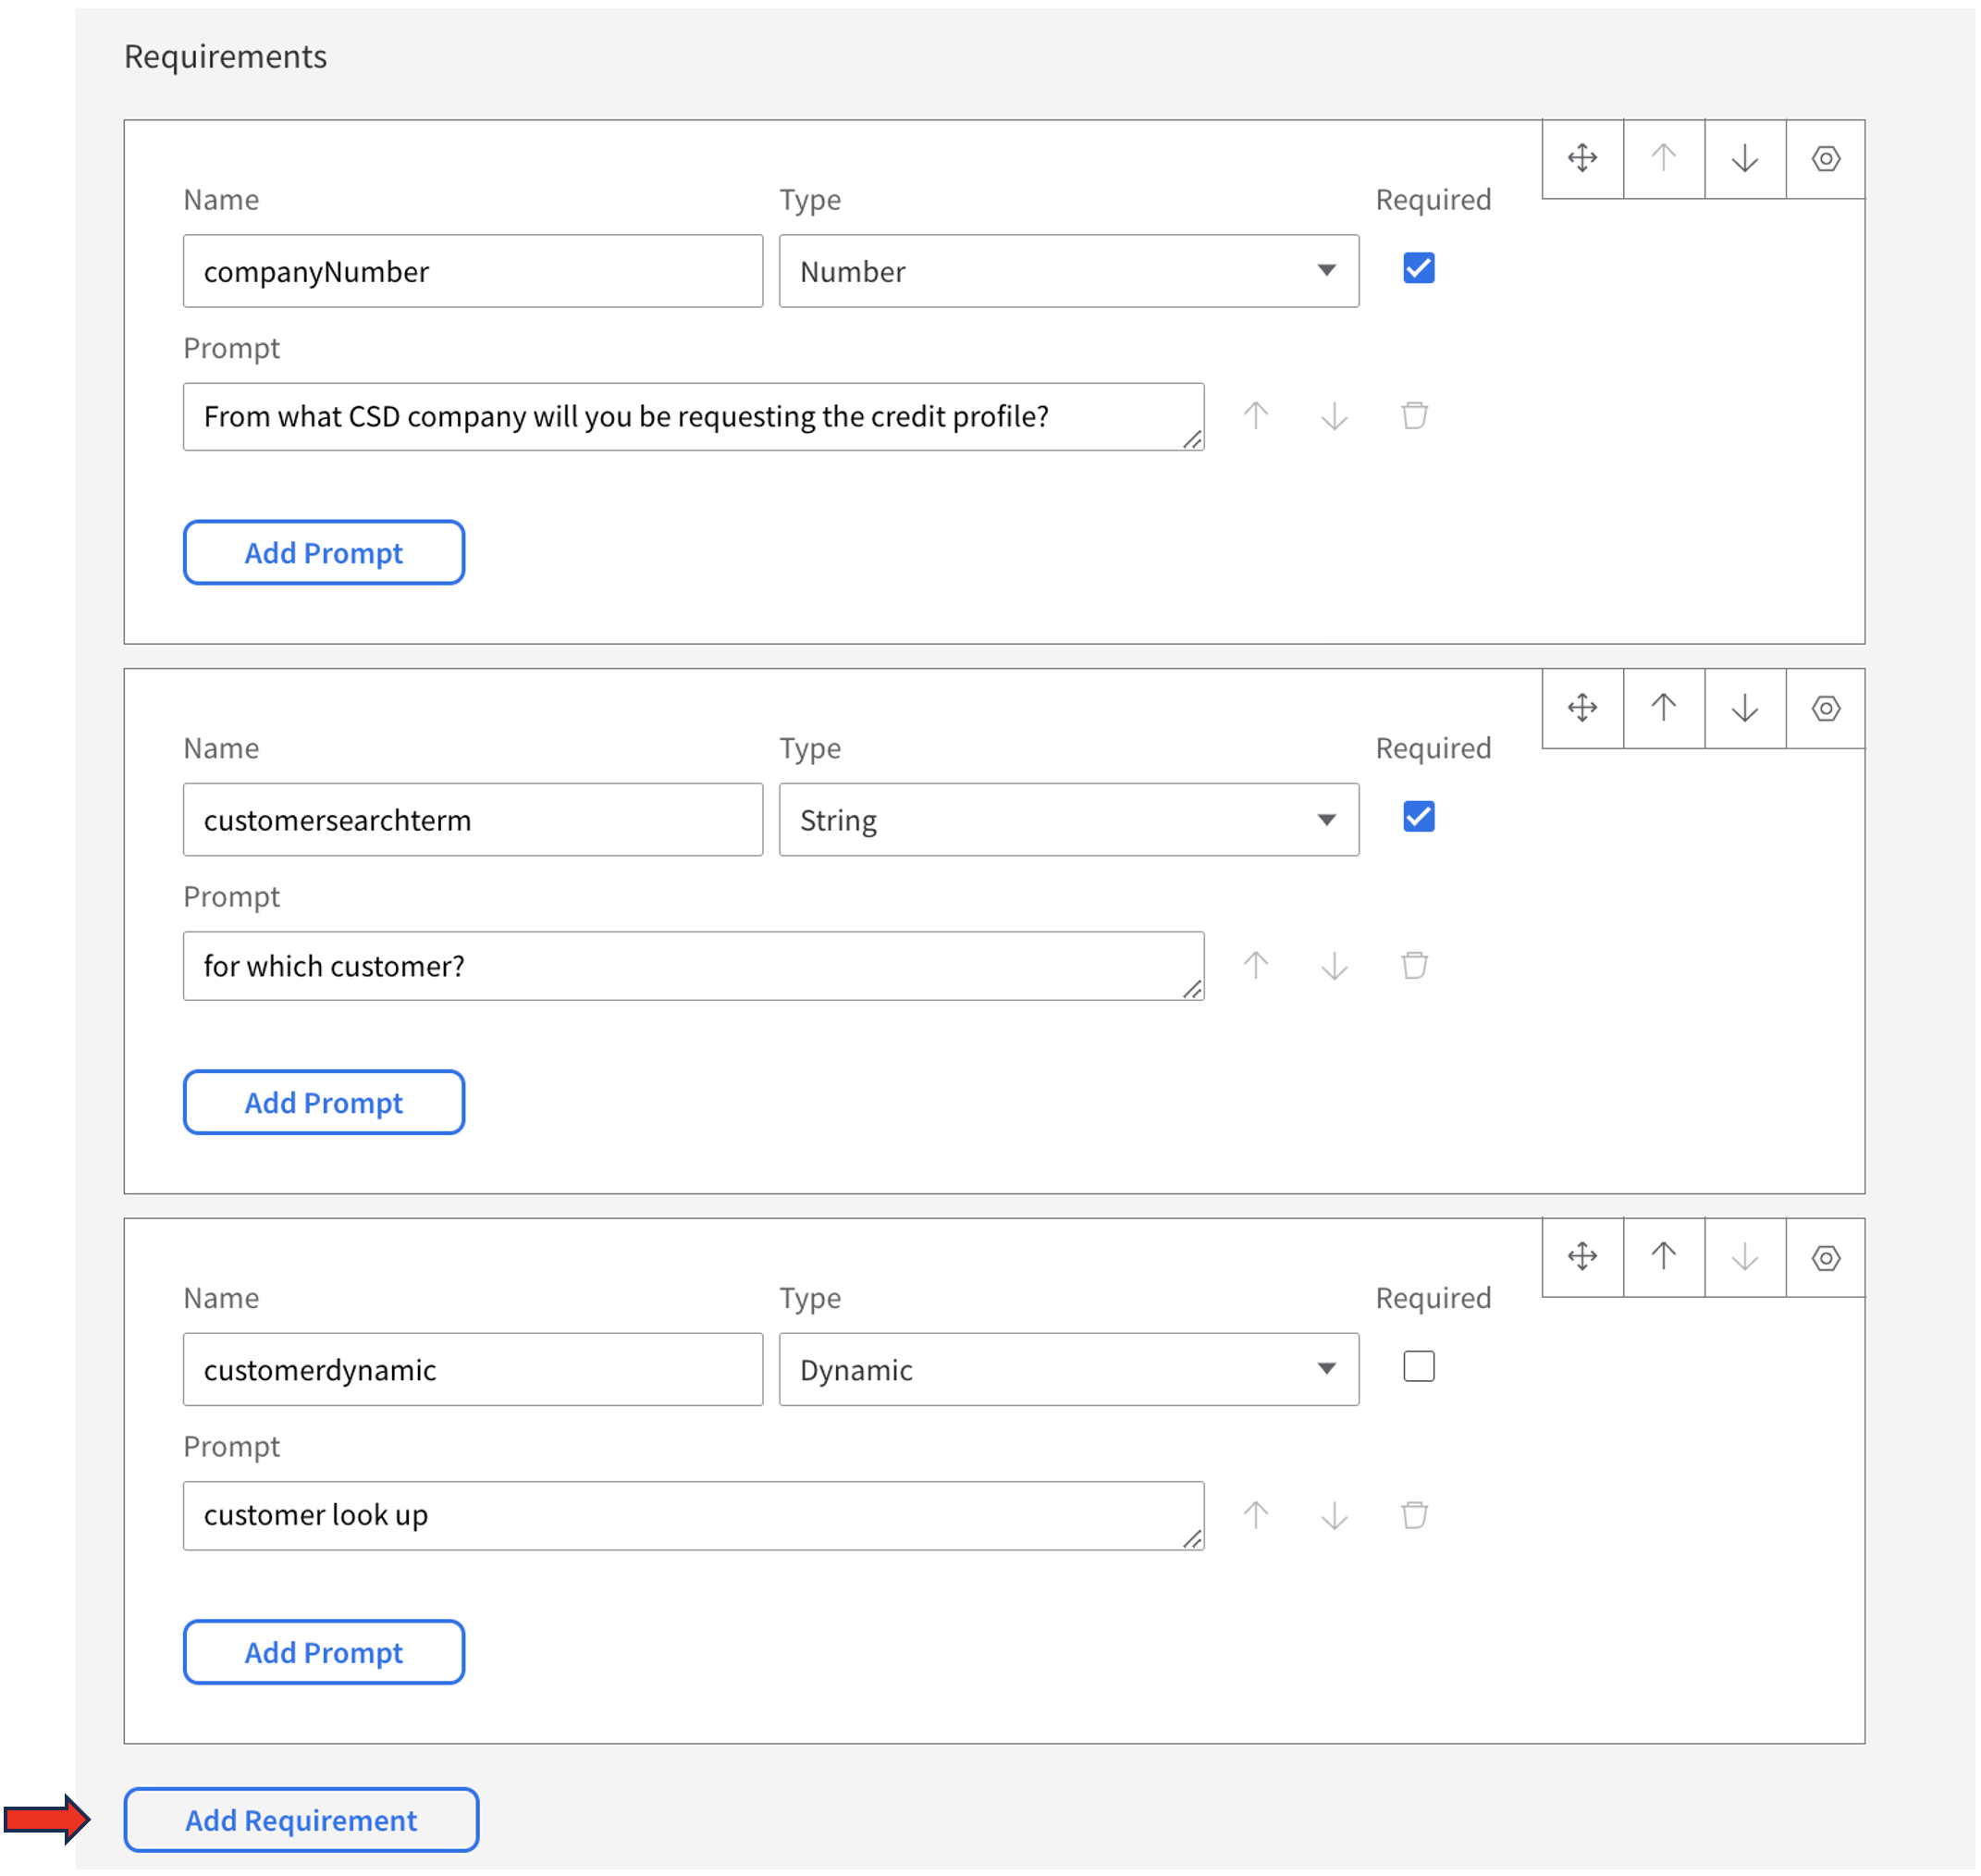
Requirements
Requirements
You will be creating three (3) requirements as pictured below. There is an “Add Requirement” button to increase the quantity displayed.
Parameters
You will be creating three (3) parameters as pictured below. There is an “Add Parameter” button to increase the quantity displayed.

Click “Next” button
Utterances and Confirmation
Utterances
Define a set of utterances that start the skill when asked by the user. We recommend a minimum of three. There is an “Add Utterance” button to increase the quantity displayed.
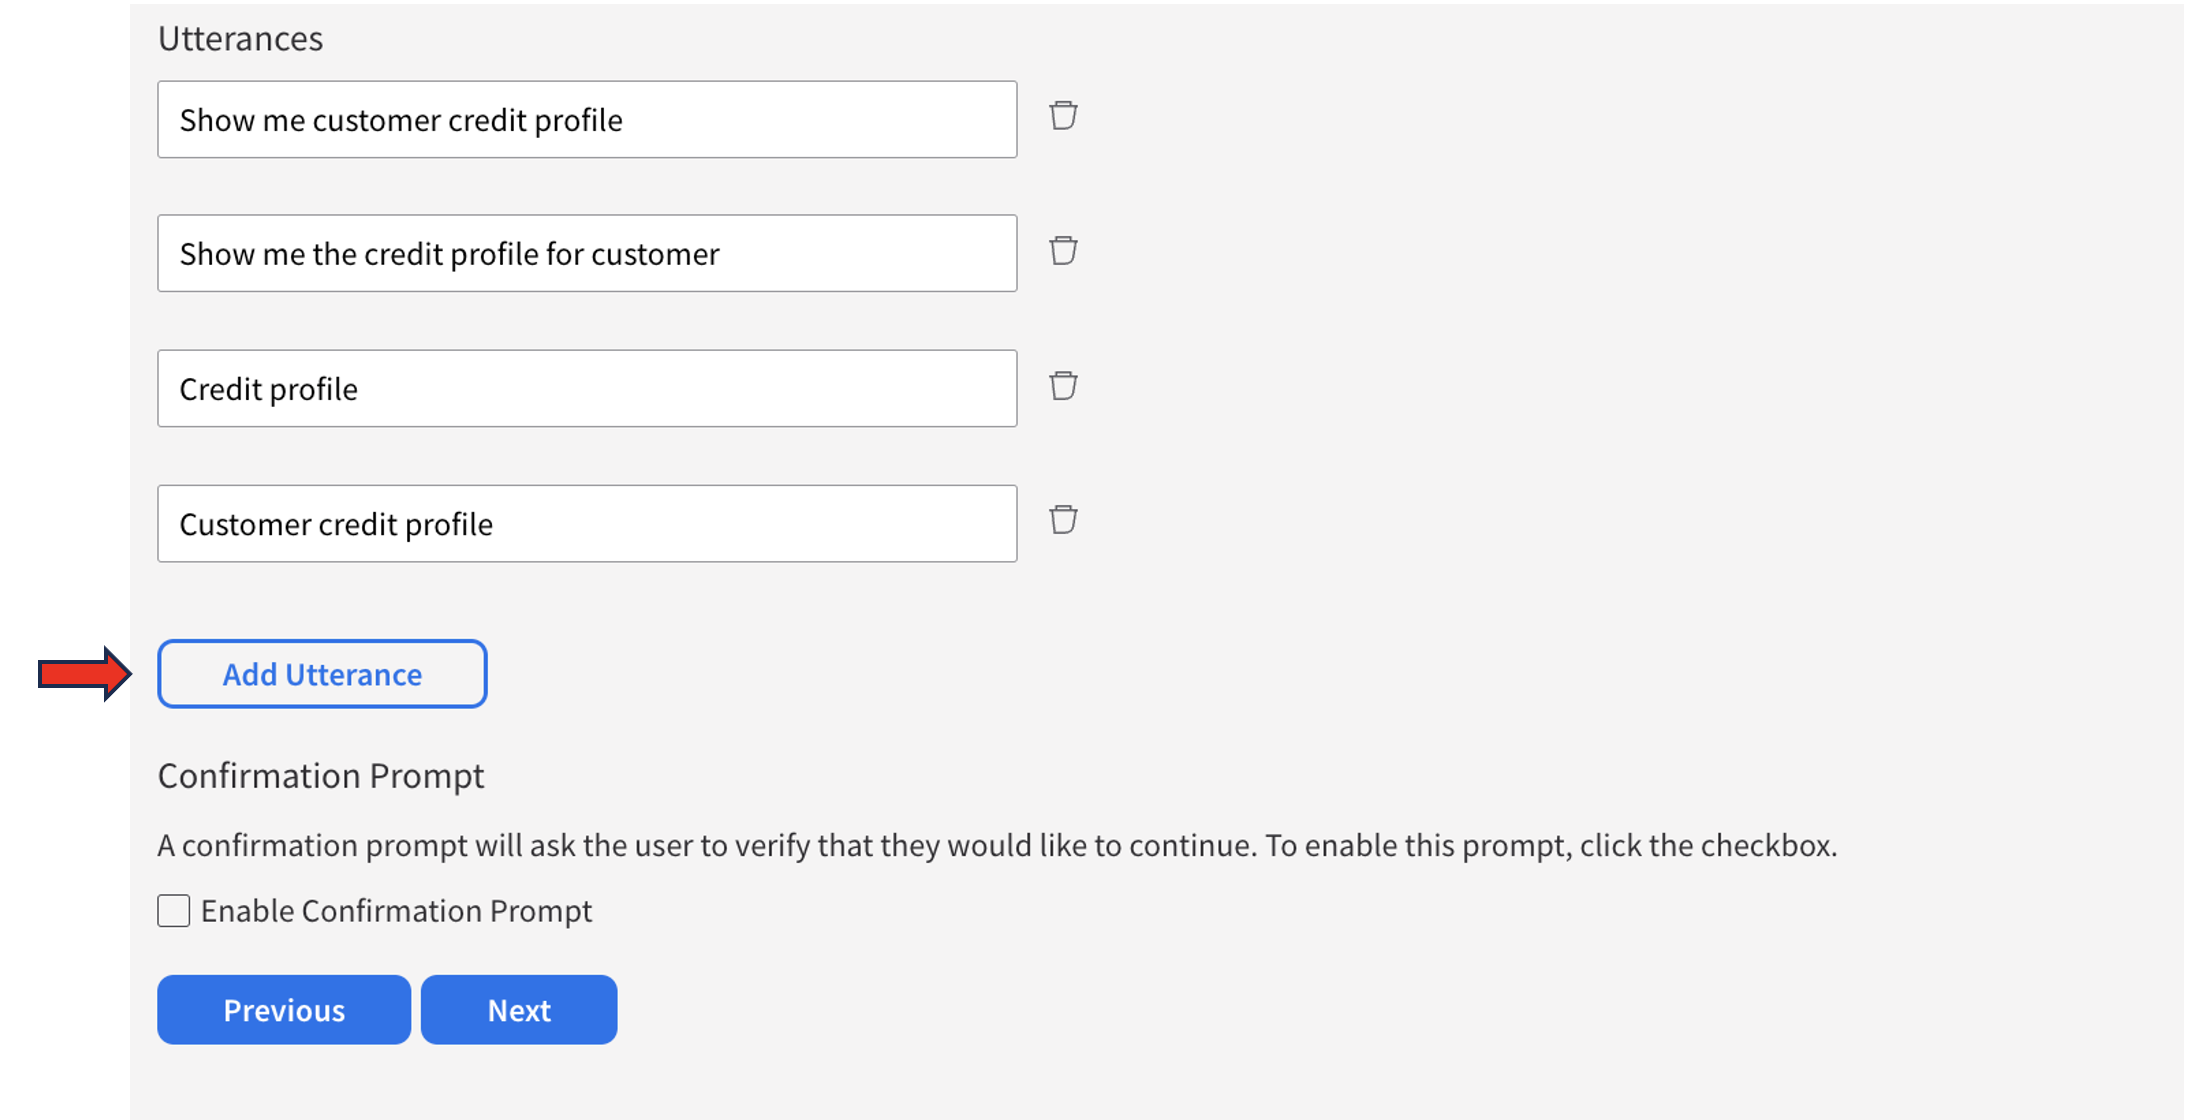
Click “Next” button
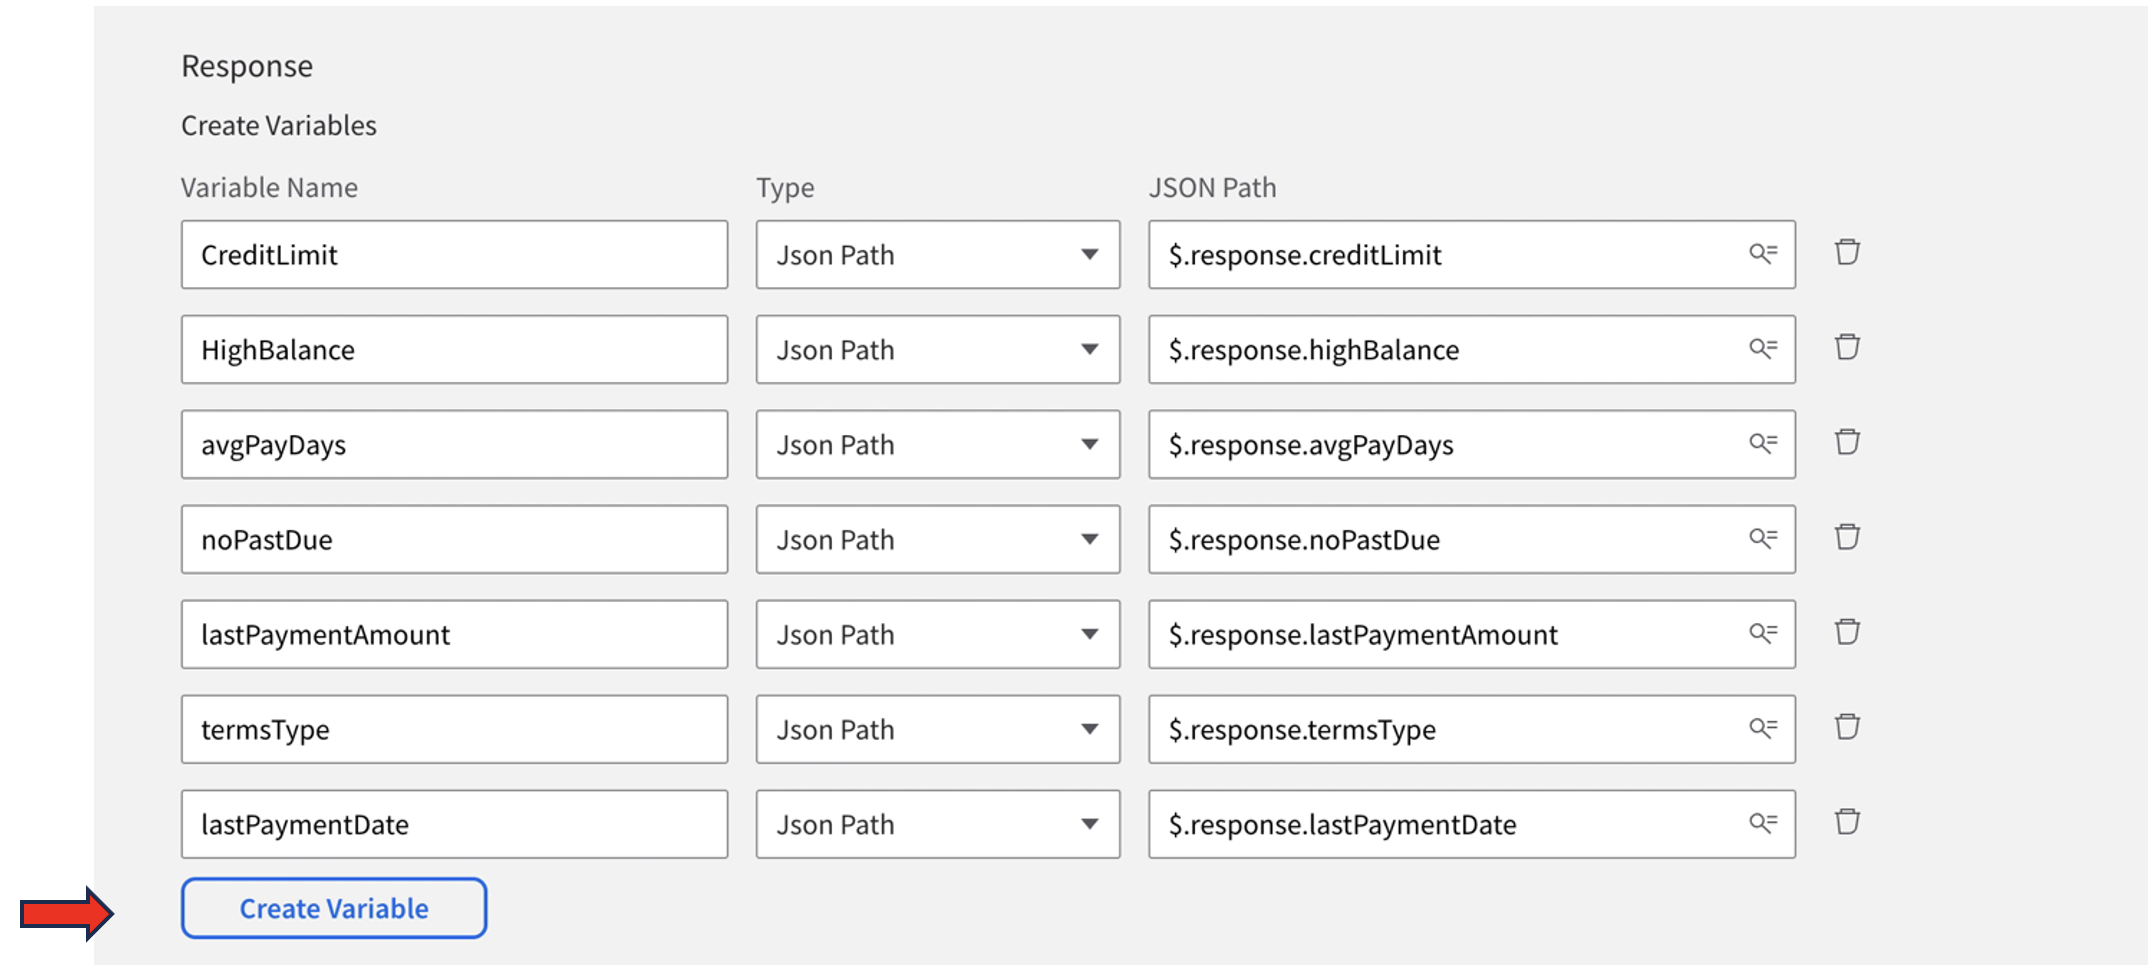
Response
Response
Create Variables
Define the following variables. The “Variable Name” is user defined and must be unique to each other. There is an “Create Variable” button to increase the quantity displayed.
Update Variables
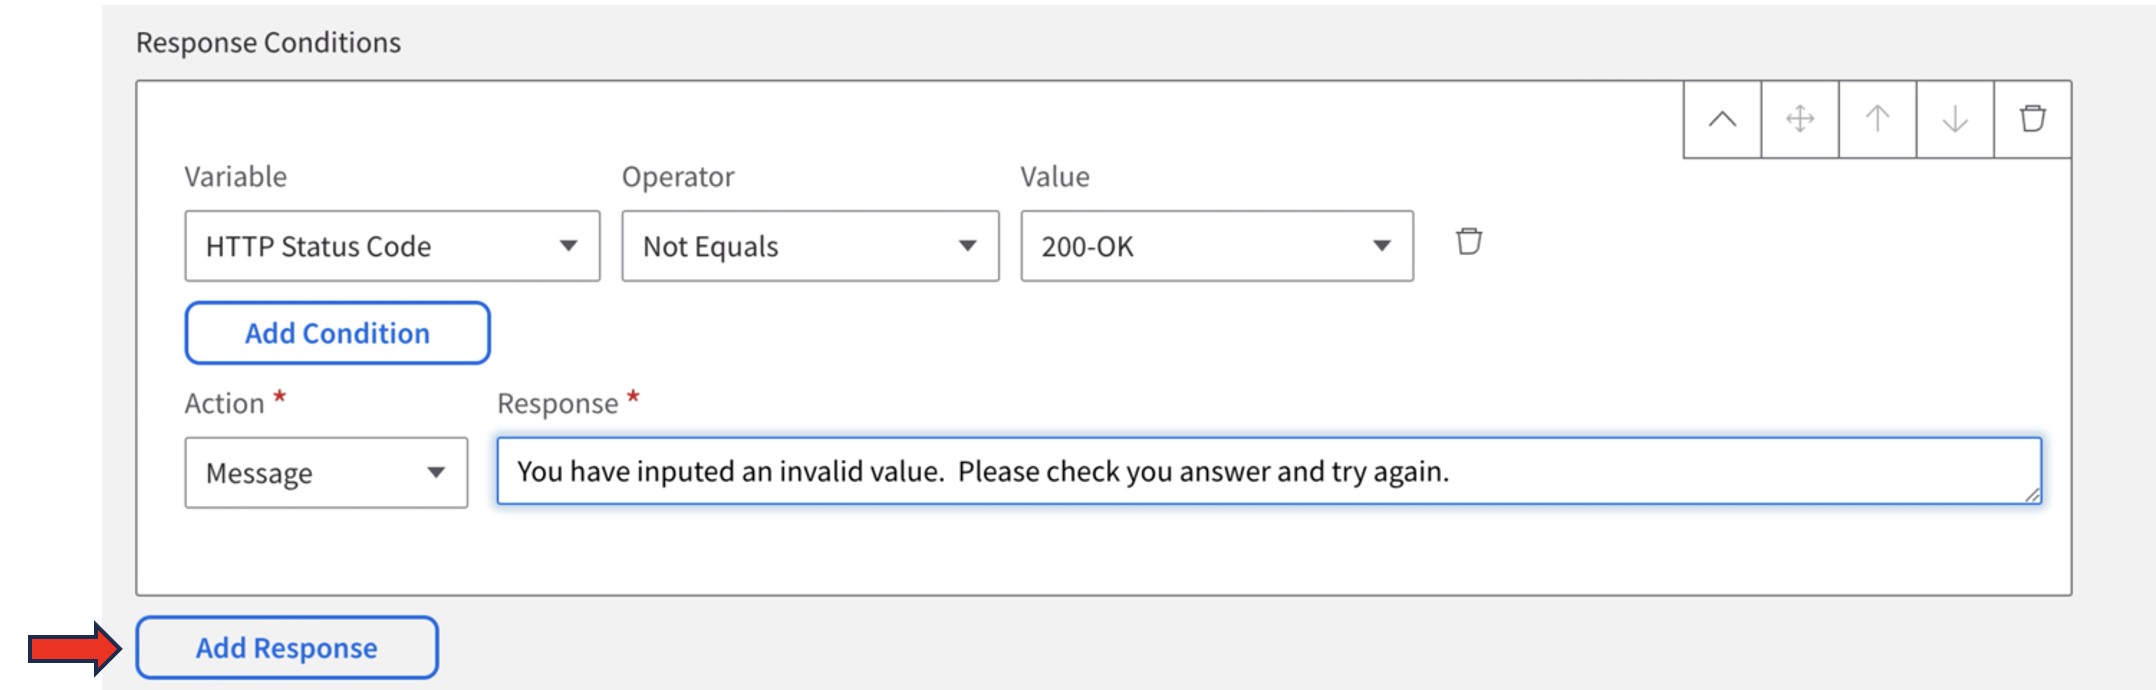
Response condition
Your will create a response condition for an invalid value entered by the user. This condition will prompt the user to retry. Select from the drop down and enter the “Response” wording manually. There is an “Add Response” button to increase the quantity displayed.
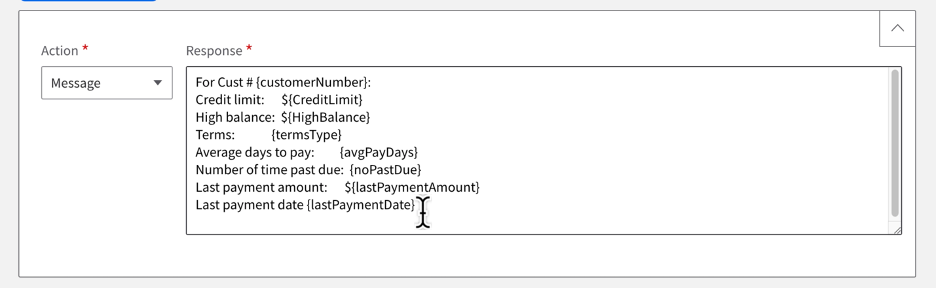
Default Response
The default response will be the information you wish to provide the user for their query. This information has verbiage created by you and within the {} will be the variable that is available for the API you are calling. When you type in the opening curly bracket { a leasy of variable will be displayed. As you type in the ones from the example below, select it as it becomes available. This can be better understood by viewing the provided video.
Click “Next” button
Summary
The summary view will give you a detailed look at everything you have entered.
Text View
Flow View
Click Save
Test Skill
Your skill is now in “Draft” mode. By selecting the skill you just created and then clicking the “Build to Test” button you will be able to test it.
Deploy Skill
Once you are ready to deploy your skill, select it and click “Deploy Skill”