Printing from the Cloud
Business Problem
While your business might be running mostly in the cloud you may still need to print locally. Being able to connect your cloud-based applications with your on-premise printers is essential to achieve that. This need for printer connectivity applies whether you access the applications from a desktop browser or a mobile device. In this tutorial, we will guide you on how to print from the cloud and establish a connection with your on-premise printers.
Requirements
- Access to an Infor Cloudsuite
- Knowledge of command line basics
- IDM-Administrator role
- User privileges to ION Desk (IONDeskAdmin)
- Postgres or SQL Server installed
- Amazon Corretto 8 64x
Tutorial
1. Enable Enterprise Print
From the Infor OS Home Portal, click on Document Management (IDM), and click on the icon to the right of Add Document to access the Control Center, and underneath Document Output click on Print.
Make sure that IDM Enterprise Print is toggled on.
If you have Enterprise Connector and the Enterprise Location already installed and ready, skip to Step 3.
2. Install Enterprise Connector
The Enterprise Connector will provide a secure communication bridge between the Infor Document Management component in the Infor Cloud and your on-premise printer hardware. For this part, see the Infor ION Desk User Guide (Cloud). If you run into any issues during the installation, check out the Troubleshooting section at the end of this guide for some common issues.
3. Add Print Location
Navigate back to the Control Center in IDM, go to Print underneath Document Output. For IDM Enterprise Print, click on Manage Service. Look for the Enterprise Location you just created, if it’s not found then Refresh the list. After you find it, click Enable.
Status will change to OK after you Enable. You may need to hit Refresh for it to reflect the Status clearly.
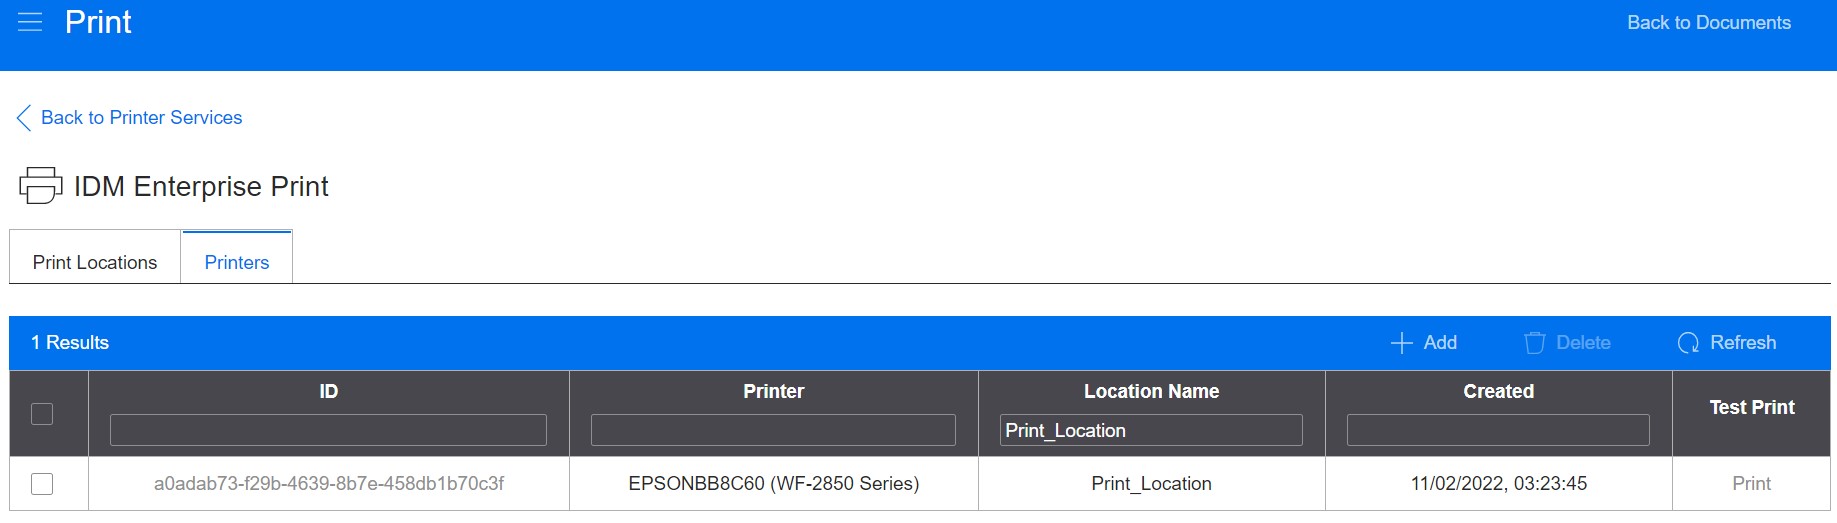
4. Add a Printer
All that’s left now is to add a printer local to your network. Click on the Printer tab, hit the + Add button, and choose your Location and the Printer you want from the first 2 drop down menus. Printer ID will be automatically generated. Then just hit Save.

5. Test Print
To the right of the printer you just added, you can click Print underneath the Test Print column.
Print Troubleshooting
If your printer page does not appear, as an admin you can do these steps.
- If you or nobody else are near the printer to confirm, you can navigate to Job Management under Document Output and search for the print job that was sent to see if it was successful.

- The status shown here may say InProgress. Give it some time and it will change to OK, but for now copy and paste the ID.
- On the Enterprise Connector server, navigate back to the directory where you installed Enterprise Print and go the bin folder. There you will find a series of .cmd files.
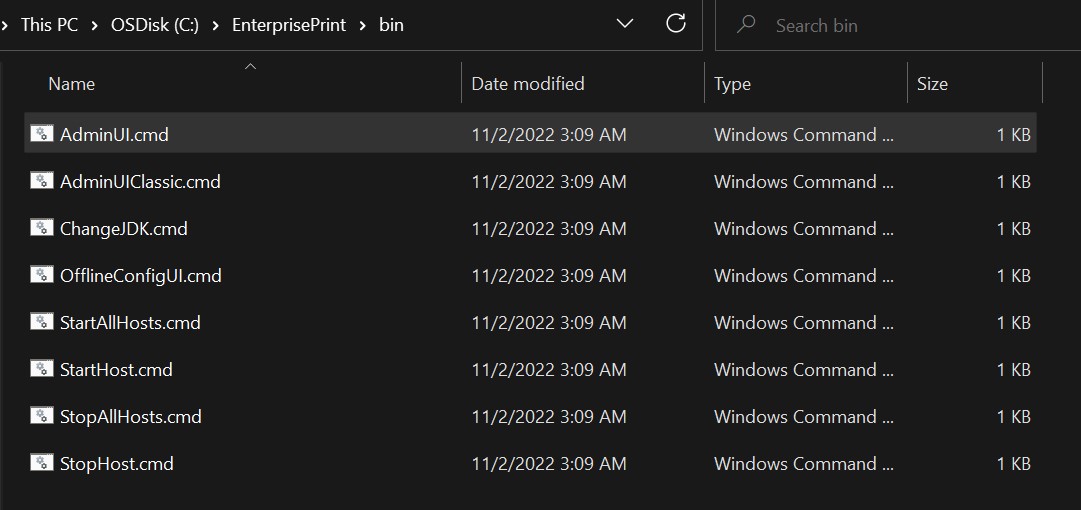
- Double click the AdminUI.cmd to open it up.
- You will be presented with a screen like this.
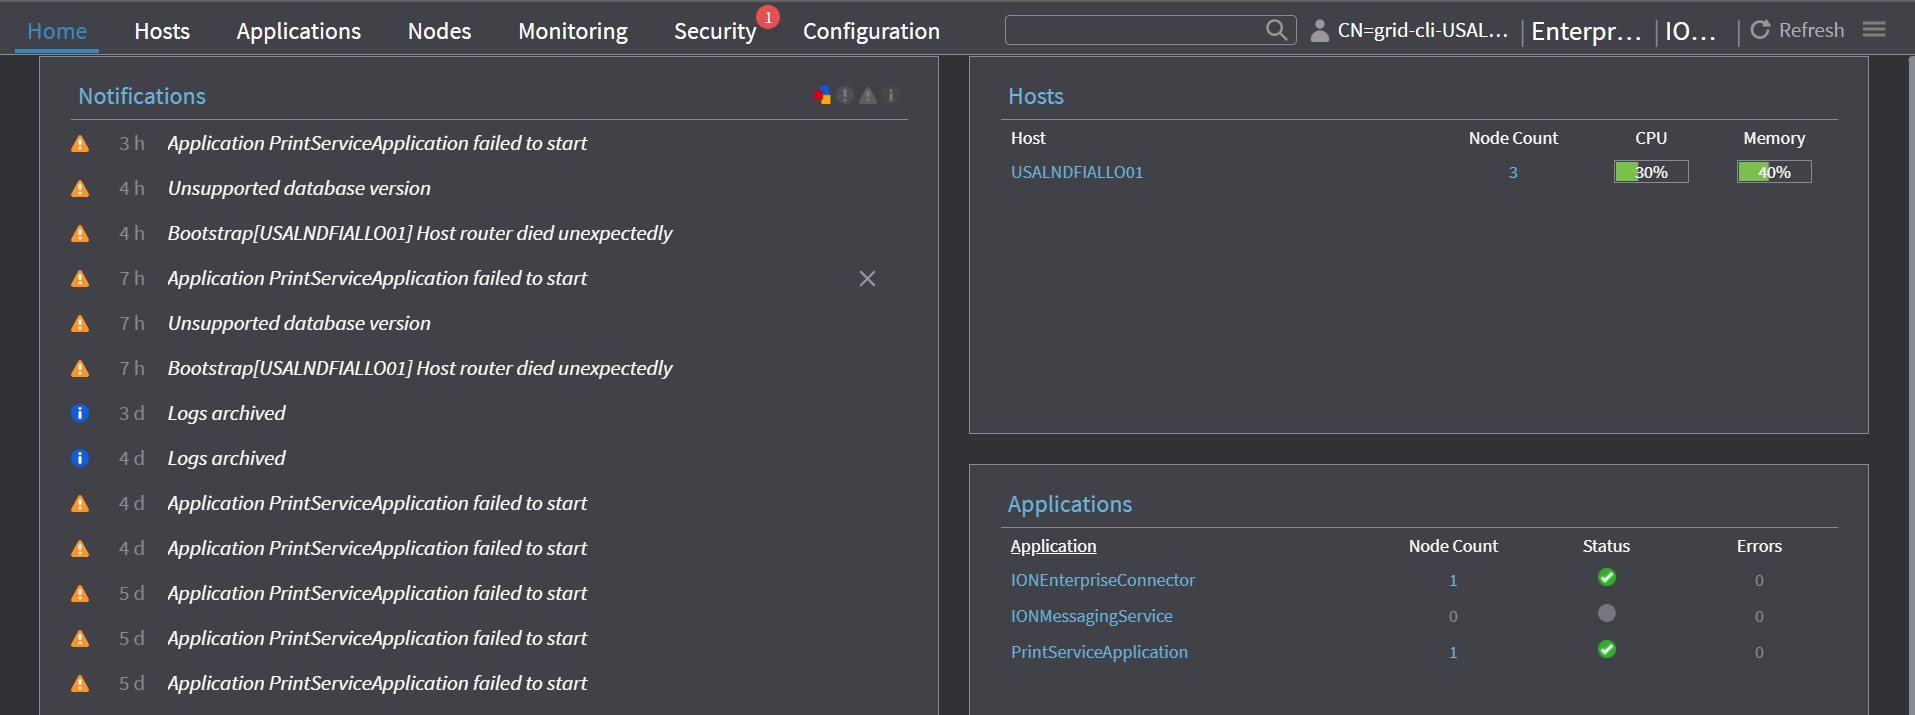
- At the top click Applications, then at the top right I recommend clicking the option to display the applications as cards instead of a list.
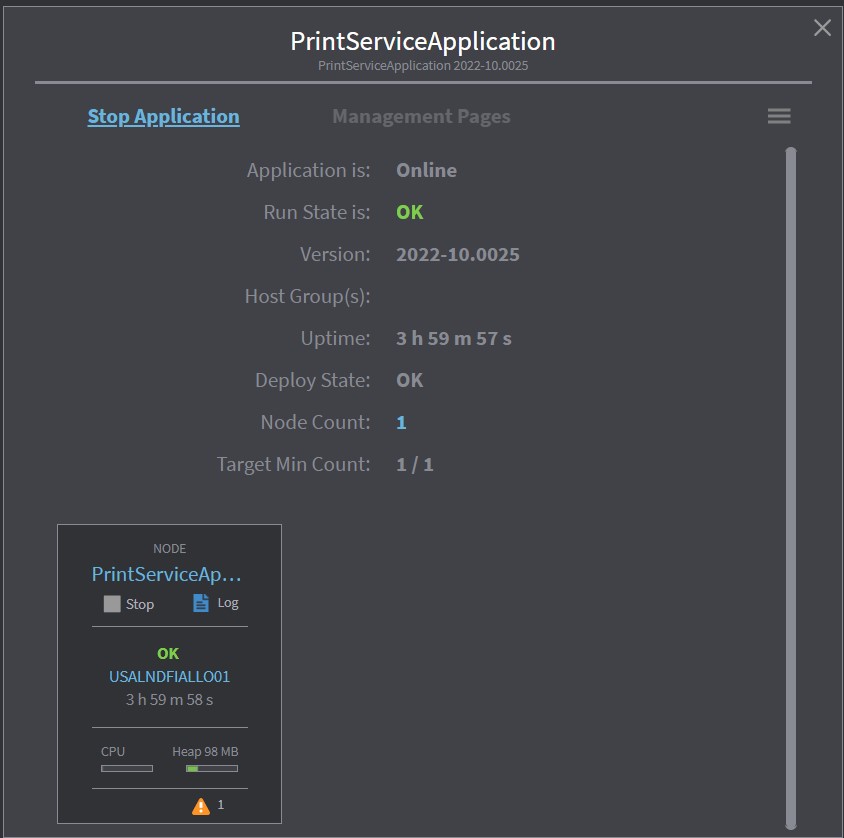
- Click on the application to open it up then hit Log.
- At the top, paste the ID into Filter and here you’re looking for Job Success.

Additional Troubleshooting
- Amazon Corretto needs to be a version of 1.8.0_272 or later. An error will be given later during the installation process if you don’t meet this requirement. If you downloaded the most recent one via the link given, this should not be an issue.
- For the “Grid Connection Configuration” step when installing Enterprise Connector, you may get an error saying bootstrap service could not start. This is because the ports are taken, maybe by another instance of Enterprise Connector setup for another tenant. Changing the port values should fix this.
- When running the jar file, you may get an error stating that Java does not exist or some file location indicating an error with Java.
- This is most likely caused by the PATH variable not being set correctly for it.
- Running Repair on the Amazon Corretto installer can fix this
- You can also follow these steps given by Java.
- This is most likely caused by the PATH variable not being set correctly for it.
- You may find that in Job Management that the Job never changes to OK and seems stuck on InProgress. In a situation like this, the Logs in the local Admin UI could give you more information.
- A common problem is that the printer was not found. Maybe it’s not on or maybe you added the wrong printer. Confirm that the printer you added is the one that is available.