Implementing Custom Algorithms
Overview
Infor AI tools provide out-of-the-box algorithms that are common in machine learning. For various reasons, you have decided that the out-of-the-box models don’t deliver the functionality you are looking for, or you believe the performance can be improved on. Now, you wish to develop your own custom algorithm to improve your performance metrics.
Components
- Machine Learning: Infor AI
Requirements
- Access to an Infor CloudSuite
- Infor AI Security Roles:
- COLEMANAI-User
- COLEMANAI-Administrator
Tutorial
Difficulty: Medium
Estimated completion time: 20 minutes
Step 1: Choose your development environment
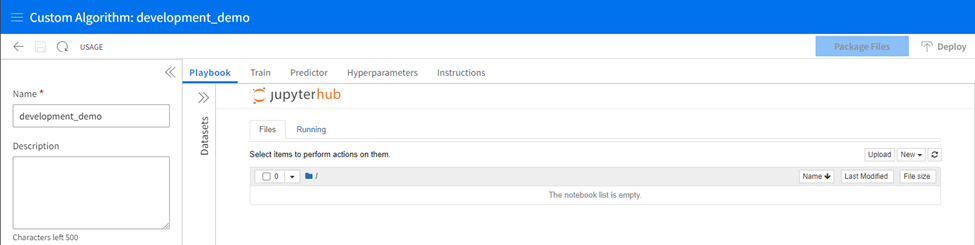
You may code in a local environment or workspace if you prefer. You’ll need to package the files according to the documentation in the instructions tab. If you have chosen to develop outside the platform, ensure you understand your requirements as described in the instructions tab. Otherwise, open the Custom Algorithms section and add a new custom algorithm from the home screen. Select “Open Notebook.” and give the algorithm a name before saving to enable the notebook.
A look at using Jupyter Notebooks in Infor AI seen here:
Step 2: Understand your requirements
To create a custom algorithm, you must create two essential scrips and a set of hyperparameters. These items will be treated differently based on your choice in step 1. The scripts are:
- train: The program that is invoked to train the model
- predictor.py: The program that implements the Flask web server that can be called to get predictions from the trained model.
Step 3: Understanding the interface
There are several areas of this interface in which your development will take place.
The Playbook:
The playbook tab is a non-required coding space where a Jupyter Notebook interface lets developers code and experiment with their development in a sandbox-style workspace. Creating a new notebook allows you the standard interface of a Jupyter Notebook. You can view the available Python packages and their versions with a “!pip list” command.
Train and Predictor Tabs
Train and Predictor tabs are spaces ready to receive the final train and predictor.py scripts for deployment. These spaces have no testing capabilities, so it is best practice to develop and test your scripts in the playbook tab and copy them to the train and predictor tabs when they are complete. The hyperparameters tab is where you will upload a CSV detailing the hyperparameters for your algorithm and their default values and types.
Hyperparameters Tab
The hyperparameters tab lets you individually add hyperparameters and their properties directly to the grid. You may optionally import a CSV with this information, which will then be displayed in the table and editable from there.
Datasets
The datasets section will expand from the left bar, allowing you to bring datasets already staged in Infor AI into the Jupyter Notebook environment.
Instructions
More instructions and sample files for easy access.
Step 4. Prepare your data
If you haven’t already, stage your data in Coleman.
Expand the datasets panel on the left side of the jupyterhub interface. Type the name of your loaded dataset and find it in the list. Select Load to see it appear in the list of loaded datasets.
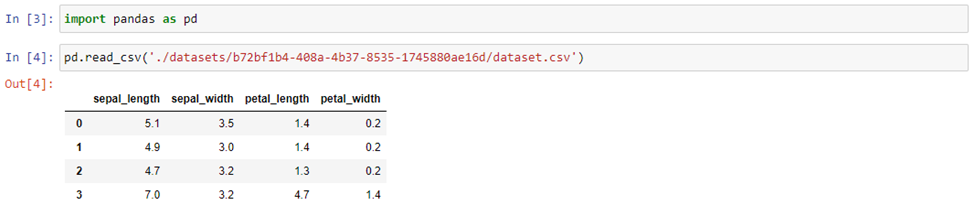
Once you have loaded a dataset, a new folder named “datasets” will appear in the jupyterhub directory.

Use the folder structure to locate your dataset, and the subfolders it might live in, create an import command to bring your dataset into the kernel for use. Use a command like read_csv in pandas:
Step 5: Write your code!
Unleash your creative juices. Code, test, recode, and compare models. Shape your code into the train and predictor scripts and copy the appropriate code to their respective tabs.
Step 6. Import Hyperparameters:
Add your hyperparameters to the grid in the Hyperparameters tab and set their attributes (default values).
Step 7. Package and Deploy:
Package and deploy the custom algorithm using the Package Files and Deploy buttons at the top right of the custom algorithms interface.

Step 8: Use the algorithm in a quest
When building a quest, the custom algorithm activity block will now let you access the deployed package.