Export via IDM Utilities Tool
Business Problem
Your organization has a repository that contains various types of documents. However, you now have a need to export a specific type of document to another repository. You have multiple repositories, and you want to transfer all documents that belong to a particular document type to another repository. In this case, you need to use the IDM Utilities tool to export the documents. This tool enables you to export the chosen document type along with its metadata and associated files.
Components
Requirements
- A basic understanding of how to use the command line is recommended for this guide.
- IDM-Administrator role
- User privileges to ION Desk (IONDeskAdmin) and ION API Gateway (IONAPI-Administrator)
- This will involve running a local program that connects to the Infor Cloud. Large imports and exports can consume a lot of memory on the local machine so 16GB RAM is recommended.
- Java 8+ is required on the local machine.
If Java 11+ is used then JavaFX needs to be installed as well (https://openjfx.io/). The Utilities tool can be started from command line where the “module-path” points to the JavaFX directory:
java -Xms1024m -Xmx1024m –module-path “C:\Program Files\Java\javafx-sdk-11.0.1\lib” –add-modules=javafx.controls,javafx.fxml,javafx.web -jar Utilities-.jar
Tutorial
Exporting documents via the Infor Document Management (IDM) Utilities tool allows transfer of document types between systems.
1. Finding the IDM Utilities Tool
To access the Export function in IDM, start by navigating to the Control Center.
Once there, select the “Tools” tab and click on “Utilities” then “Download”.
Keep in mind that there is extensive documentation available for these packages, but this guide will focus specifically on the IDM Utilities’ Bulk Import function.

2. Starting up the tool
There will be 2 jar files in the unzipped utilities package. The one you’ll want to run is does not have “sources” at the end.
The IDM Utilities tool can be ran completely in the command line, but there’s also a GUI that we can use. Navigate to the folder, type “cmd” in the folder and hit Enter. This will open the command line right in that folder. Then input this command along with the name of the correct jar file to open up the GUI.
java –jar <ExecutableJarFileName>.jar
Ex: java -jar Utilities-2022.08.00-47.20220728T090651Z.jar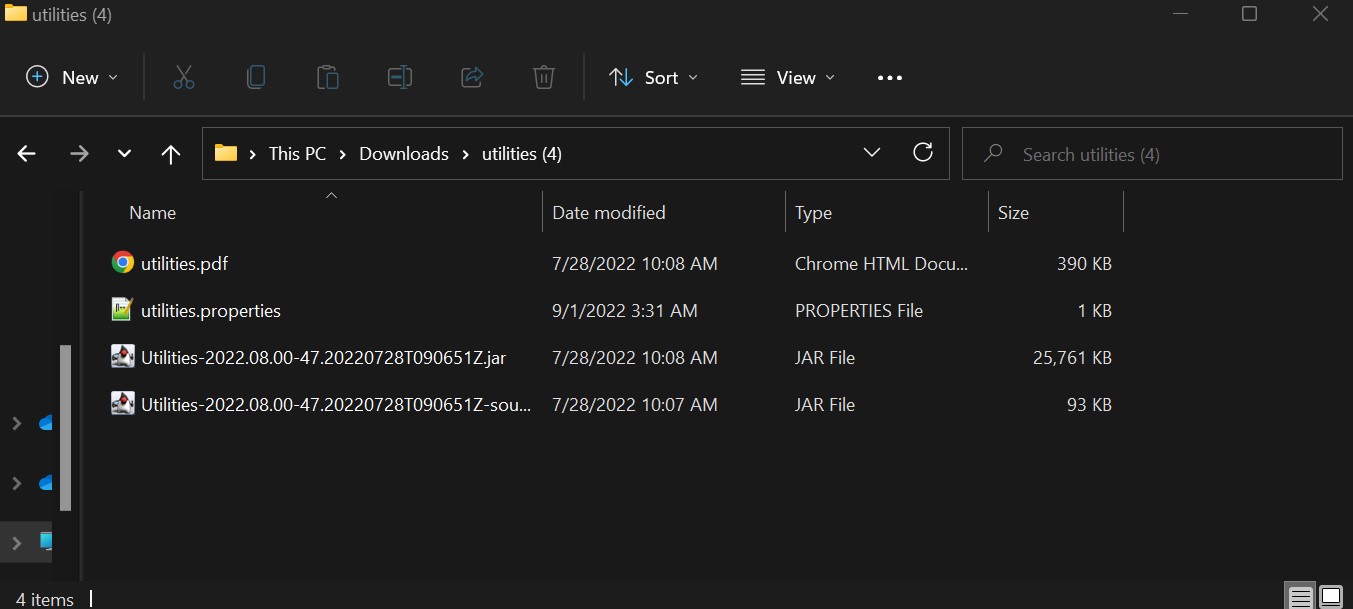
3. Setting up the IONAPI file
Now, in order to connect the IDM Utilities tool to your respective environment you’ll need to generate an IONAPI file. Navigate to Infor ION API, click on “Authorized Apps” and in the search bar type in “IDM”. You are looking for an API that says “Backend Service”.

Click on it, navigate down to “Download Credentials” and click on that. You’ll want to enable “Create Service Account” and input your name and then hit Download.
4. Running the Tool
Using the jar command from earlier, start up the tool, and put in the IONAPI file you created.
The export is executed in two steps, the first step is the export of metadata the second step is the files. The first step must finish successfully but the second step can be aborted and then when restarted it will automatically continue downloading the rest of the files. The export is saved into the “export” folder.
Your screen should look something like this.
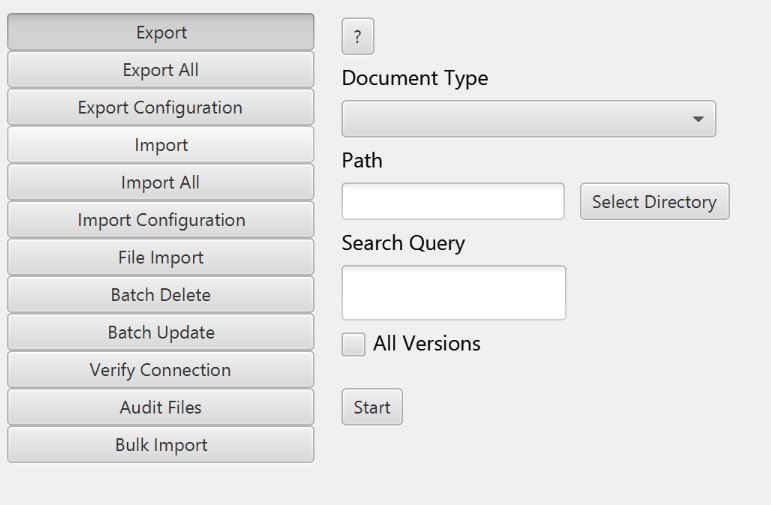
Select the Export tab.
Some things to note here.
- The Path is where you point to the directory for where you’d like the Configuration xml files to be saved.
- Make sure that your user can access all documents.
- Only checked in documents will be exported. Documents that are checked out will be skipped.
- Search Query is used to specify which documents.
5. (Optional) Generating XQuery
For those unfamiliar with XQueries, an easy way to build one is through the IDM XQuery Builder.
XQueries allow you to specify what documents you want to search for through this program. You can find the IDM XQuery Builder in IDM itself.
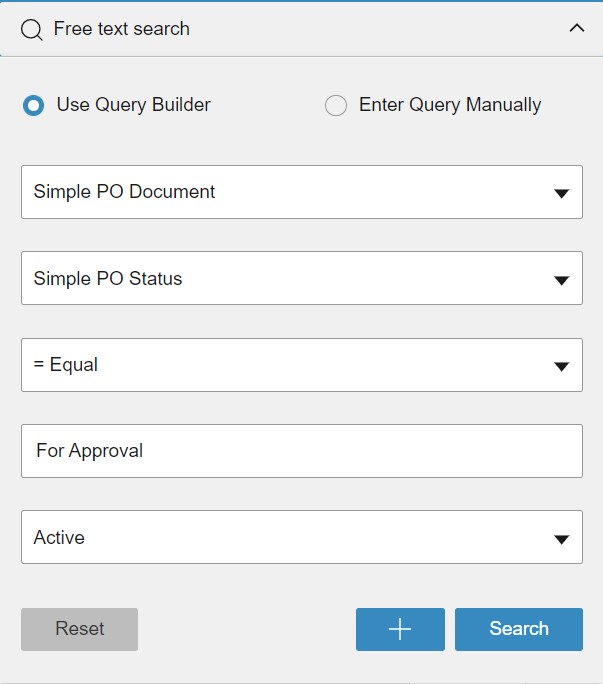
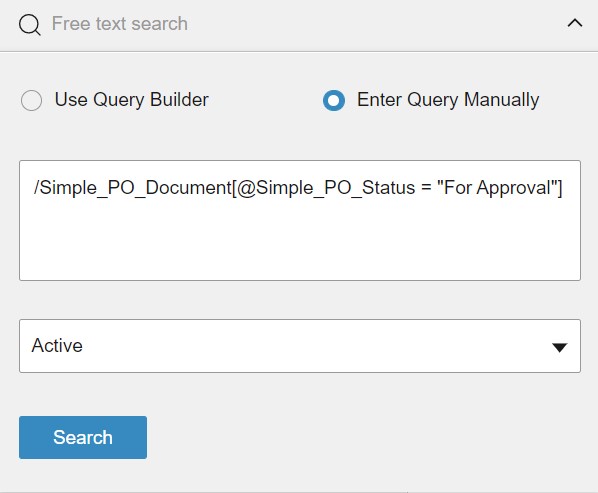
Put in the criteria you are searching for and then at the top click “Enter Query Manually” and it will give you the XQuery which you can copy and paste into Batch Update.
If you’d like, you can also follow along in this video.
Command Line Arguments
If you’d like to run this on the command line, here are the arguments for running the jar file:
| path | the path to an existing migration folder on disk, if the folder is not empty then we assume that we are resuming the download of files for an existing export |
| documentType | the document type to export, for example “MDS_File” |
| allVersions | if specified then all versions for a document will be exported, with many versions, this can take considerable more time for the export to complete |
| sharepoint | should be specified if the system is SharePoint, otherwise only the first 5000 document will be exported |
| xquery | the search query used, if this is specified then “–documentType” and “–sharepoint” can’t be specified. The search query should only search in one document type otherwise the error handling might not work. |
java –jar <ExecutableJarFileName>.jar

Ex: java -jar Utilities-2022.08.00-47.20220728T090651Z.jar