Add/Remove Widgets in a Published Workspace
Business Problem
Workspaces in Infor OS Portal play a pivotal role in aligning operational tasks with user requirements. Over time, the need to adapt these workspaces arises, whether due to changing business strategies or evolving user roles. Modifying an existing workspace in the Portal ensures it remains aligned with these shifts.
This tutorial will lead you through the basic necessary steps to effectively edit a workspace in the Portal, ensuring continuous optimization and relevance within the Infor CloudSuite environment.
Solution Components
- Infor OS Portal and Workspaces
Solution Requirements
- Access to an Infor CloudSuite
- Security Roles:
- Infor-SystemAdministrator
- MingleAdministrator
- PORTAL-ContentAdministrator
Tutorial
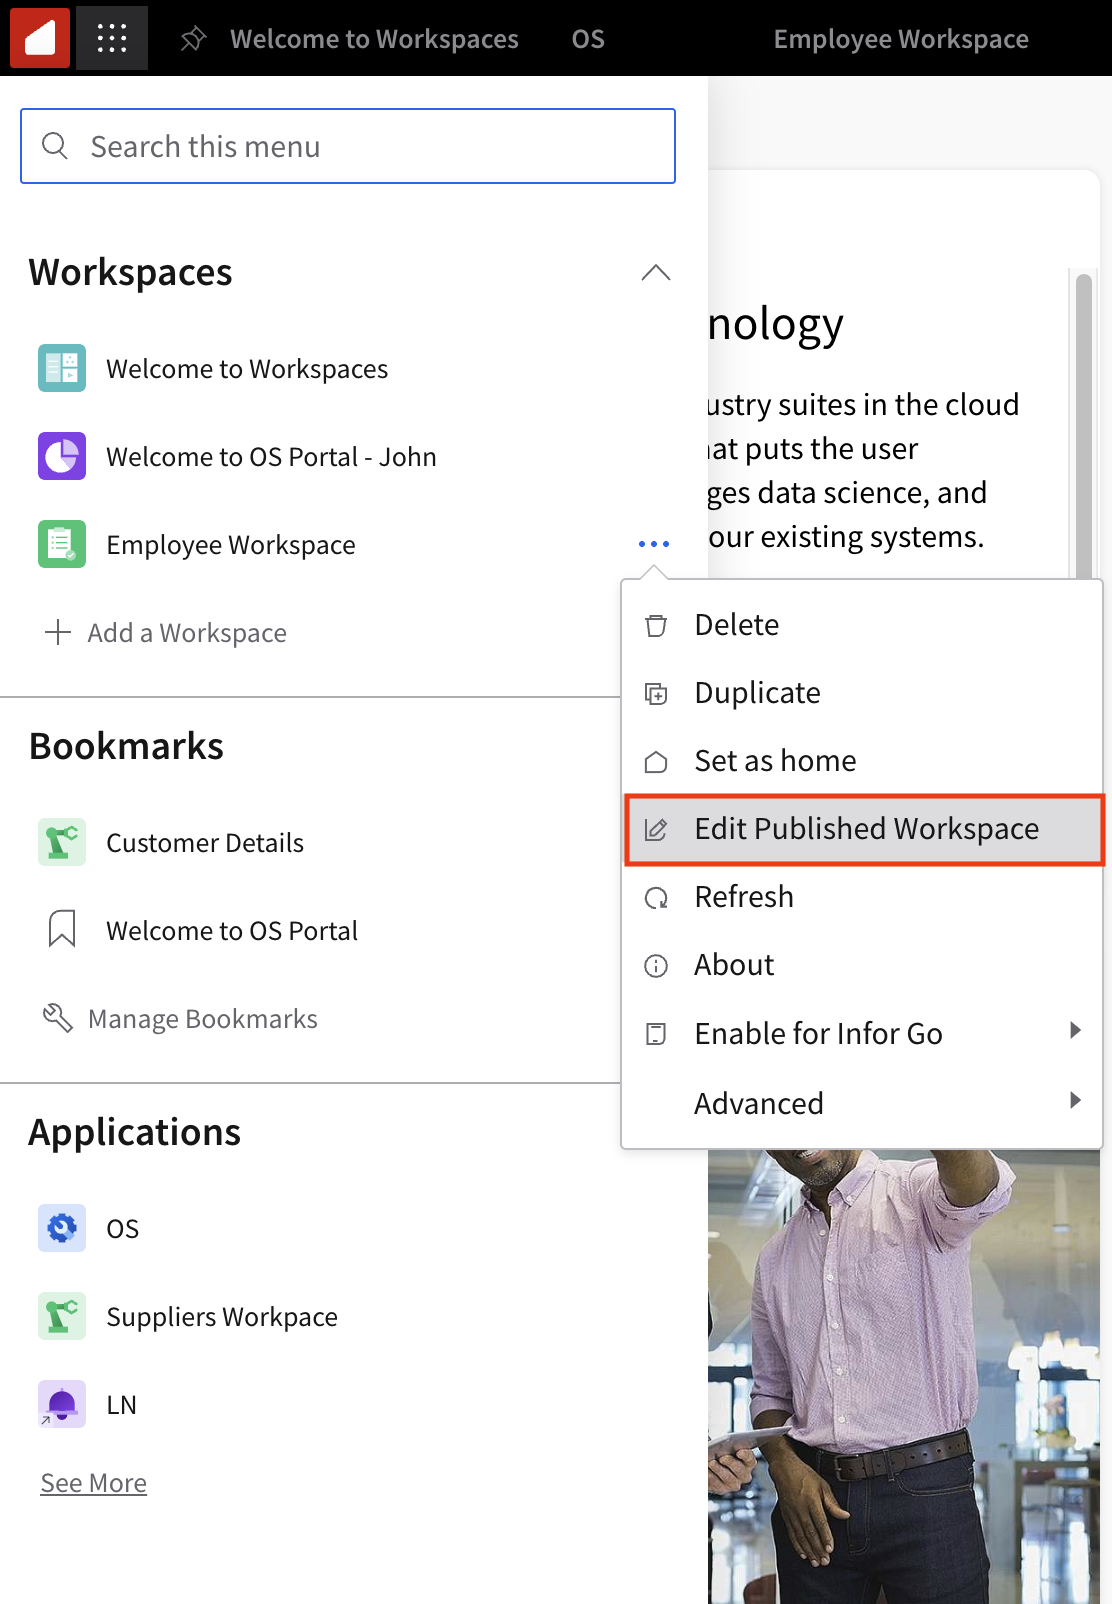
- Access the Navigate Menu and, under Workspaces, locate the Workspace you intend to modify. Single-click on it, then select the ellipses, followed by “Edit Published Workspace”.
2. In the upper right corner of the screen, choose “Edit Layout.” You are now in the editing mode.

3. You now have the flexibility to either remove an existing widget by clicking the “X” beside it or introduce a new one.
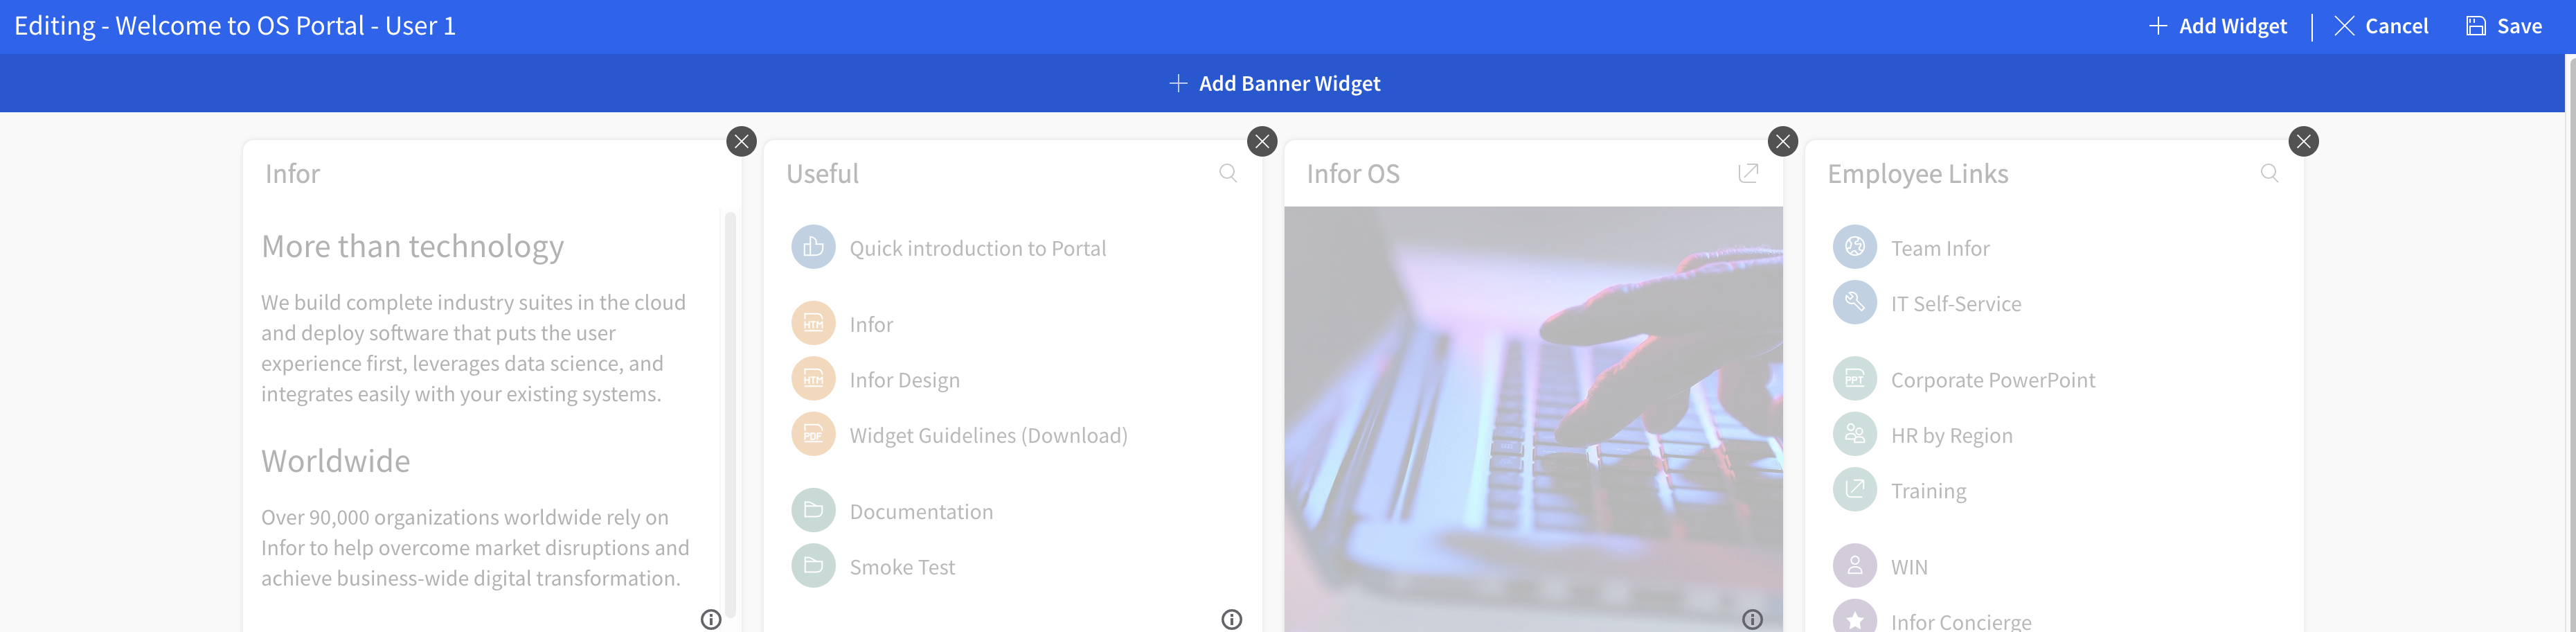
4. To incorporate a Widget, select “+ Add Banner Widget” for banners or, for the main body of the Workspace, click on “+ Add Widget” located in the upper right corner of your screen. Subsequently, the Widget catalog will appear on your screen.
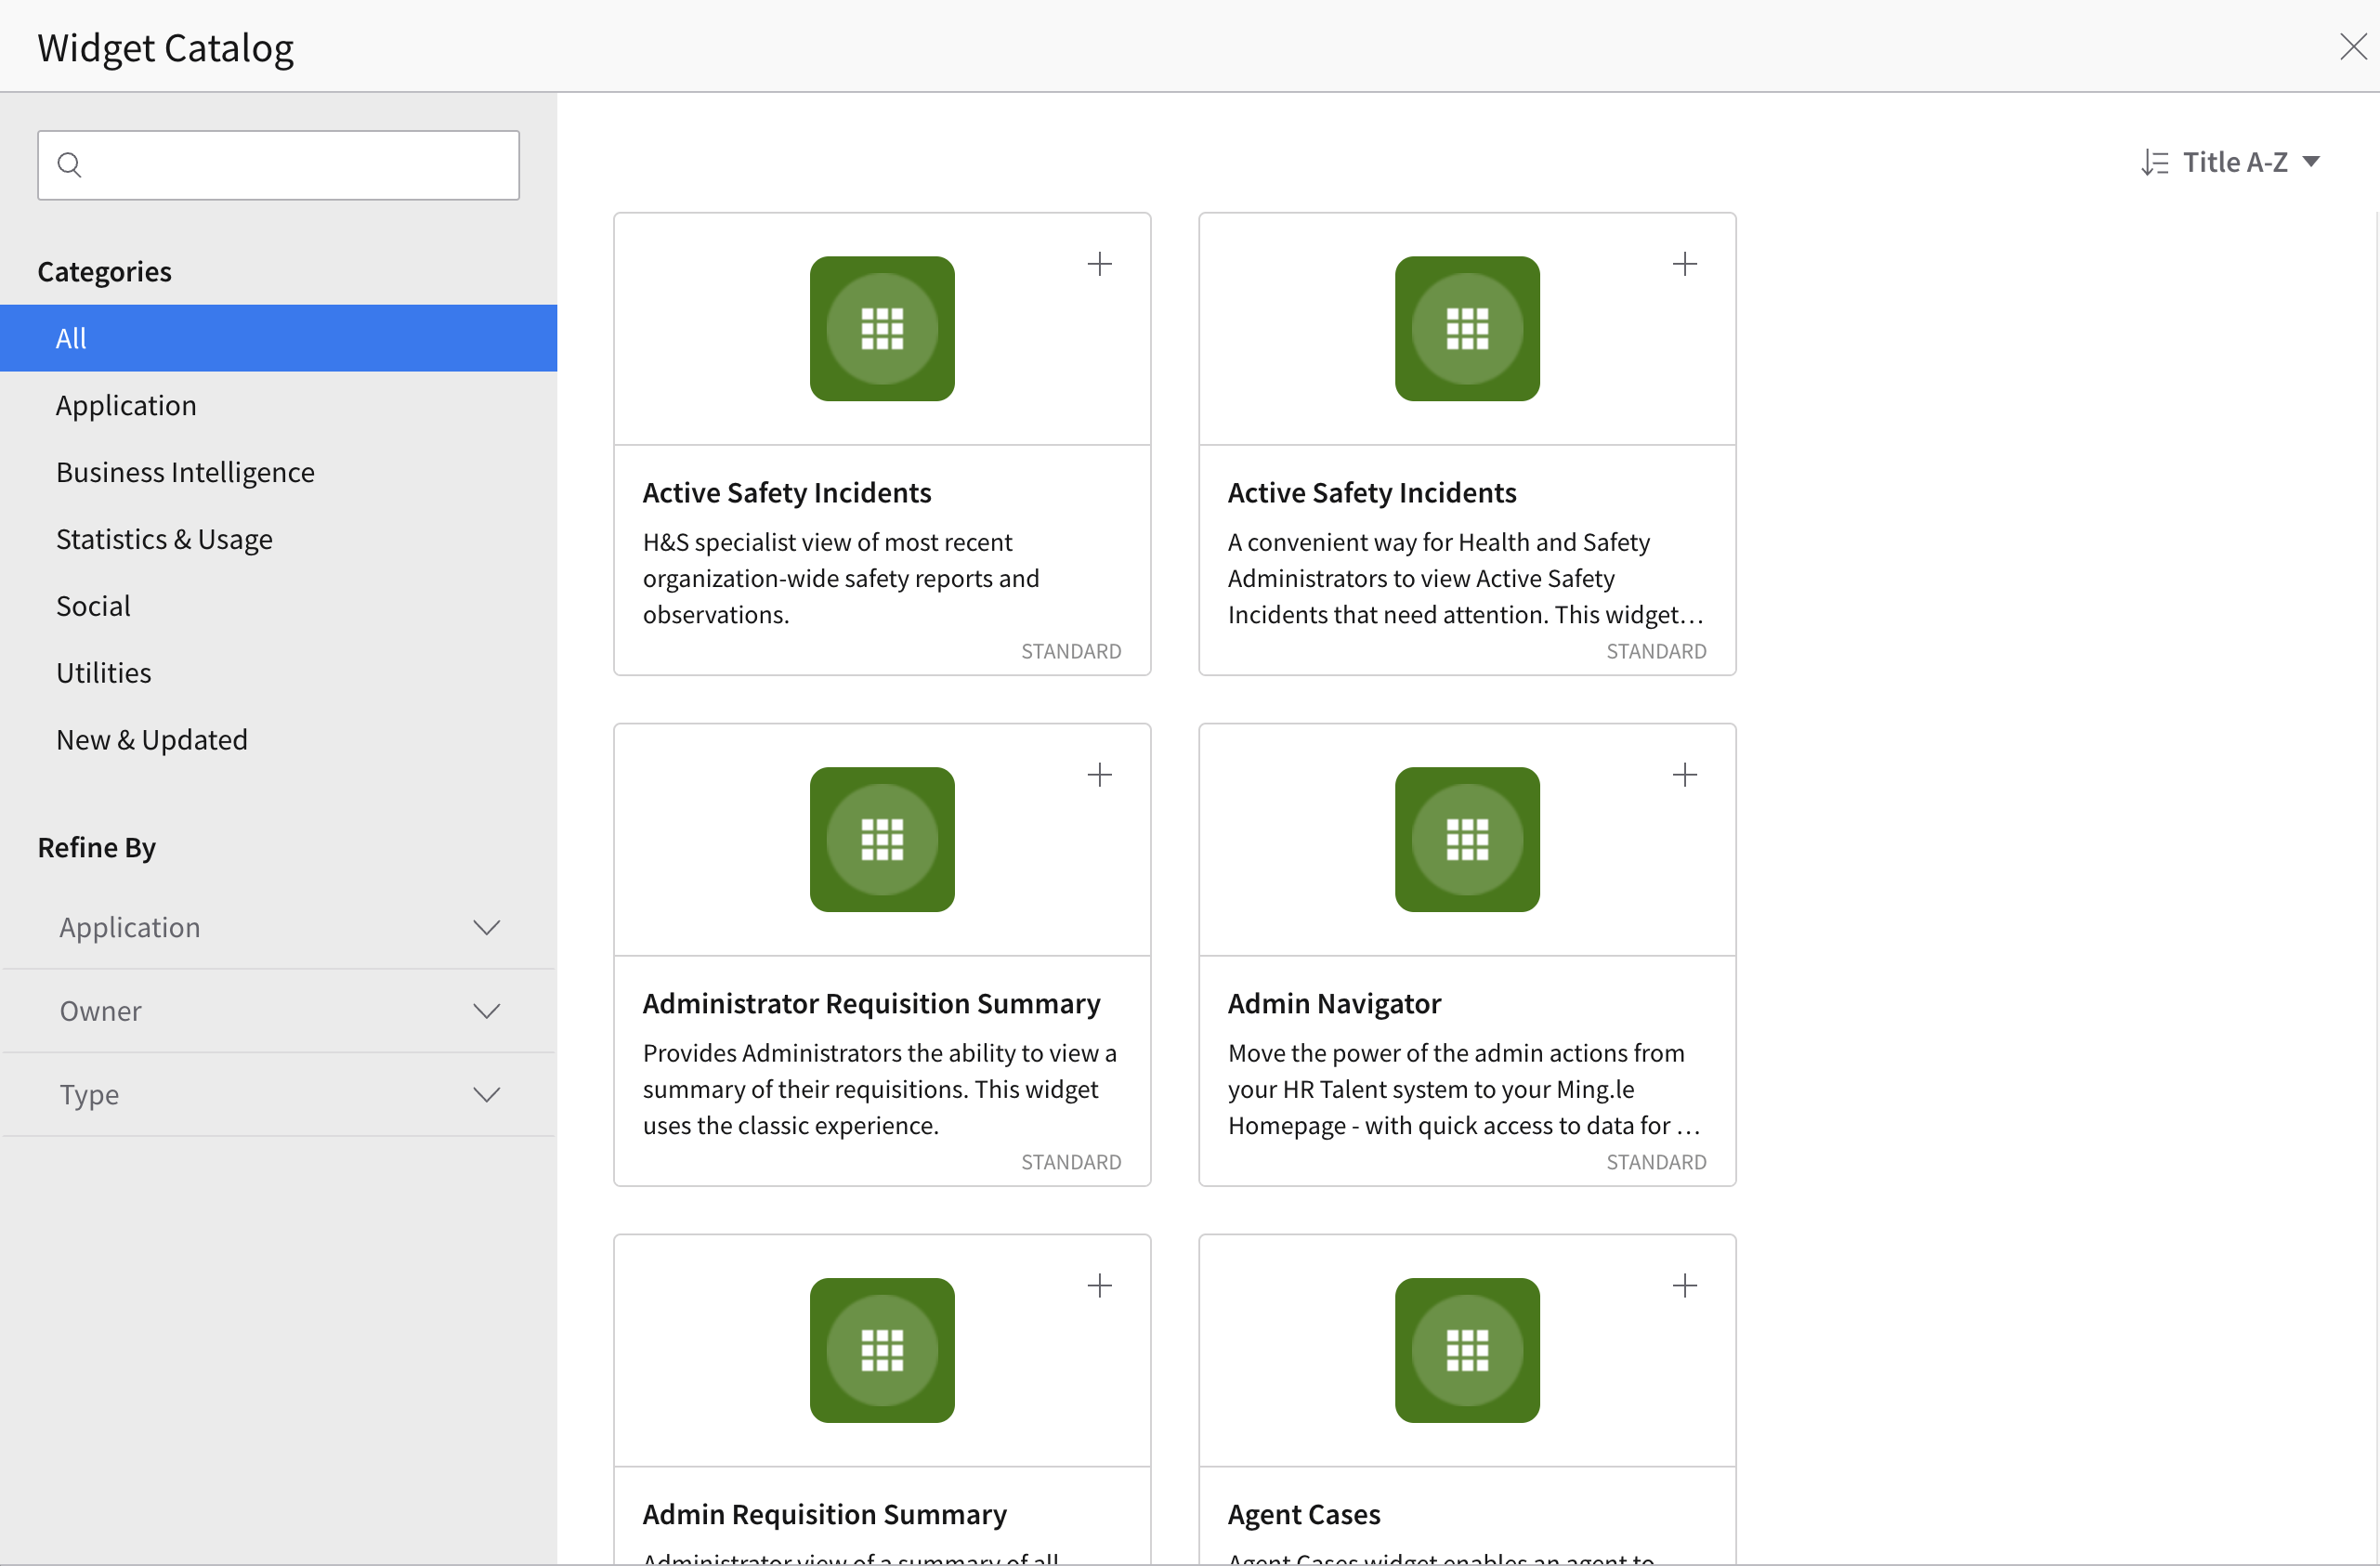
5. Find the widget you’re looking for by using the search feature if you know its name, by browsing through the categories, or by refining your search based on Application, Owner, or Type. Once identified, click on the “+” symbol inside its corresponding box. After doing so, it will be integrated into your Workspace. If you don’t have any other widgets to add, click the “X” in the top right corner.
