Adding a Published Workspace
Business Problem
The default Workspaces provided with Infor CloudSuite cater to numerous business needs. Still, there might be instances where you need to integrate specific data presentations from the catalog. This necessitates adding a Published Workspace tailored to those unique requirements.
This guide will assist you in setting up and configuring the necessary tools to integrate Published Workspaces from the catalog into their environments.
Solution Components
- Infor OS Portal and Workspaces
Solution Requirements
- Access to an Infor CloudSuite
- Security Roles:
- Infor-SystemAdministrator
- MingleAdministrator
- PORTAL-ContentAdministrator
Tutorial
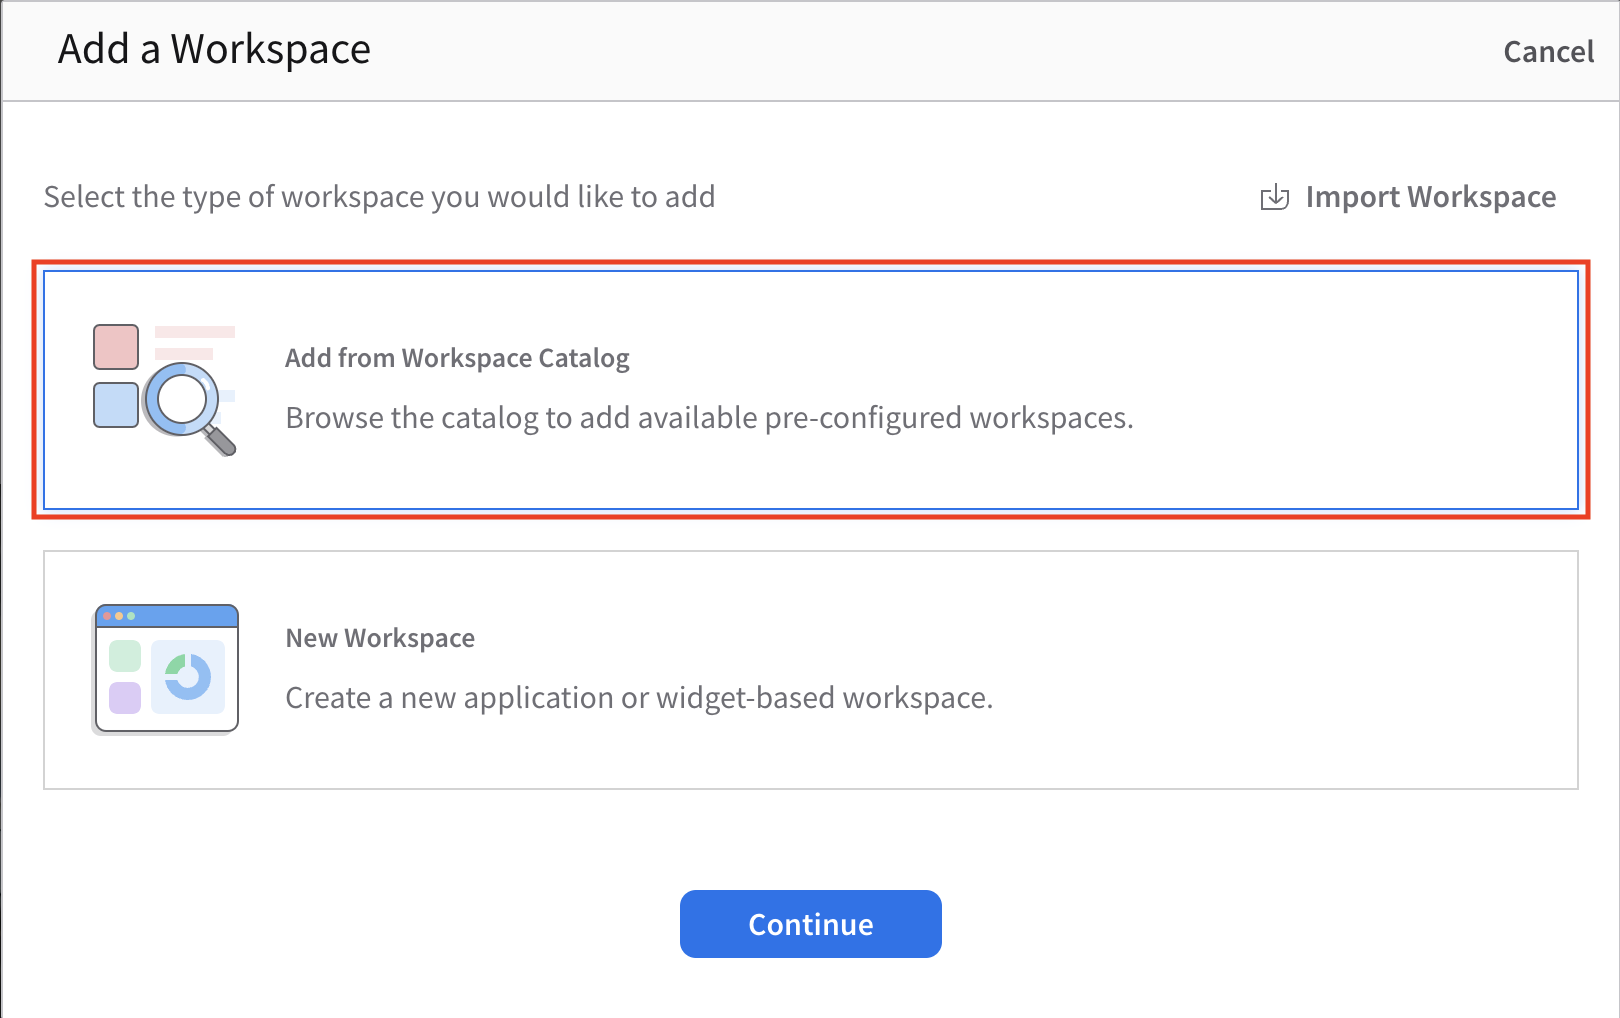
- Open Navigate Menu and under Workspaces click the “+ Add a Workspace”
2. Select “Add from Workspace Catalog” from the pop-up and click continue
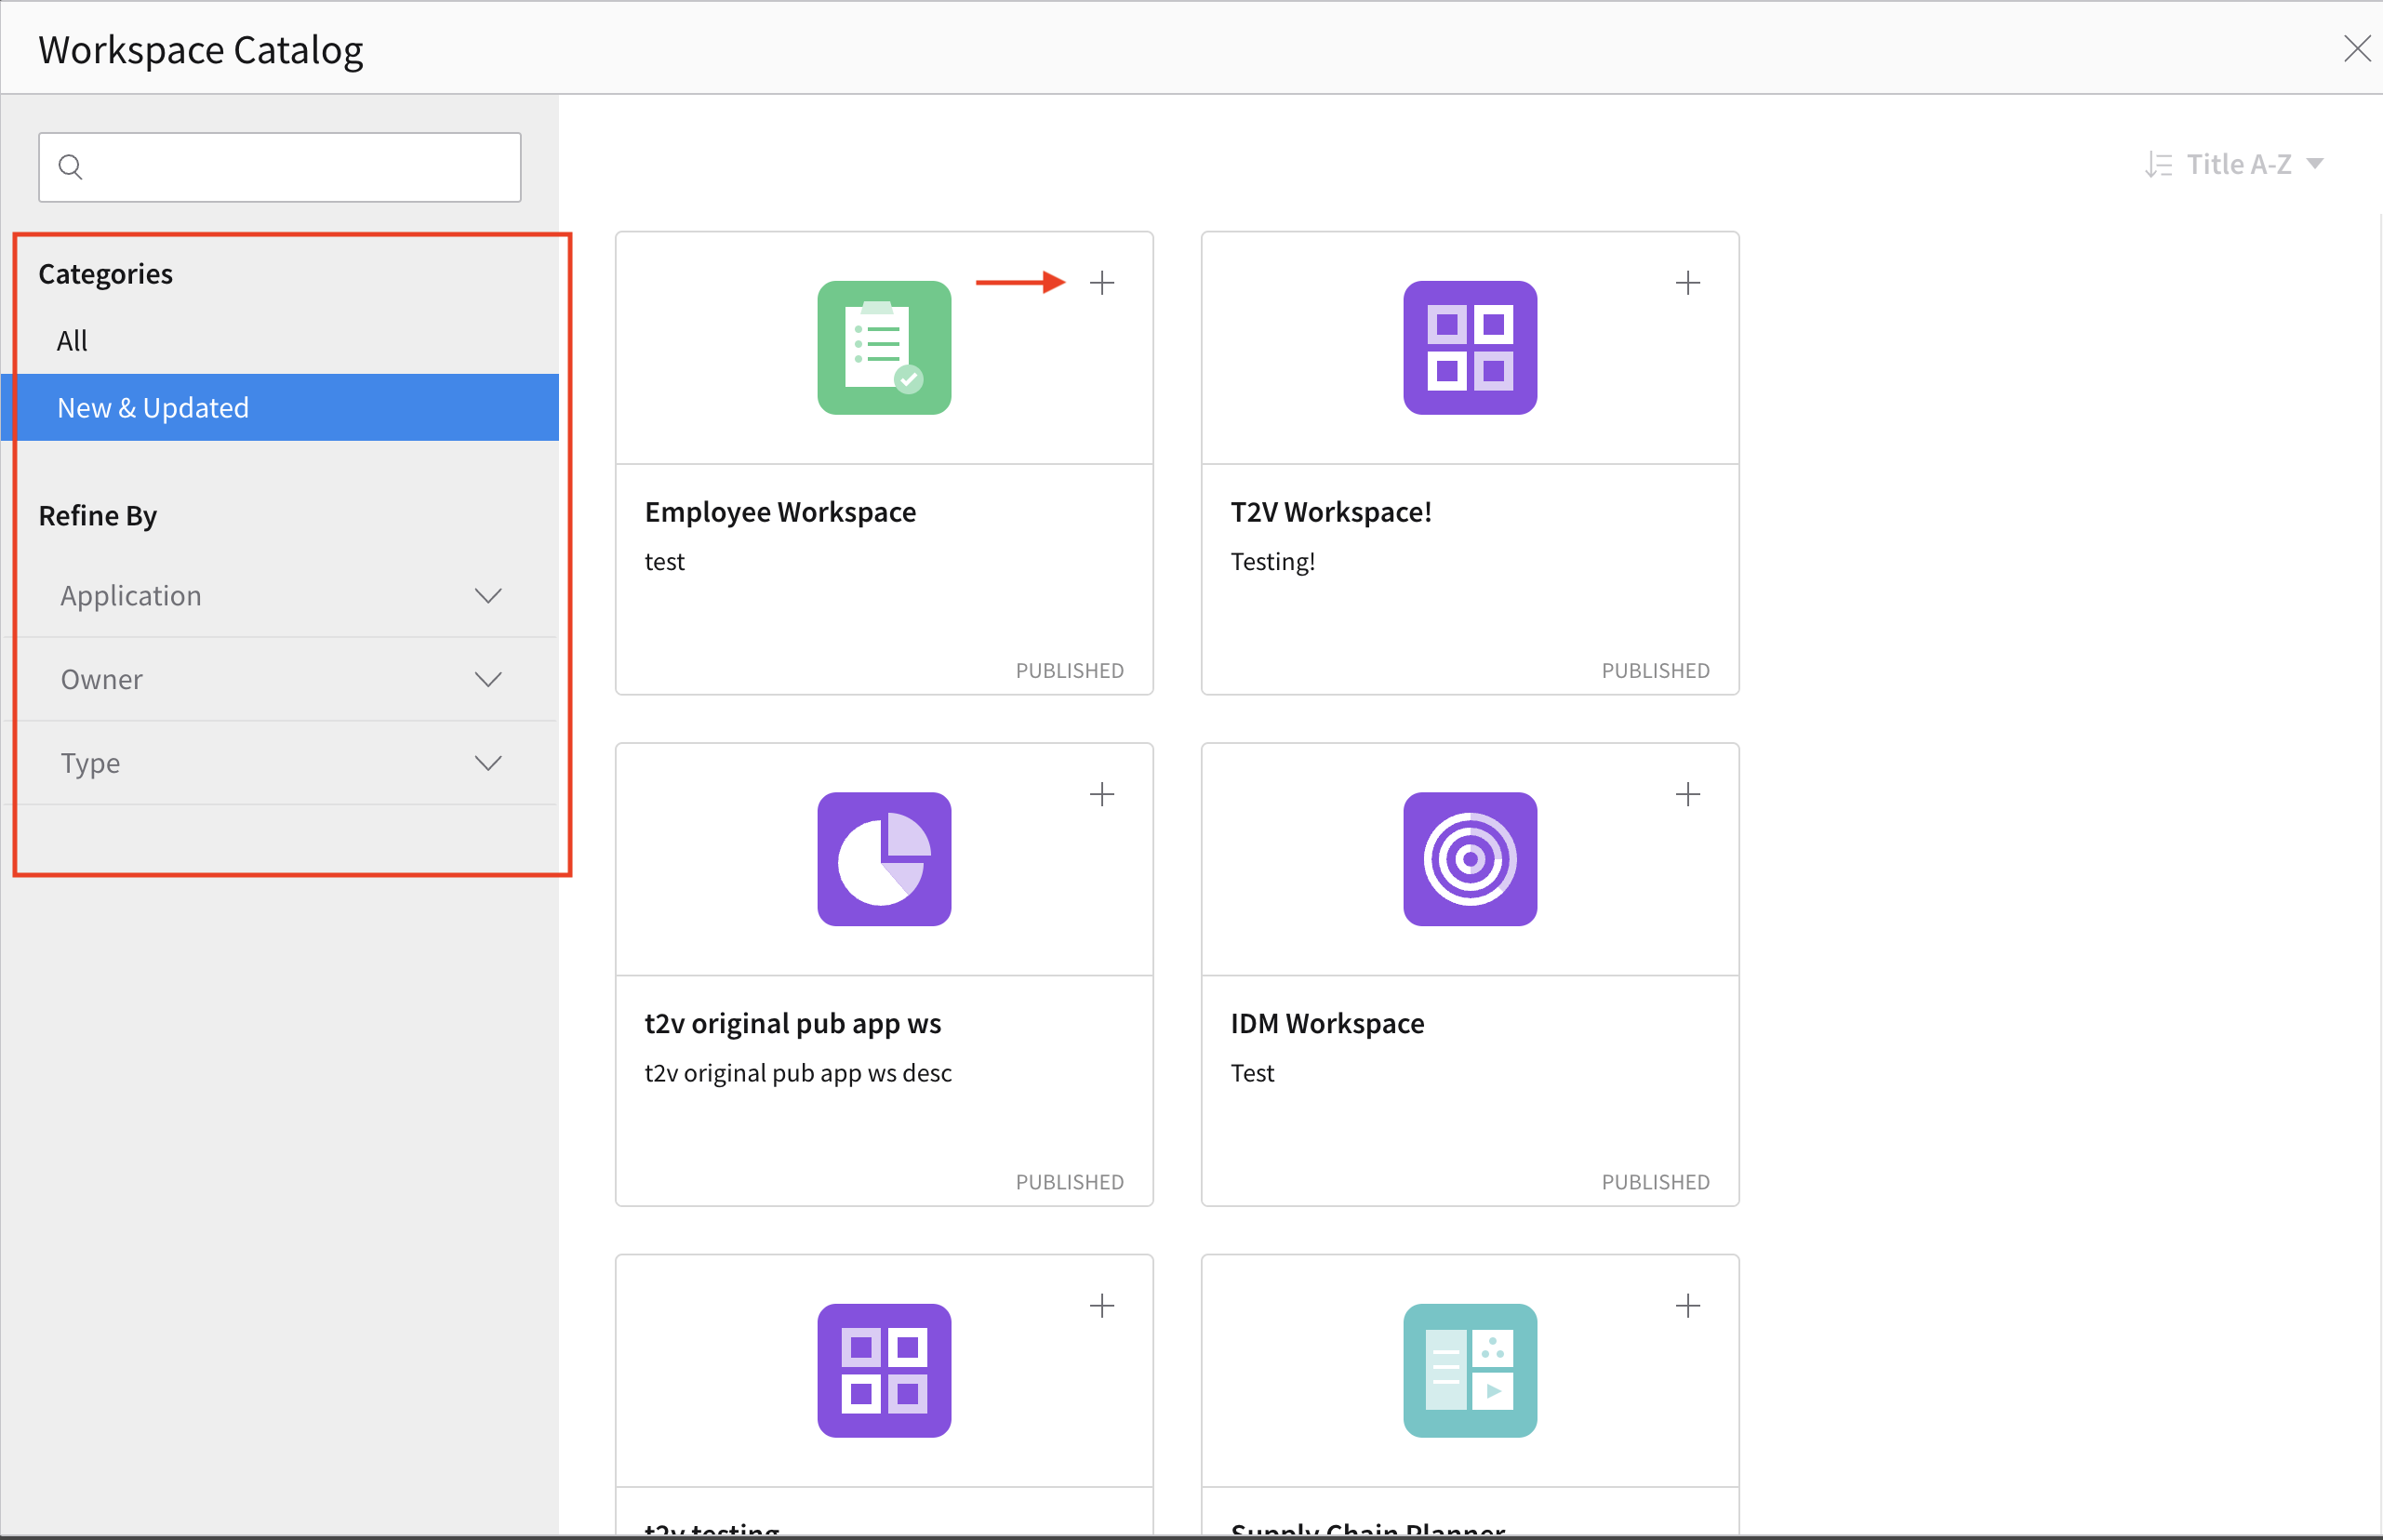
3. The Workspace Catalog will appear, allowing you to filter by Categories, Application, Owner, or Type. After locating your desired workspace, simply click on the plus sign within its box.
4. A notification stating “Workspace added” will appear at the bottom of your screen. If you’re not adding any more, simply click the ‘X’ at the top to conclude the process.
5. The newly added Workspace will appear in a separate tab.