Starting a workflow from an API
Overview
Infor OS Platform features a robust API Gateway, which includes the powerful ION API Suite complete with workflow endpoints. This functionality enables seamless integration of your applications, allowing you to trigger workflows effortlessly. By leveraging these capabilities, you can enhance your system’s interoperability, streamline business processes, and achieve greater efficiency across your enterprise solutions. Join us as we uncover the potential of Infor OS Platform and its API-driven approach to modern workflow management.
Requirements
- Access to ION API Gateway
- Security role: IONAPI-Administrator
- Security role: IONAPI-User
- Infor U courses.
Tutorial
Difficulty: Medium
Estimated completion time: 30 Minutes
In this tutorial, we’ll explore the powerful capabilities of Infor OS’s API Gateway. You’ll see how its robust ION API Suite, complete with workflow endpoints, enables seamless application integration to easily trigger workflows. Discover how to enhance interoperability and streamline processes with Infor OS.
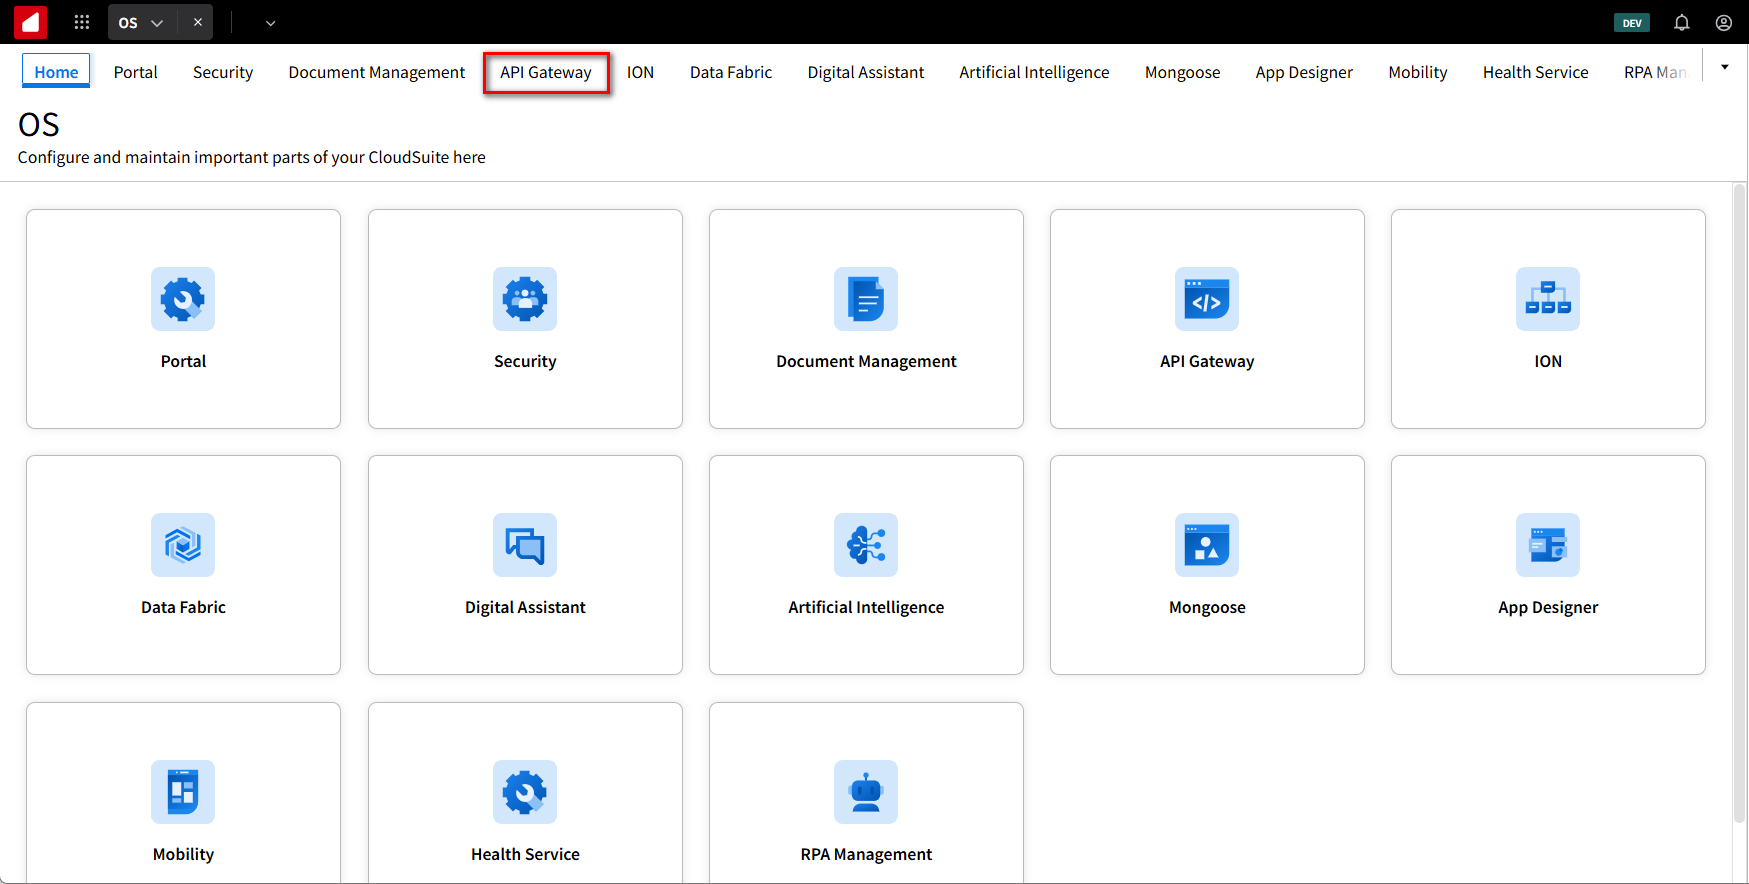
Let’s examine how to call a workflow from an API. Log in to the Infor OS Portal and select the API Gateway tab at the top of the page.
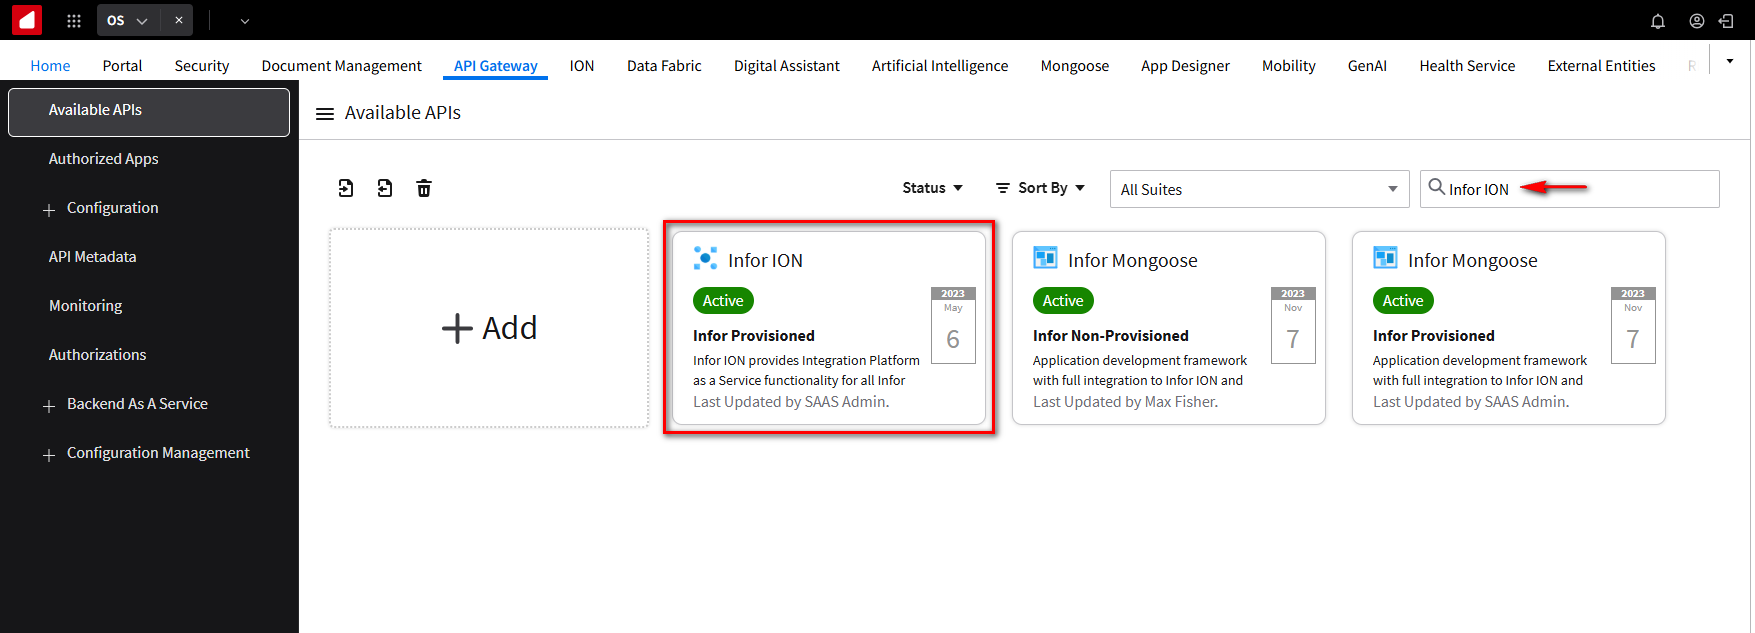
The Available APIs option is in the navigation menu in the upper left corner. Clicking this will take you to the menu where all the accessible APIs are listed.

Using the search function at the top, Type in Infor ION and double click the Infor ION Suite.
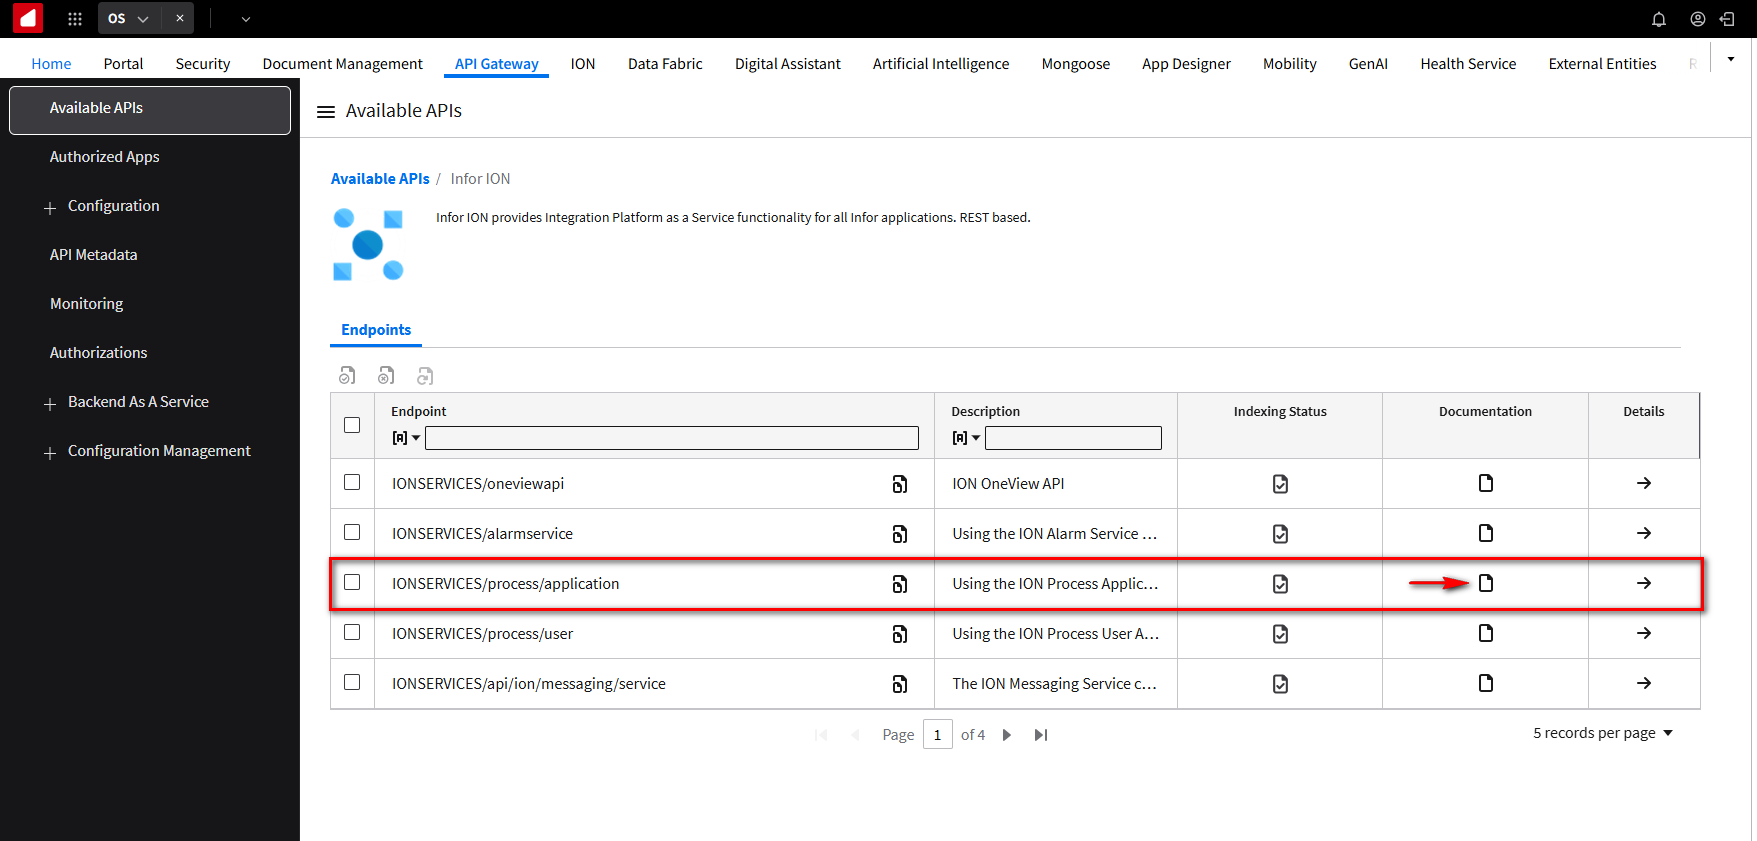
It reveals a comprehensive list of endpoints, including two workflow-specific ION process endpoints. Our focus is on the IONSERVICES/process/application endpoint; proceed by clicking on its documentation.
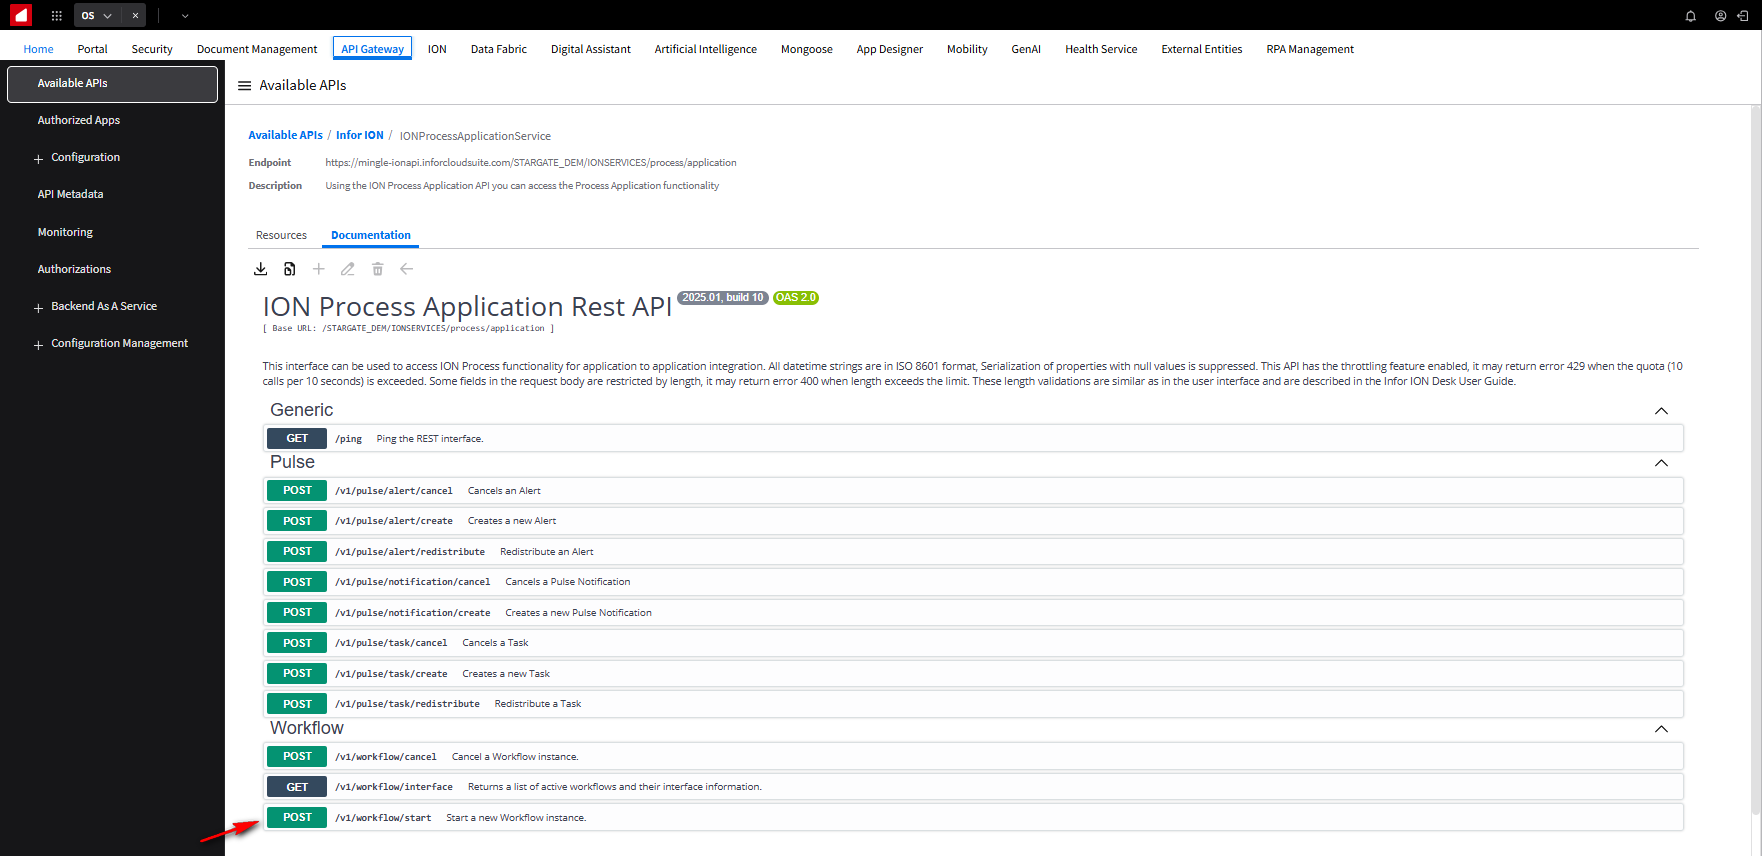
The Swagger UI interface for this endpoint is displayed.
NOTE: Swagger is a standardized UI developed by an industry group that ensures consistency across various API gateways and connection points.
What’s excellent about Swagger is its Dynamic documentation, which allows users to test the API directly from this page.
Scrolling down we find the workflow /v1/workflow/start API listed among the available methods. Click on it.
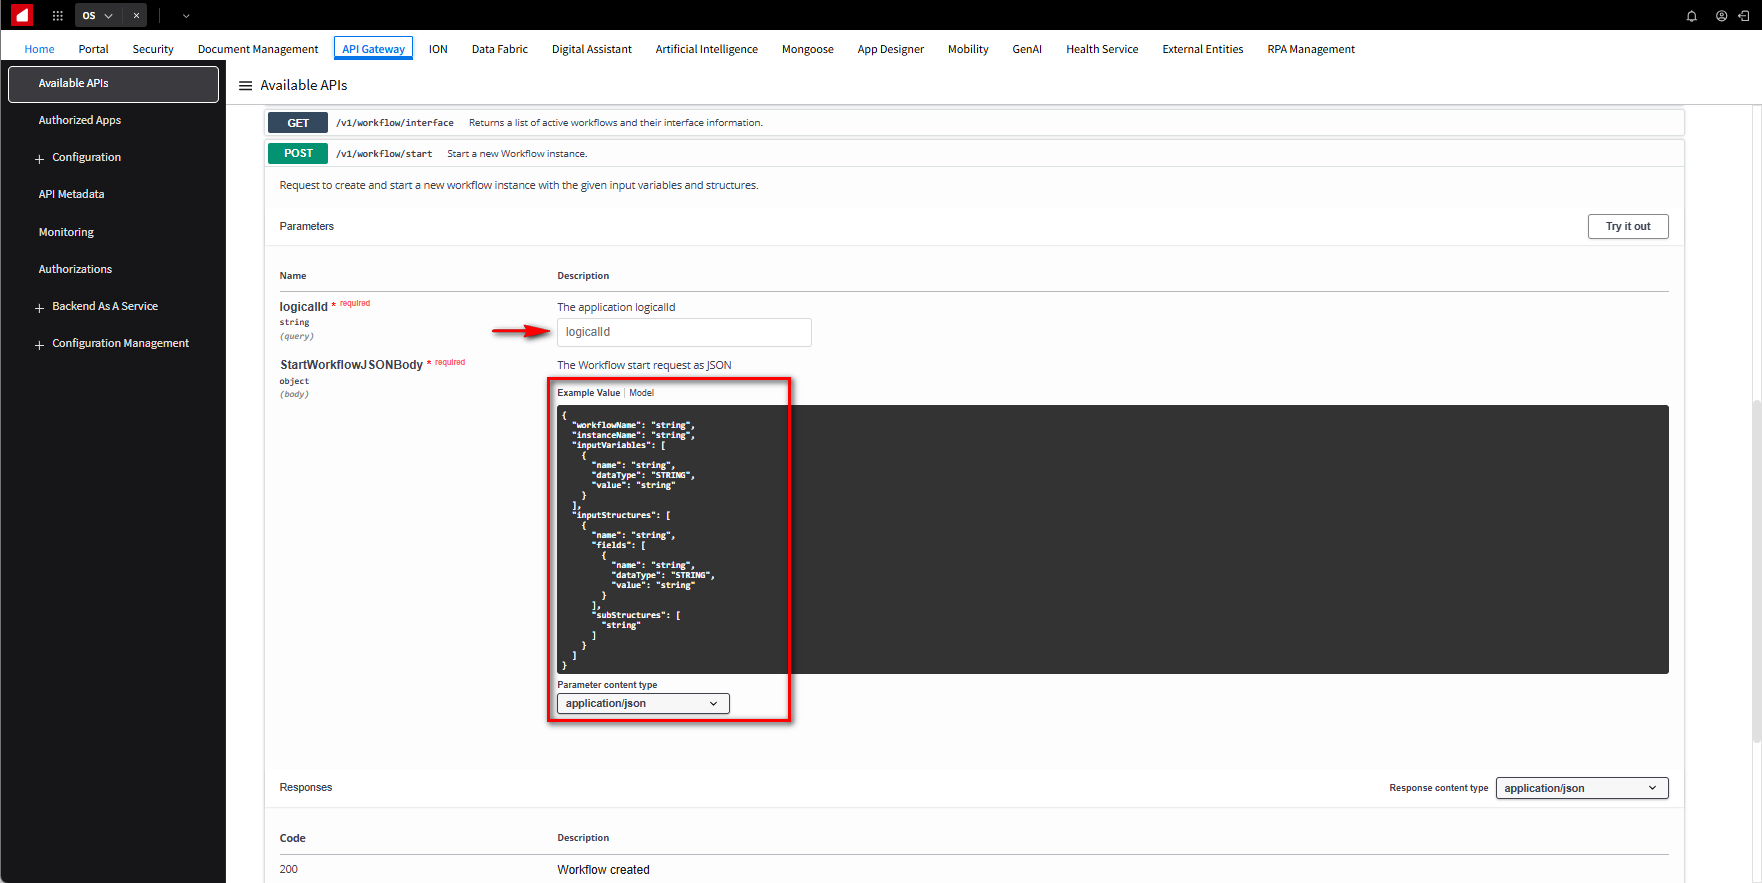
Expanding the details revealing essential information such as required inputs. Specifically a logicalid and JSON body, it also provides a helpful example demonstrating how to structure the JSON.
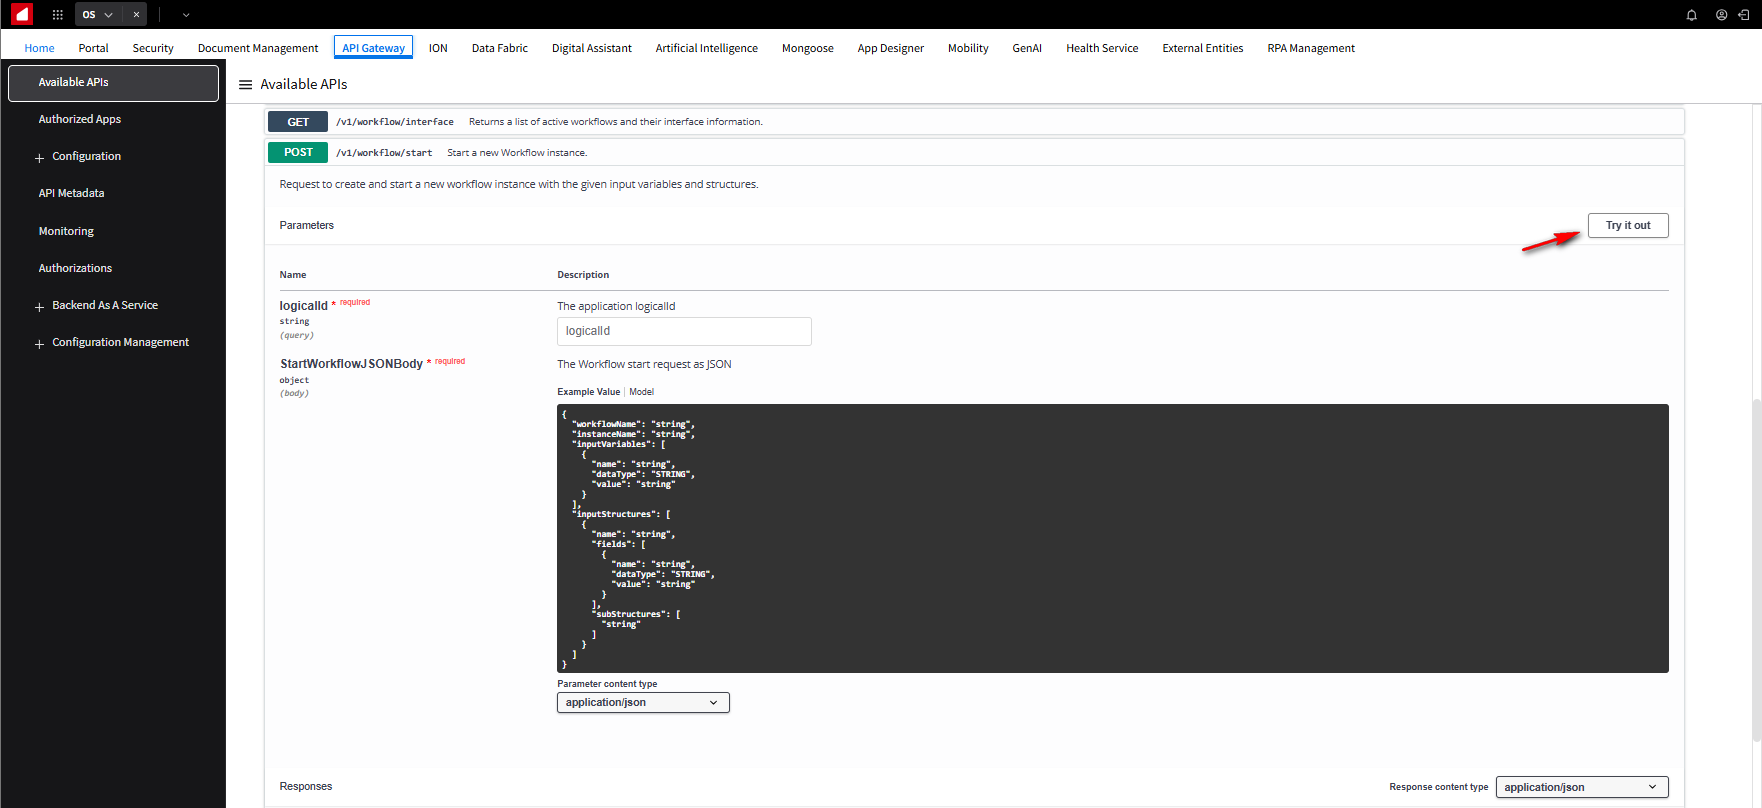
Now let’s click the try it out button.
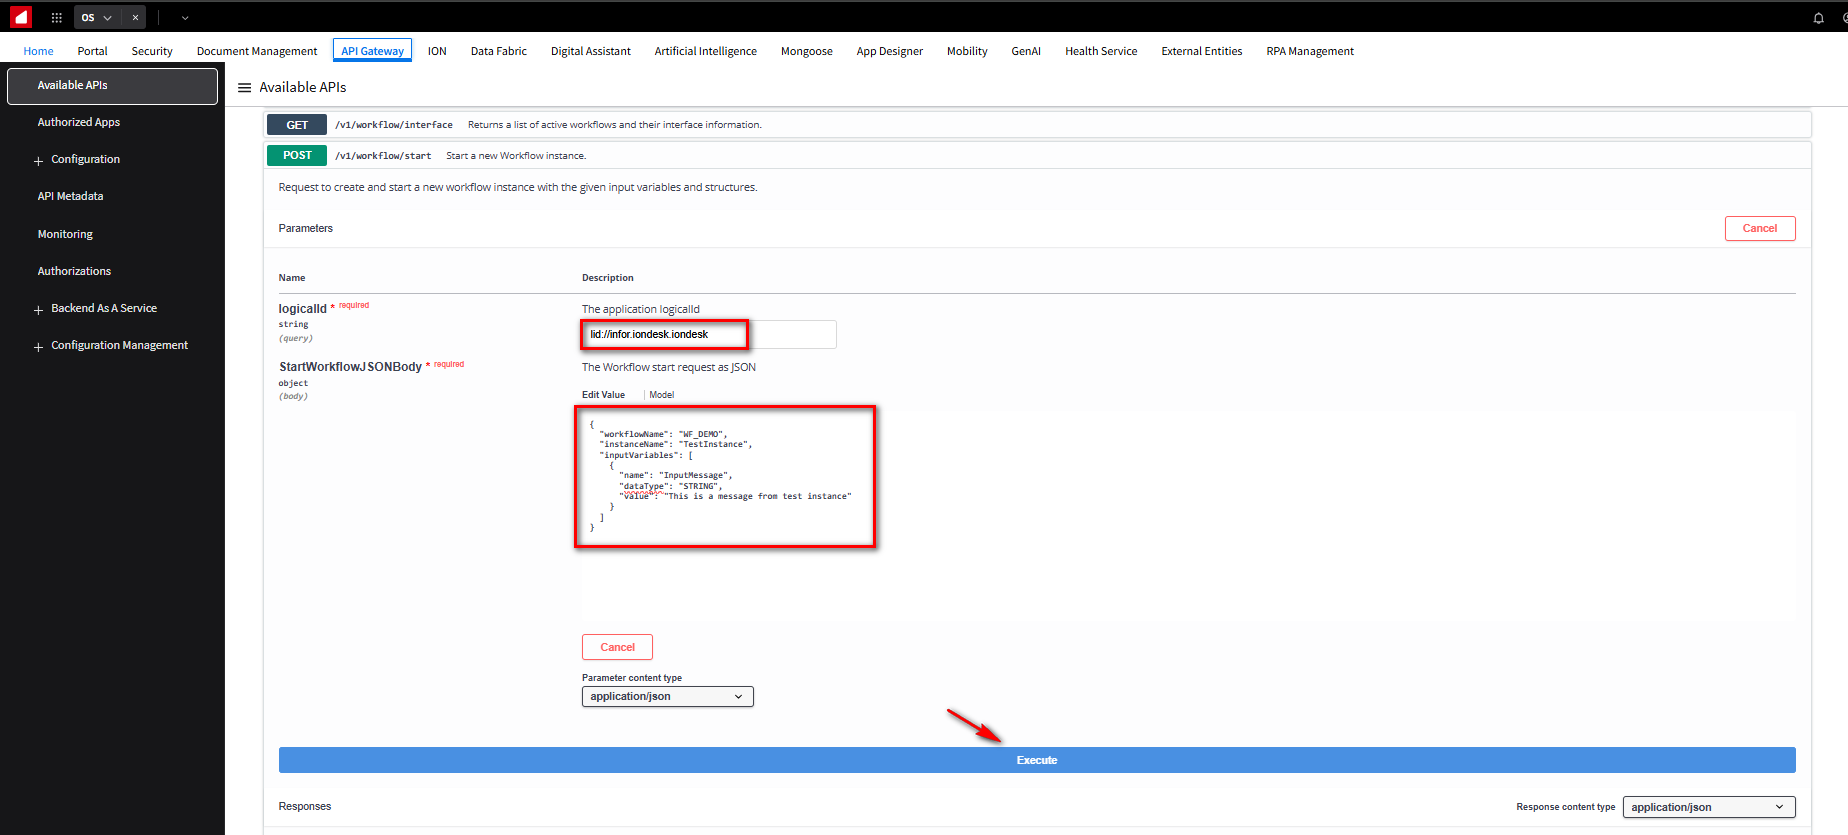
To execute this API, input the Logical ID following this format: lid://infor.iondesk.iondesk.It’s important to consult your system administrator to confirm your environment setup. Additionally, input the JSON body.
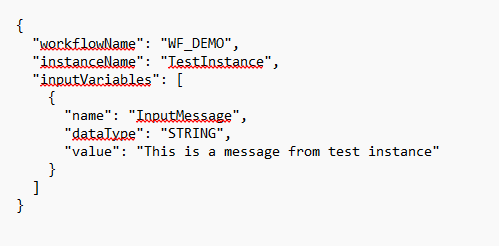
A generic JSON is displayed as a default example or guide. We will paste the JSON using the following example, which specifies the workflowName of WF_DEMO and the pre-assigned instanceName of TestInstance. Even though this workflow doesn’t require any inputs, we’ll include one for demonstration.
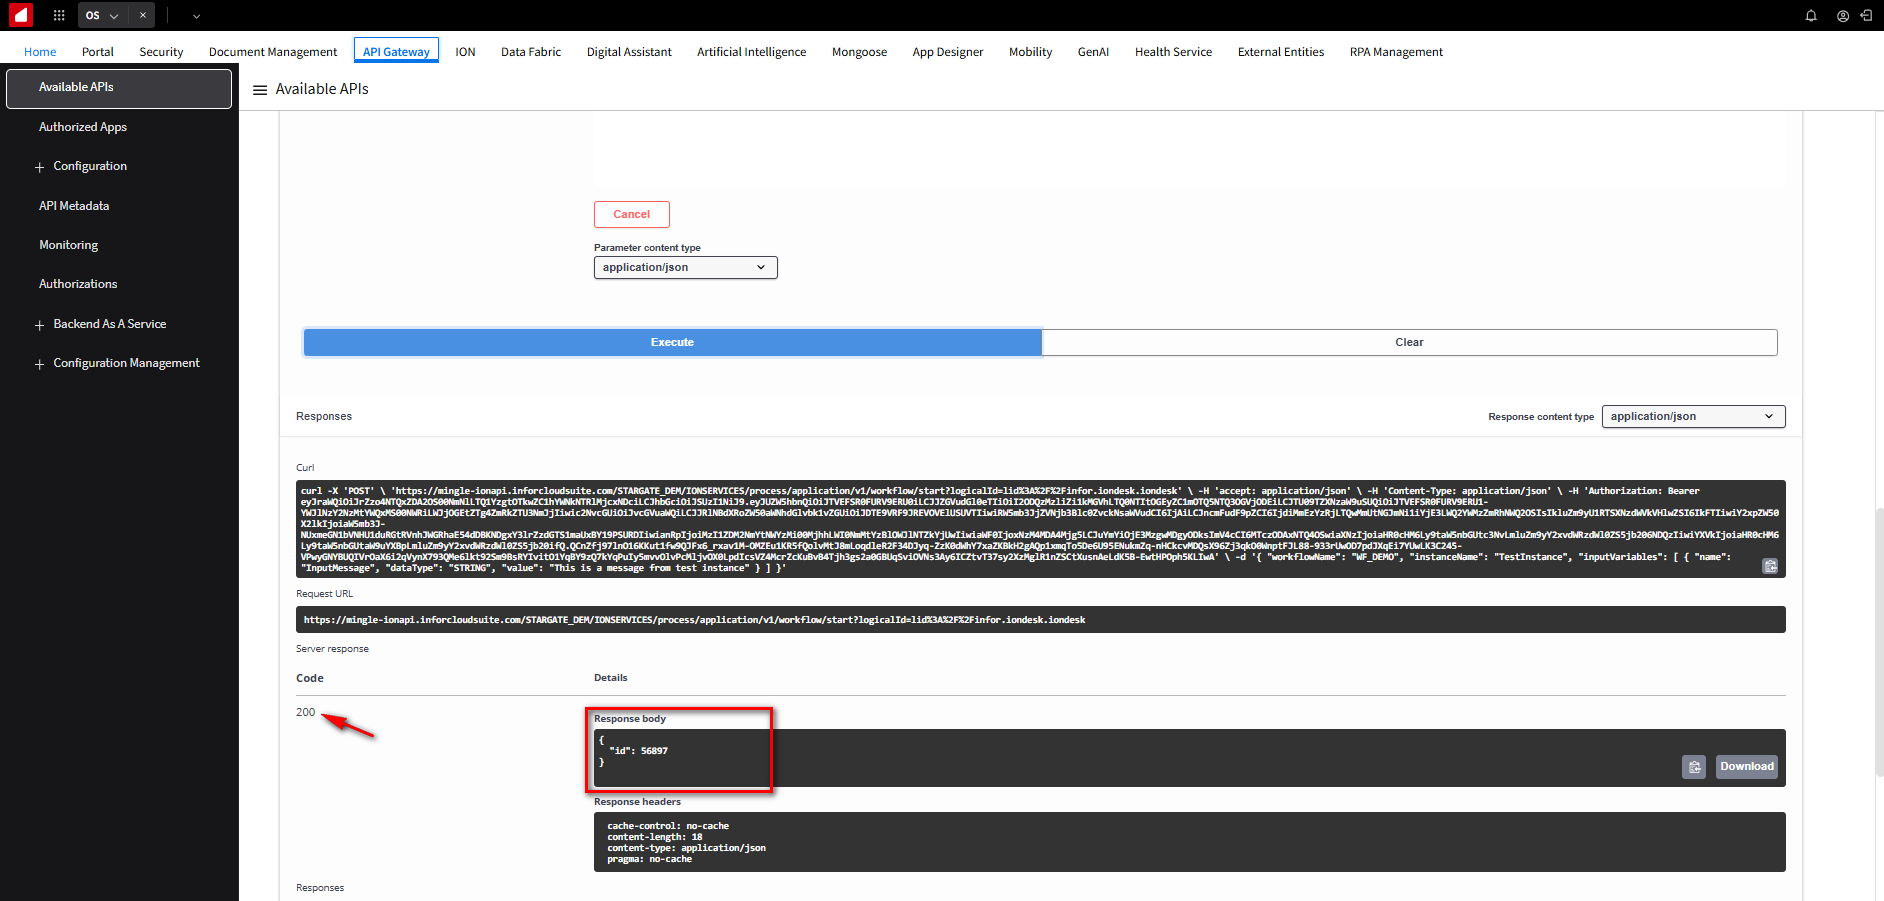
Click the Execute button.
Below in the server response section, we’ve achieved a Code 200, signifying a successful execution. The response body reveals the ID of the workflow that’s up and running.
We’ll be using Postman to make a request call. Postman is a popular and freely available API client that can be found online.
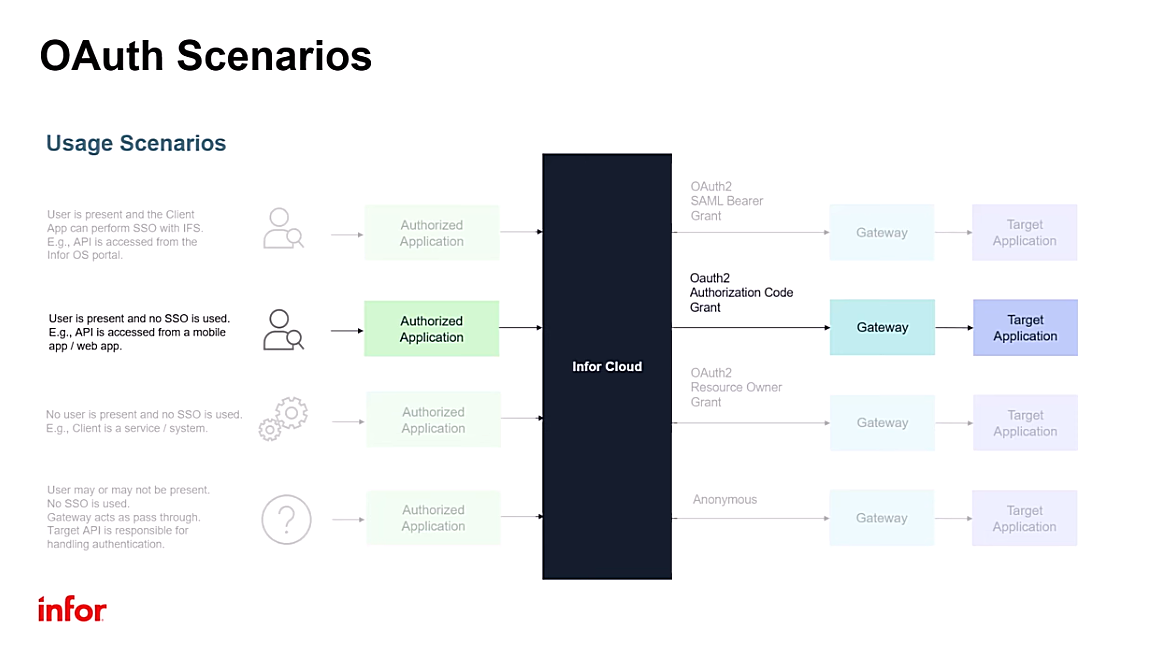
First, on the OS portal, we must build an Authorized App using the Web Application type for the request in Postman’s OAuth2 Authentication setup. In this case, the application has not yet been authenticated within the Gateway. The user must authorize the mobile application to call the ION API on their behalf. This type of interaction uses the OAuth2 Authorization Code Grant.
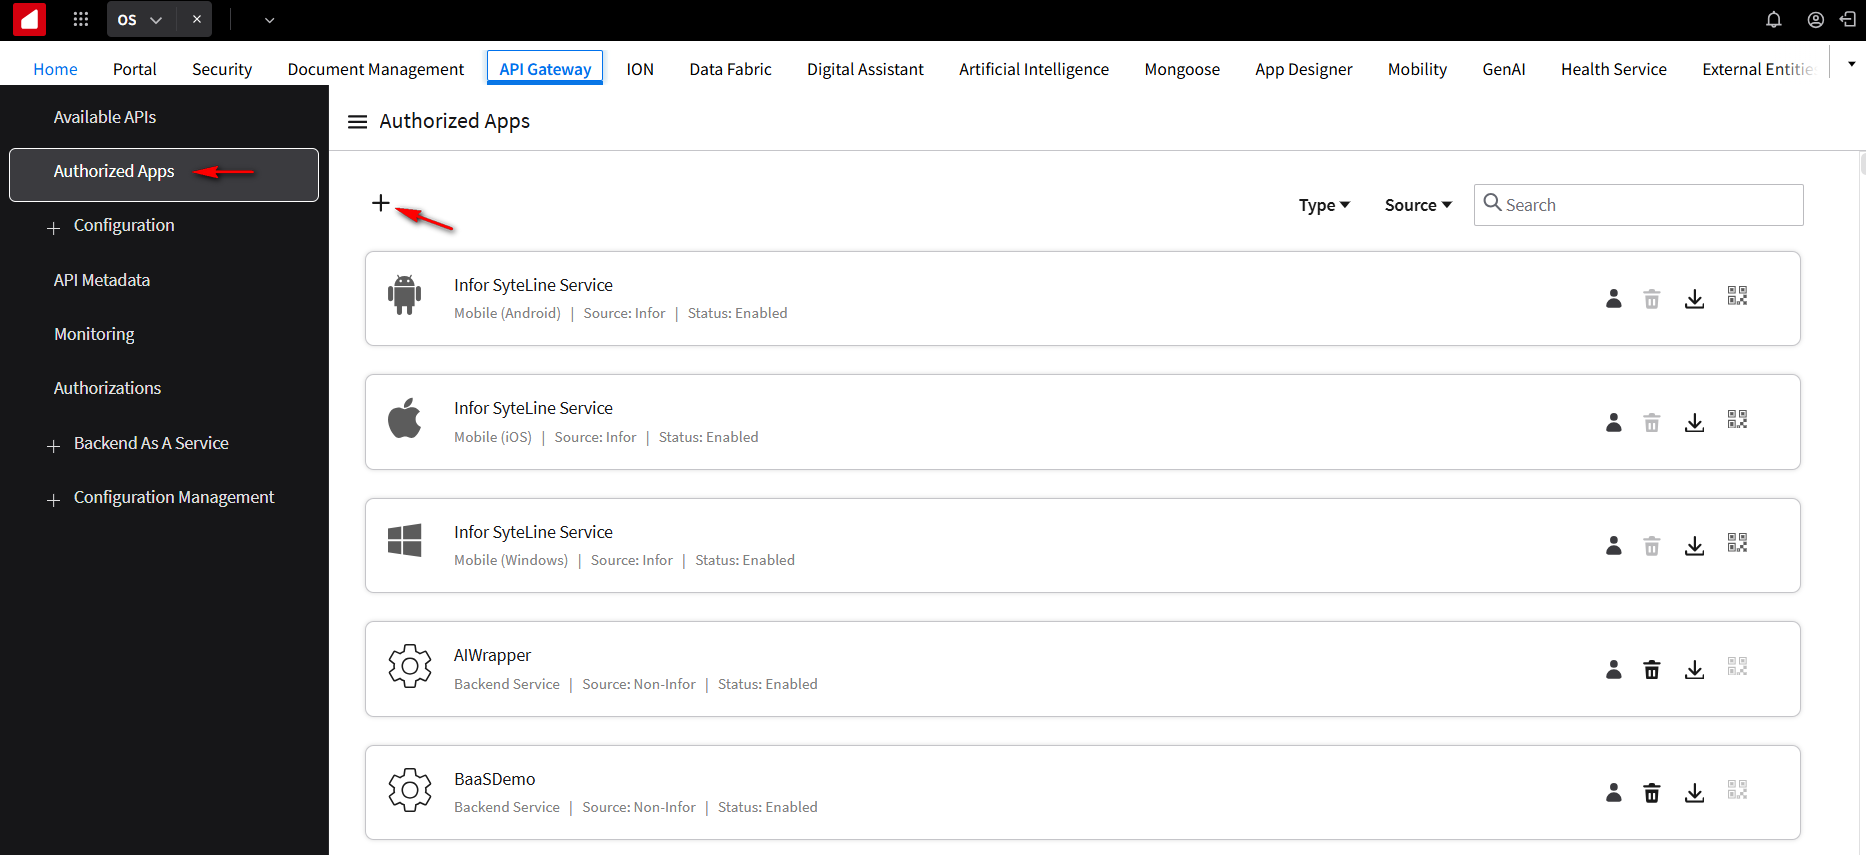
On the navigation menu select Authorized Apps, then select the + button to create a new authorized app.
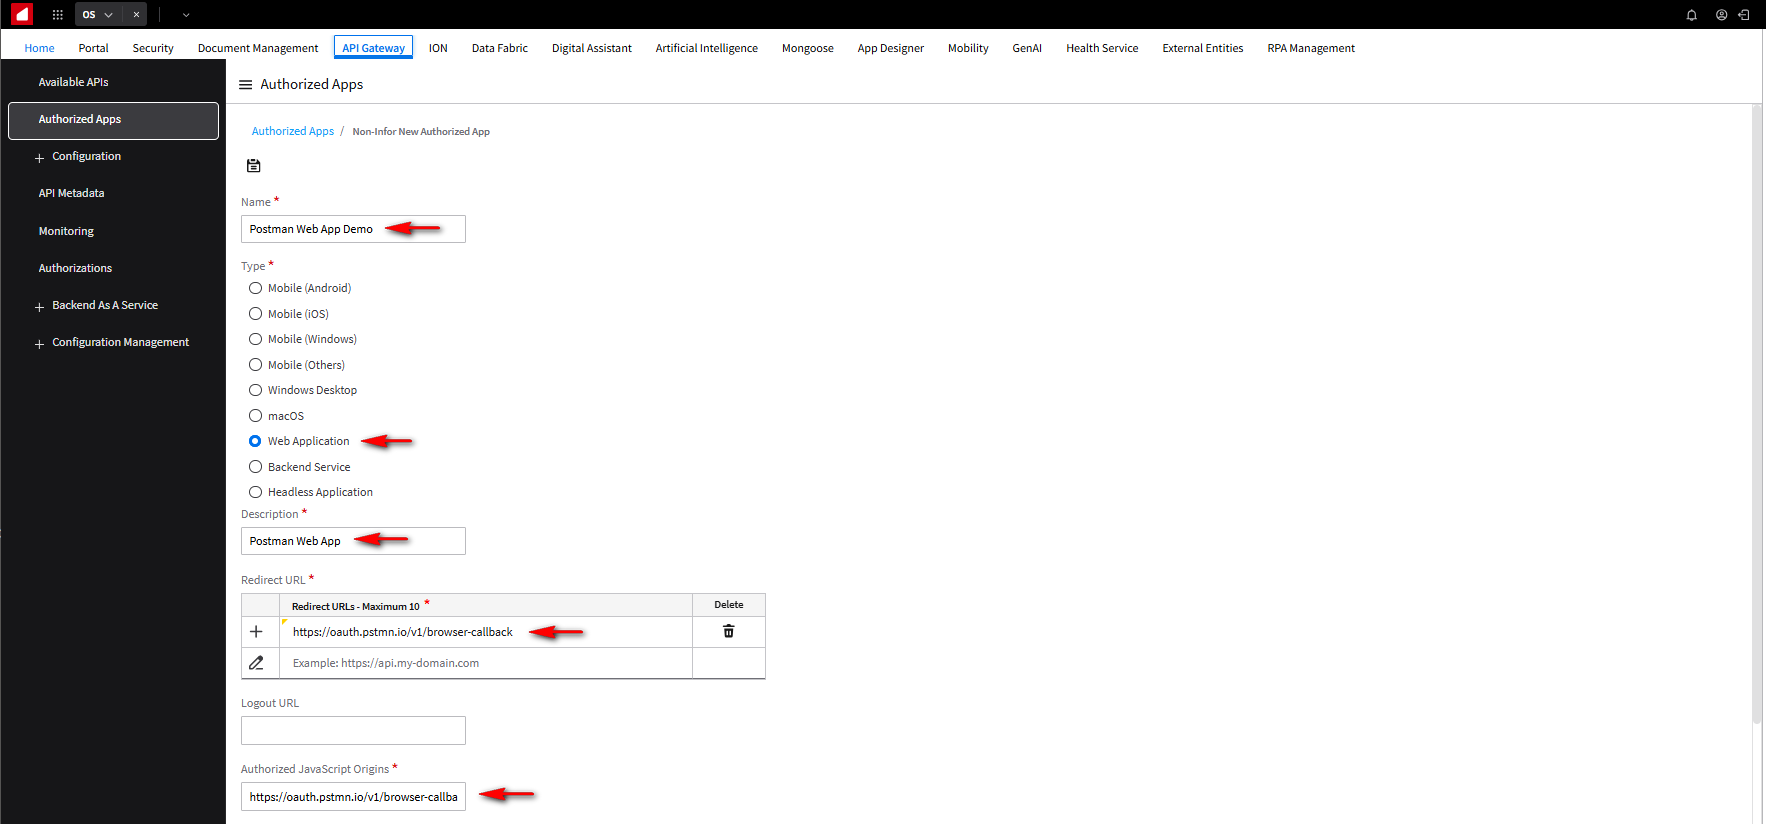
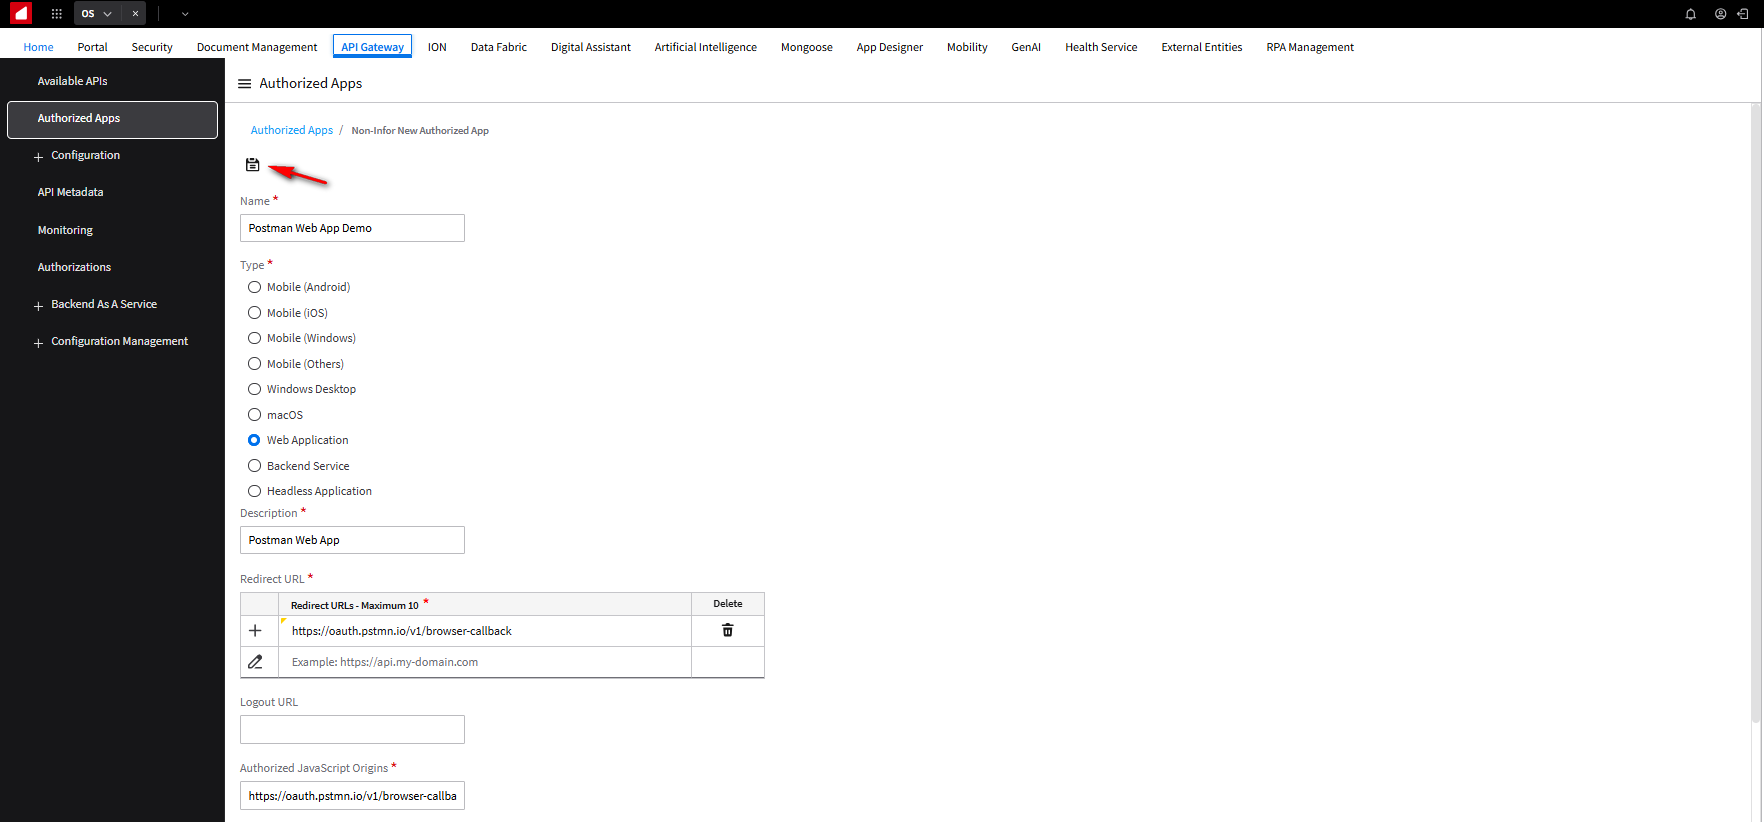
In the Name field enter Postman Web App Demo. For the Type, choose Web Application, and in the Description field, enter Postman Web App. Enter the Postman Redirect URL In this example, we will use this https://oauth.pstmn.io/v1/browser-callback. The Authorized JavaScript Origins field will be the same callback URL.
NOTE: In this tutorial, we signed in and configured Postman through the browser. https://web.postman.co/
Click Save.
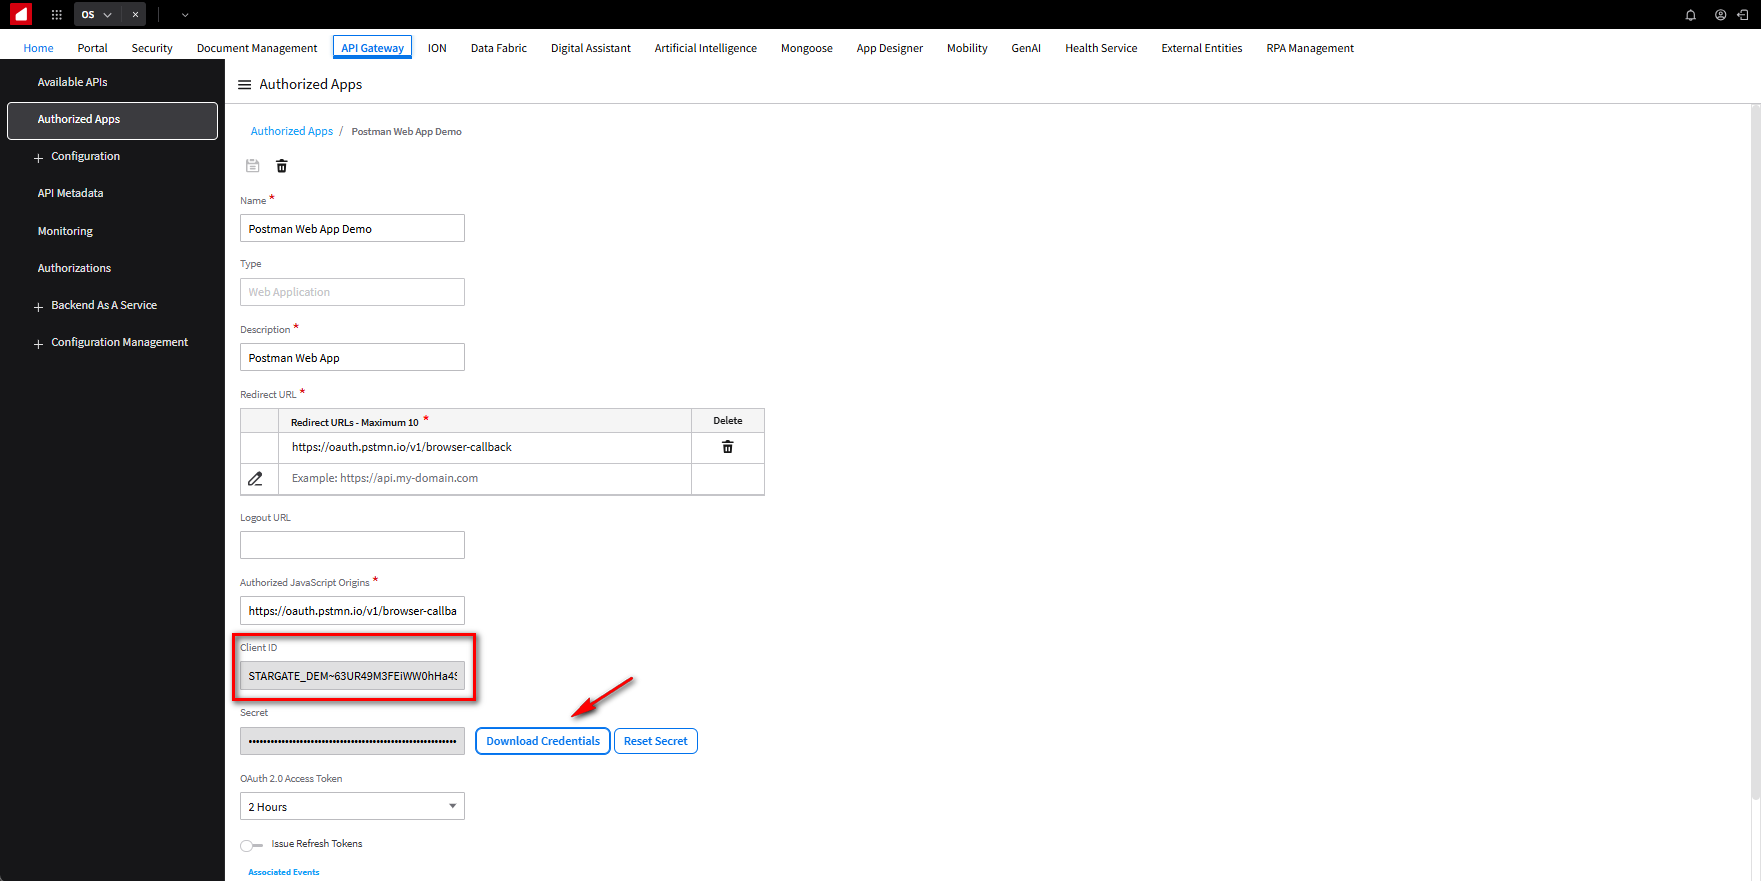
The Gateway will generate your Client ID and Client Secret, click the Download Credentials button to download the credentials file.
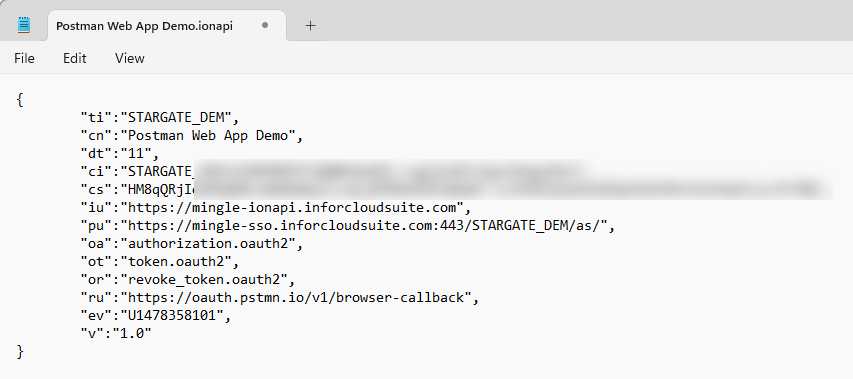
Open and view the Postman Web App Demo.ionapi credentials file, which will look like this. The file holds the details to call the API and Postman.
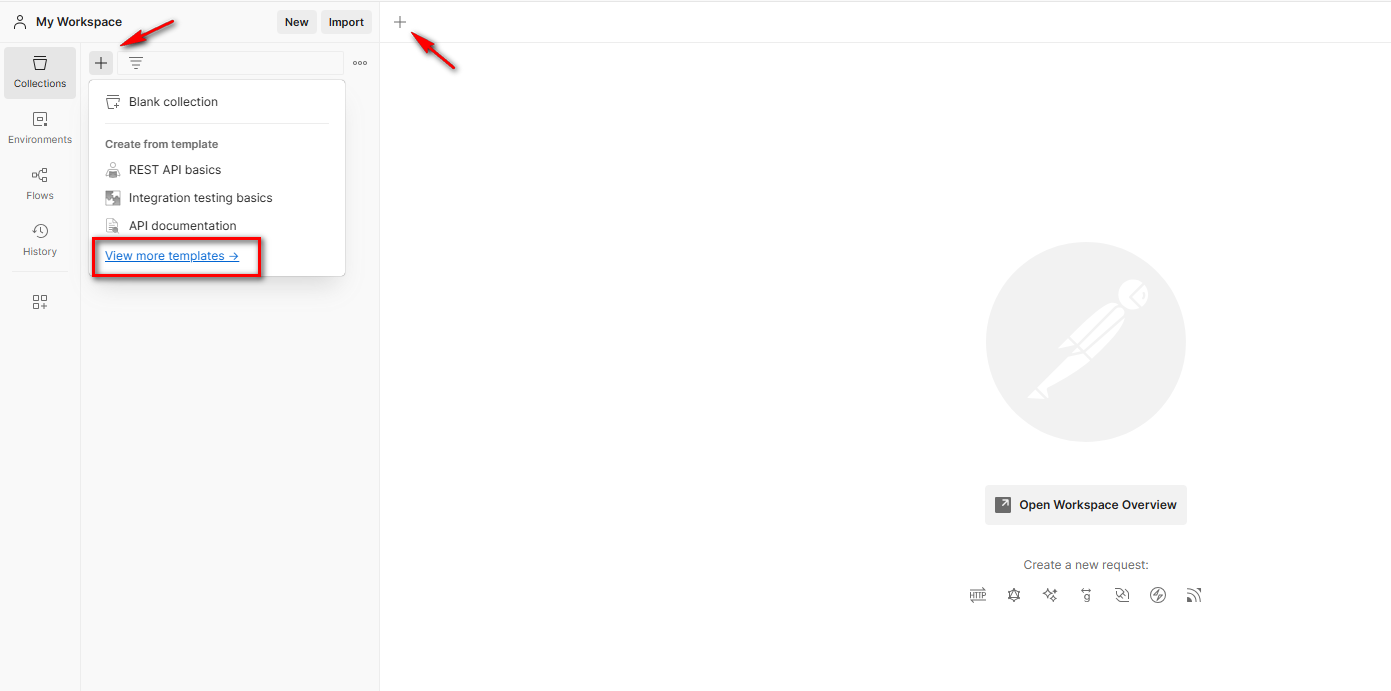
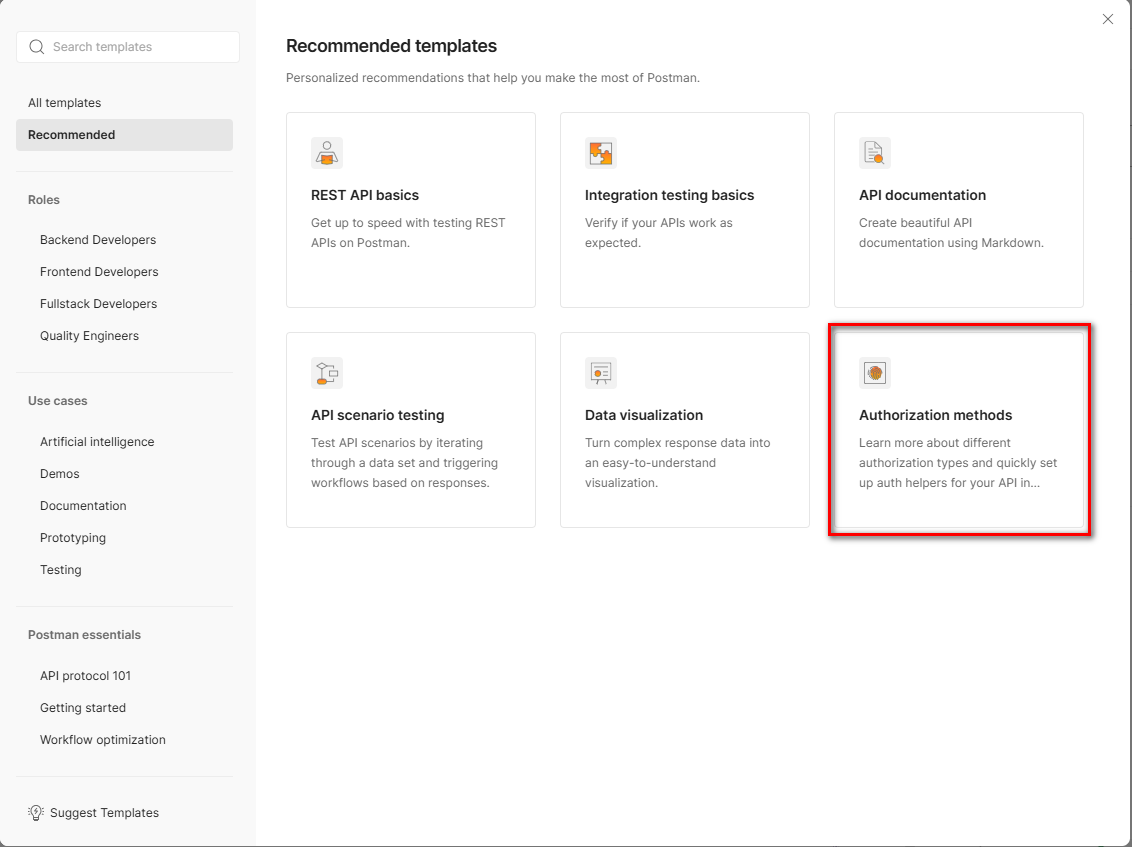
Log into Postman and create a new request collection using the Authorization methods template; click the + sign in the top left corner and select the View more templates link, or you can click the + sign in the tab section.
NOTE: Again, in this tutorial, we signed in and configured Postman through the browser. https://web.postman.co/
Click the Authorization methods button.
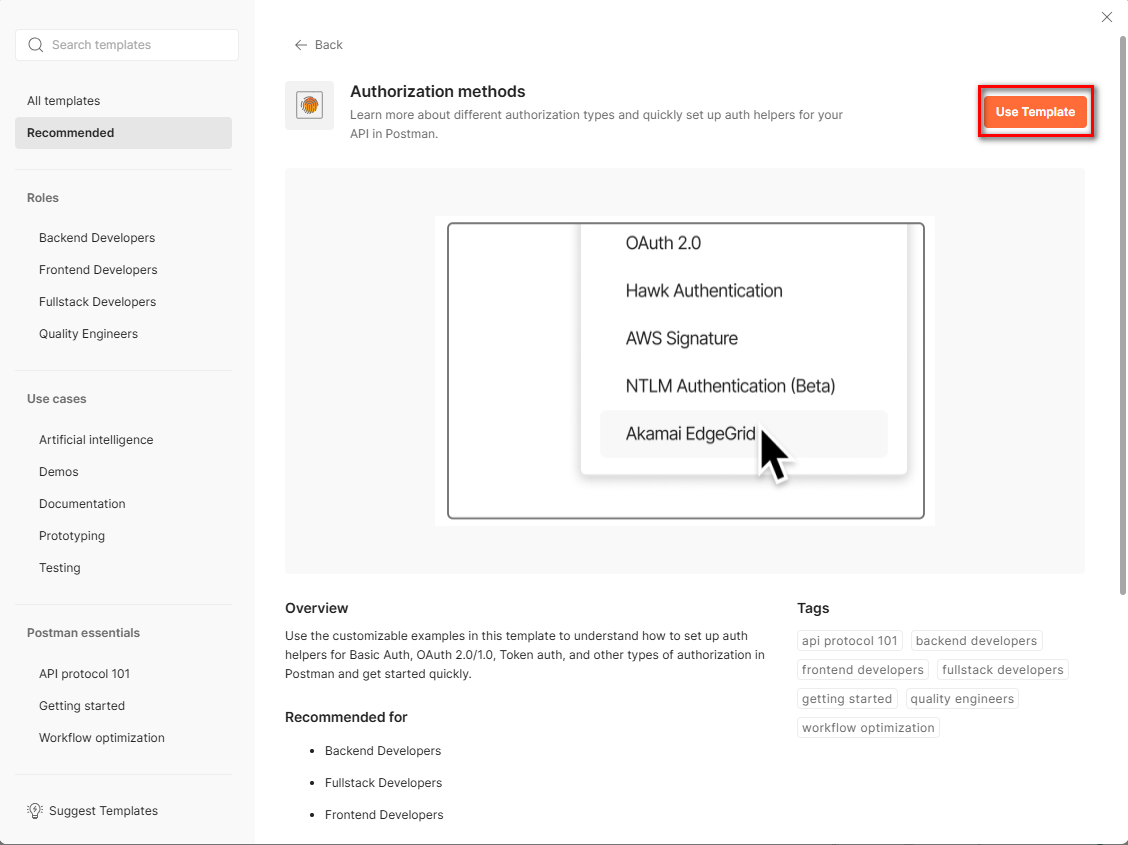
Click the Use Template button.
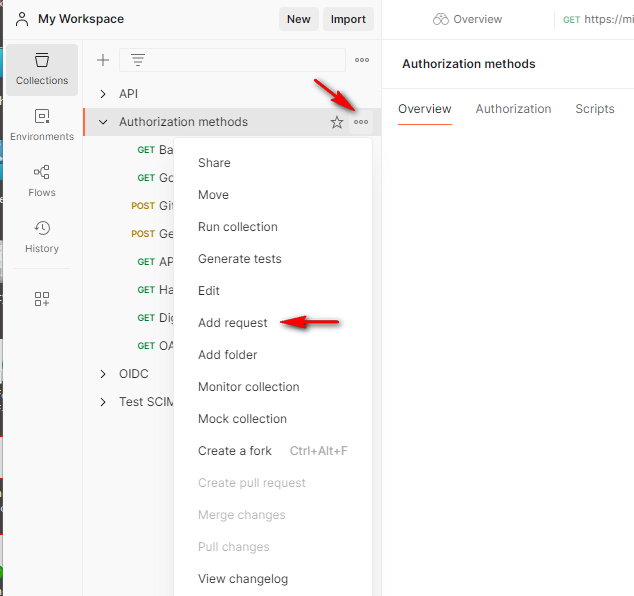
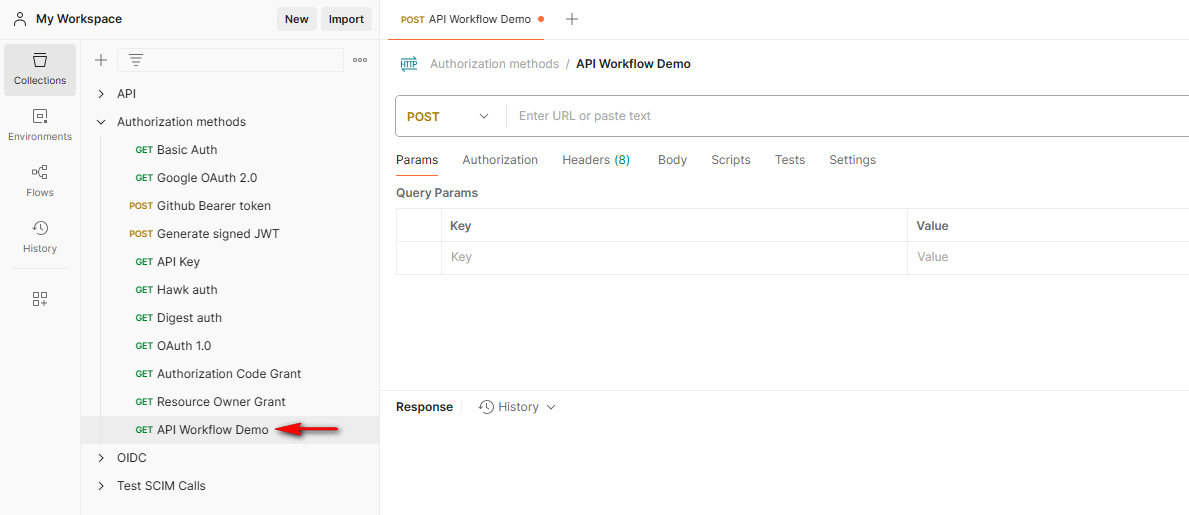
On the Authorization methods collection, click on the eclipsis and select Add request.
On the New Request collection, click on the ellipsis and select Rename. Give the Collection a new name.
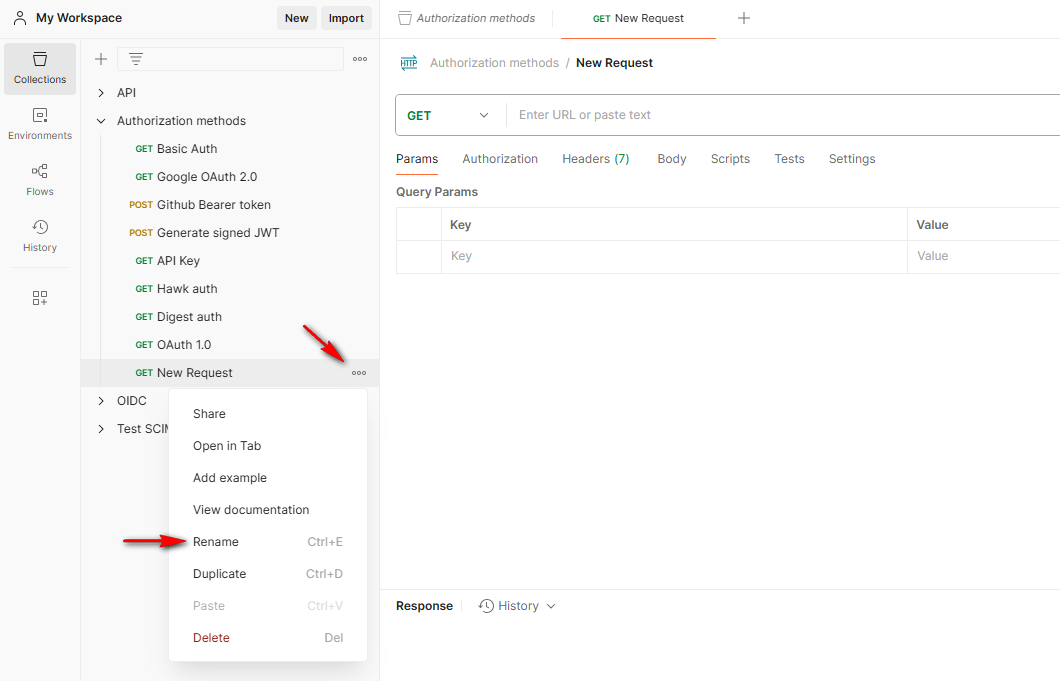
We will name it API Workflow Demo.
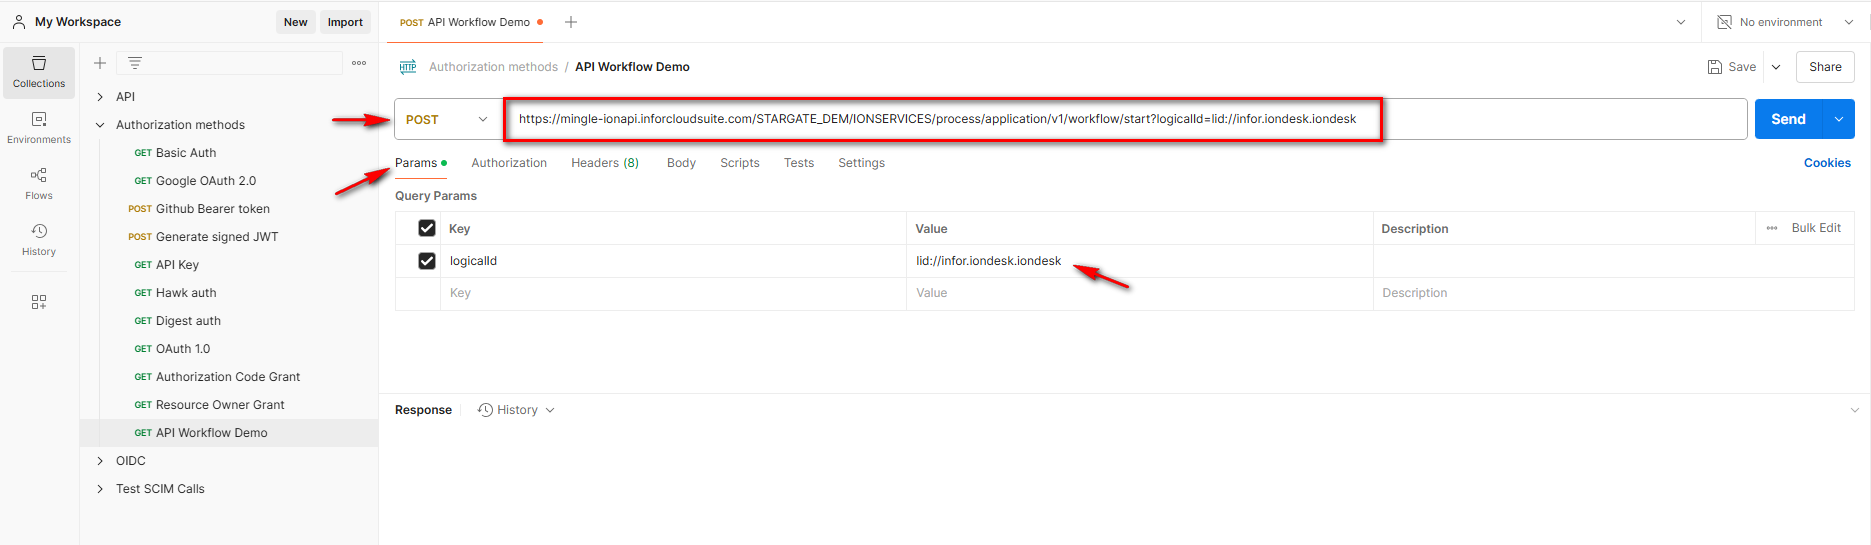
Within the Params tab, enter the IFS Service /application/V1/workflow/start ION API URL in the POST parameters field.
In this example we will enter https://mingle-ionapi.inforcloudsuite.com/STARGATE_DEM/IONSERVICES/process/application/v1/workflow/start?logicalId=lid://infor.iondesk.iondesk
NOTE: We’ve chosen the POST operation because the API Gateway specifies that the workflow start method is a POST
method.
The key named logicalId will be filled in with the required value for our API. lid://infor.iondesk.iondesk
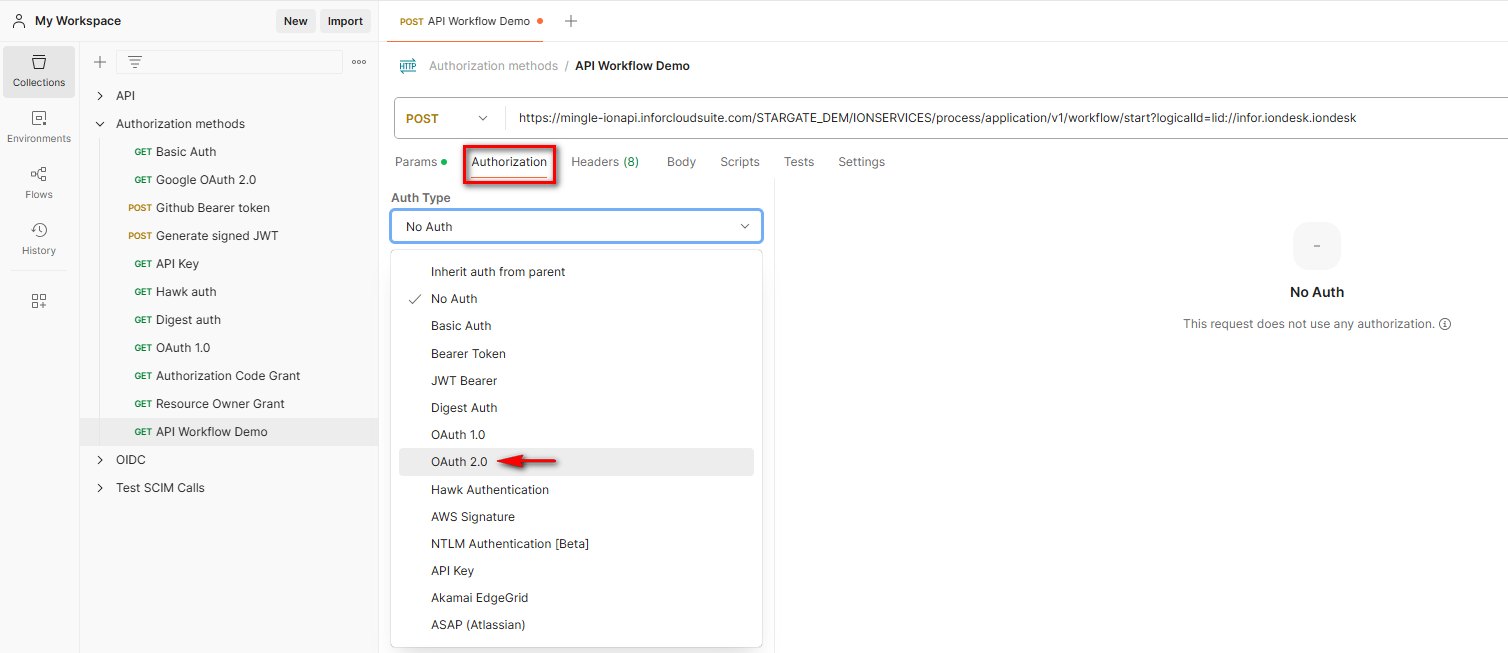
Select the Authorization tab, and in the Auth Type field, choose OAuth 2.0.
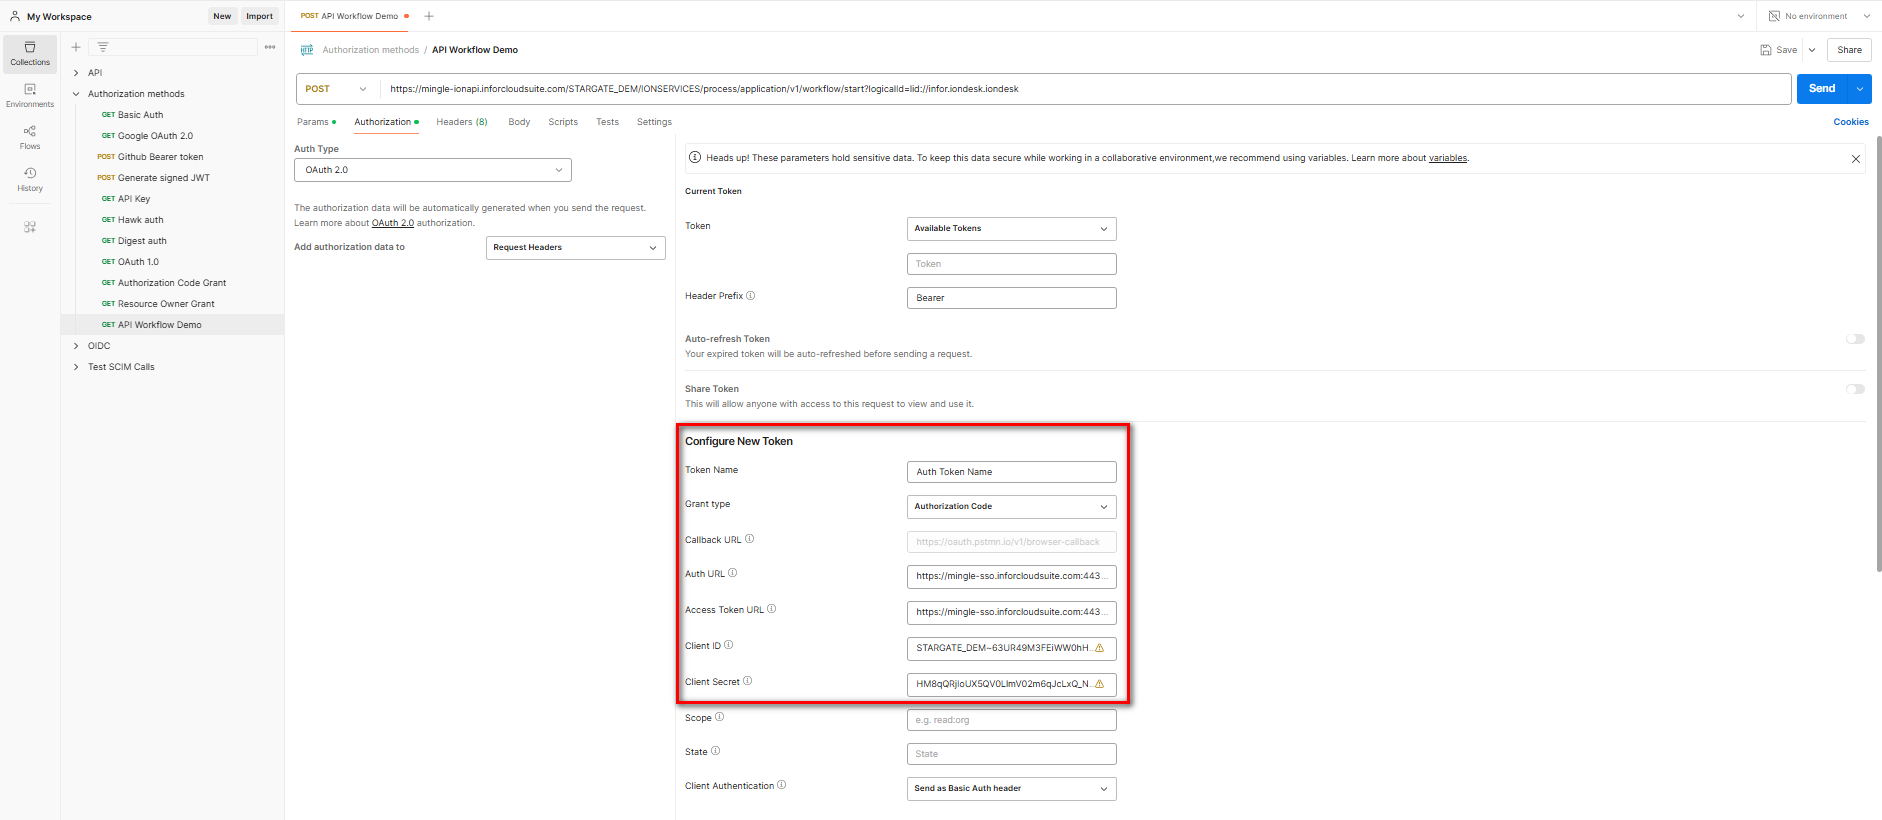
To acquire a new access token, scroll down to the Configure New Token section and enter the following Postman Mapping information from the downloaded Postman Web App Demo.ionapi credentials file performed in the previous steps.
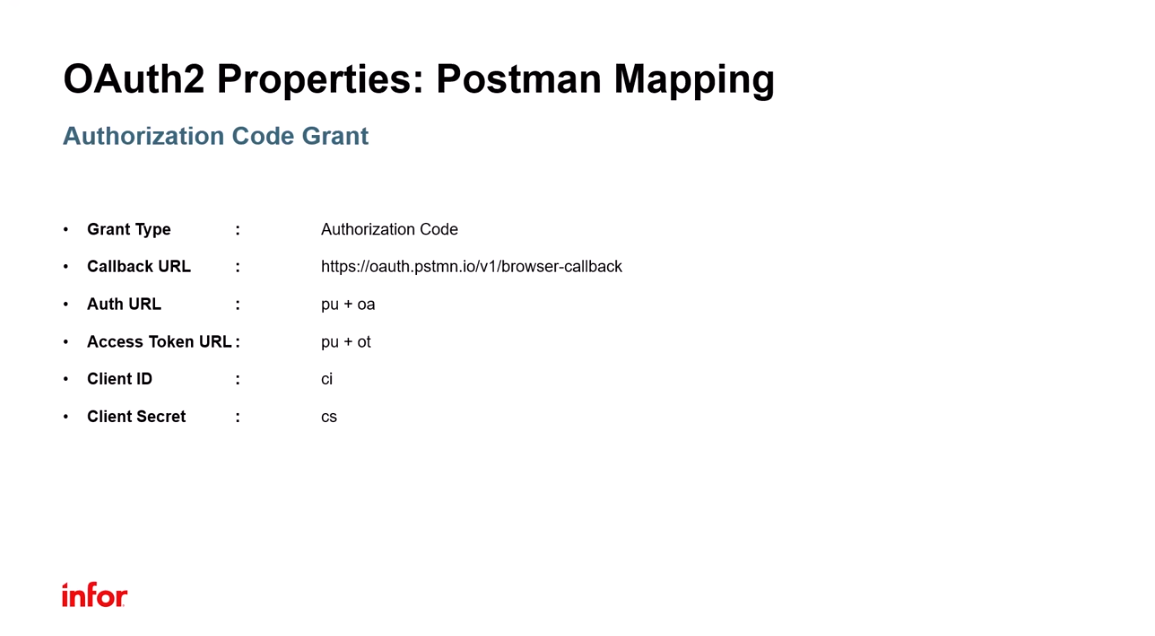
Enter the relevant credentials into the required input parameter. In the Token Name field, enter Auth Code Token and set Grant type to Authorization Code. The Callback URL is the embedded Postman link (https://oauth.pstmn.io/v1/browser-callback). The Auth URL is a concatenation of values pu + oa, similarly, the Access Token URL is a concatenation of pu + ot, The Client ID is value ci and the Client Secret is cs.
Scroll to the bottom of the page and click the Get New Access Token button.

Postman will initiate a handshake with Infor’s Cloud OAuth authentication and take you to a login screen, where you must sign in.
NOTE: Remember this is an activity in which the user must be present. The sign on must be performed, and the user is required to authorize the application I.E Postman, to call the API.
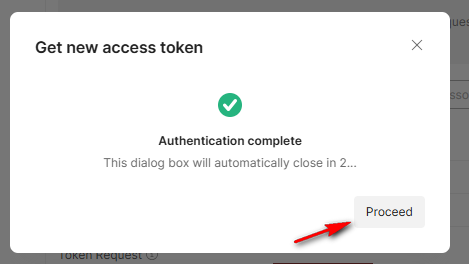
Once signed in you can see infor OS is prompting the Request For Approval regarding Postman using our credentials. Click the Allow button.

You will get the following message. You can click the Proceed button or wait a few seconds. The Manage Access Token screen will then appear.
This will provide a new token within the Postman application. On the Manage Access Tokens screen, click the Use Token button.
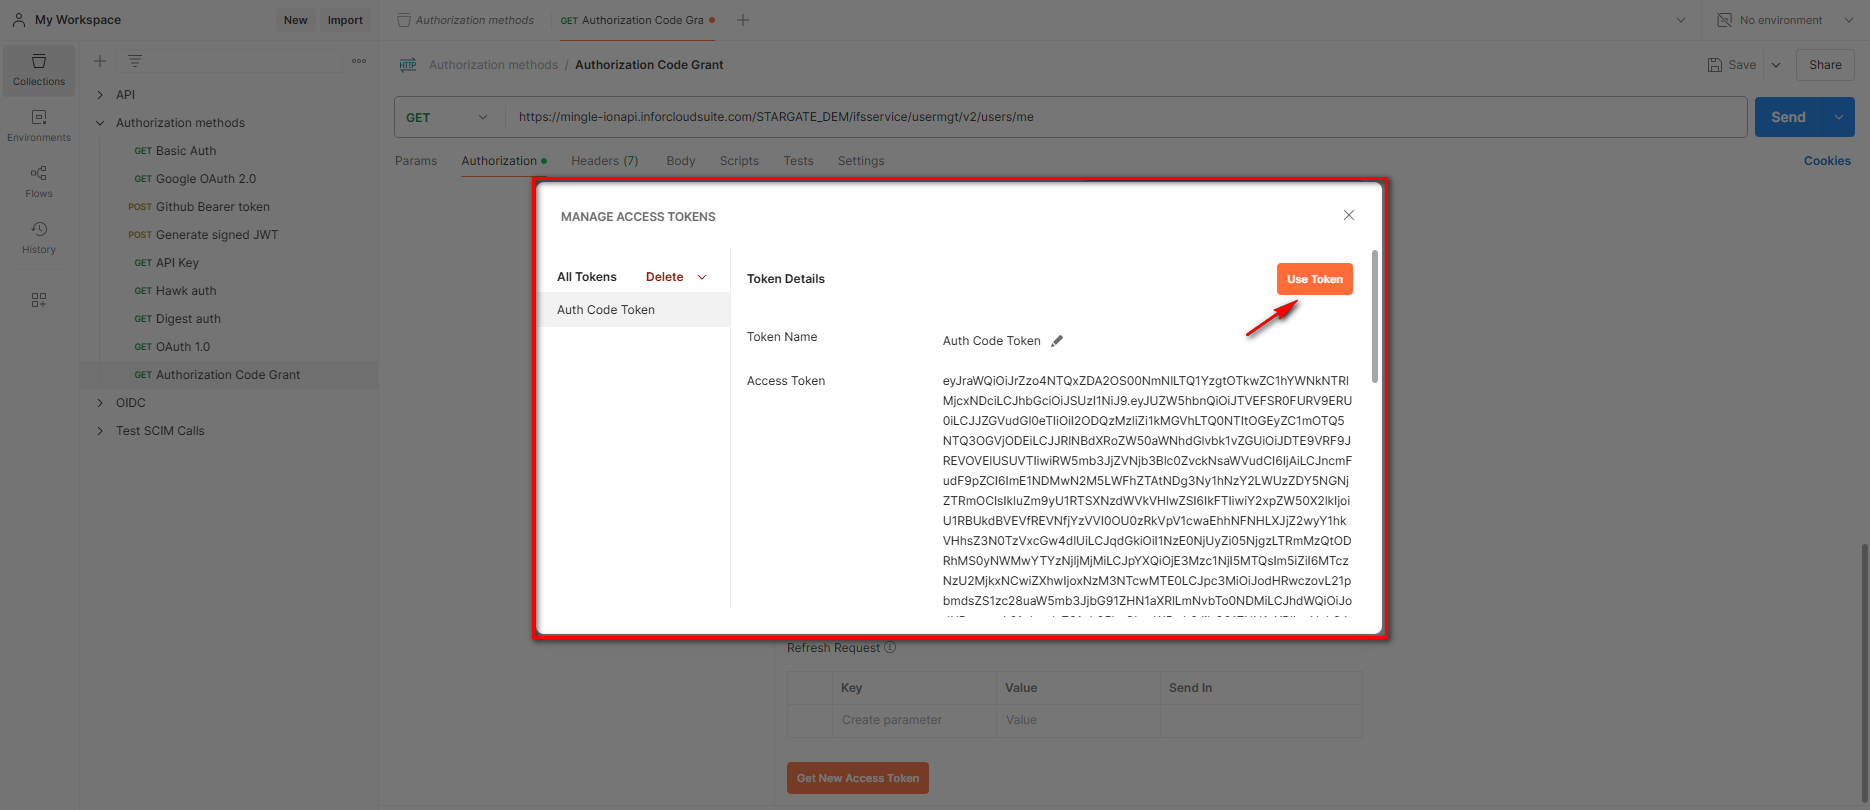
NOTE: When you click the Use Token button, a message will appear in the lower right hand corner saying that the Token was added.
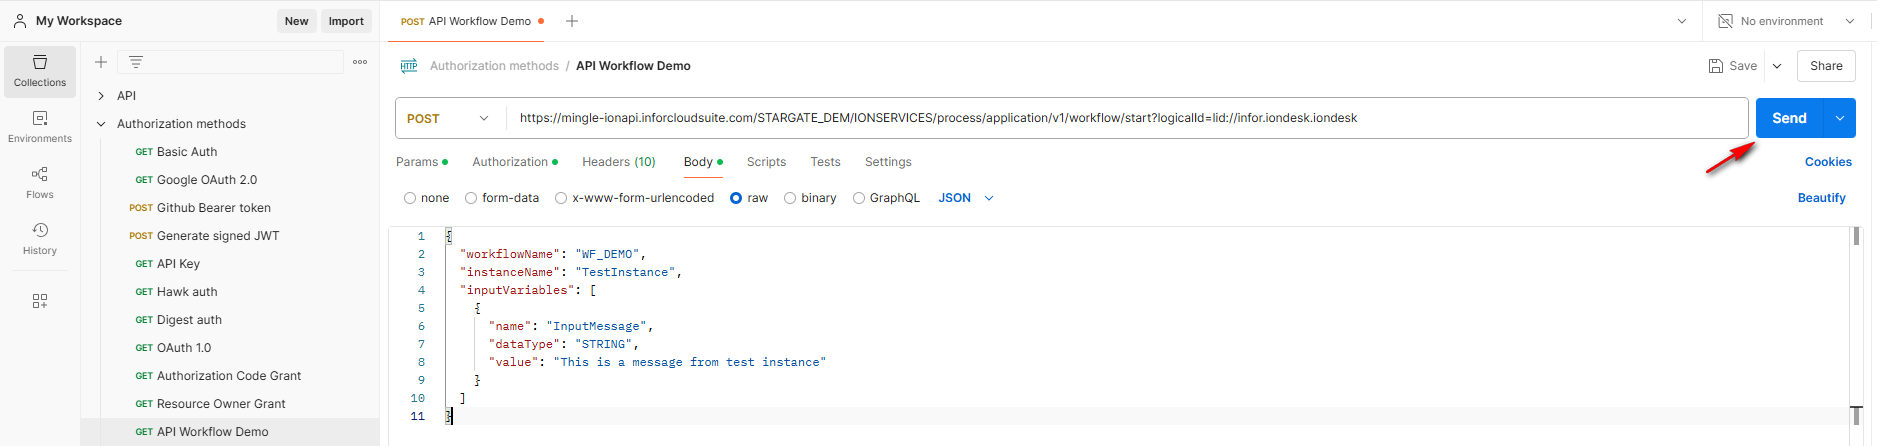
Click on the Body tab where we’ll enter our JSON to call the API and kick off the workflow. Ensure the format is set to raw and JSON is selected from the dropdown.
Paste in the script we successfully tested previously when we did the “try it out” in the ION API section of this tutorial.

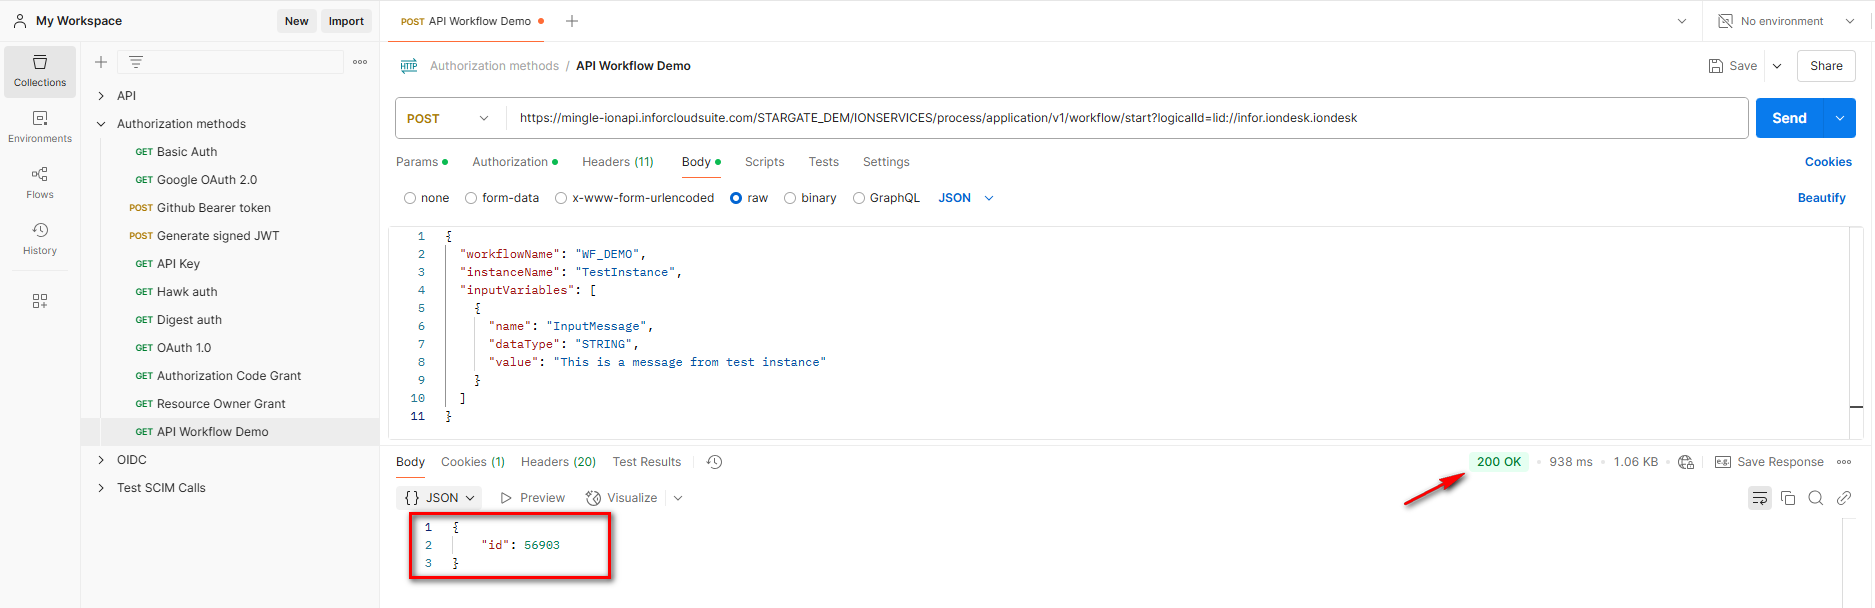
Click the Send button, to trigger the chain of events we’ve set up.
You can see that the call was successful. Error Code 200 and a job ID of 56903.
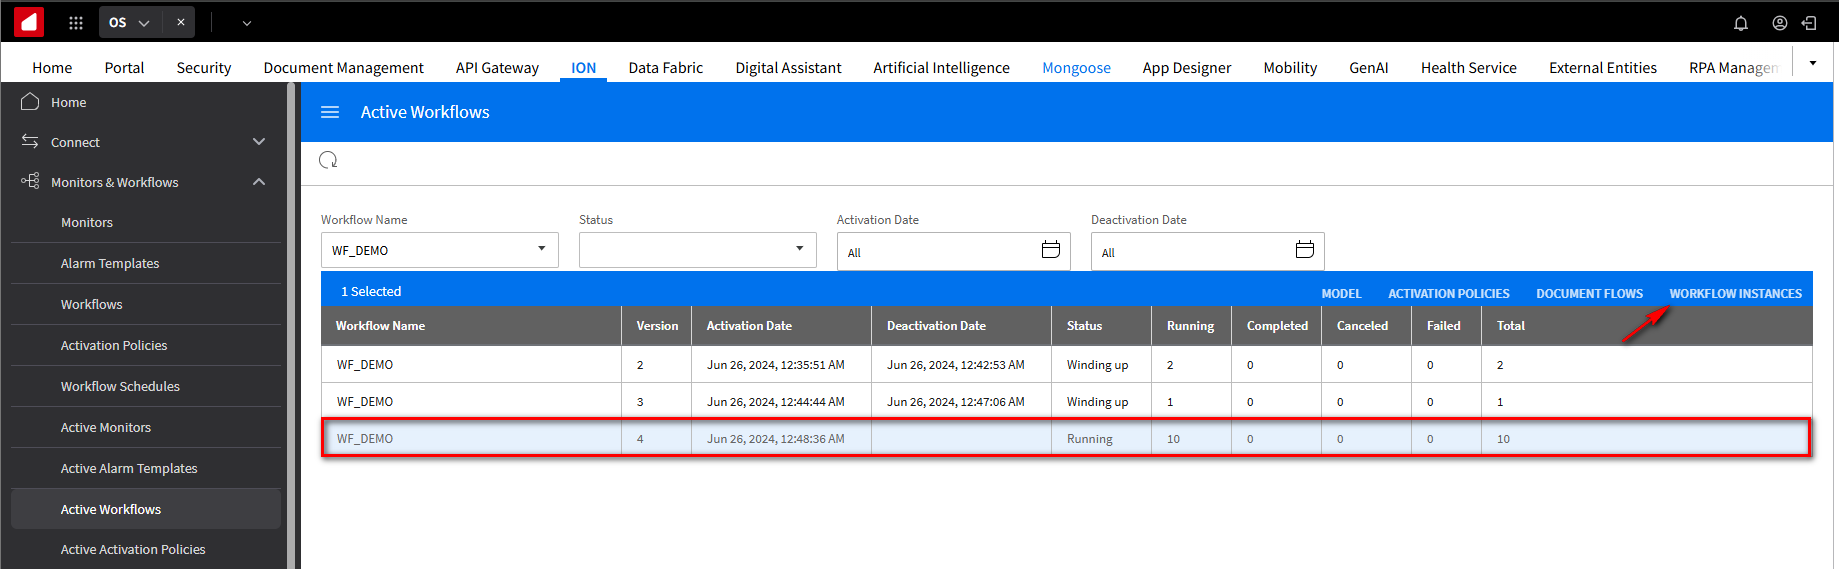
Go back to the OS Portal, and view active workflows in ION.
Click the ION tab, and in the navigation menu expand Monitors and Workflows and select Active Workflows.

Searching for the WF_DEMO workflow. You can see the last one has a status of Running.

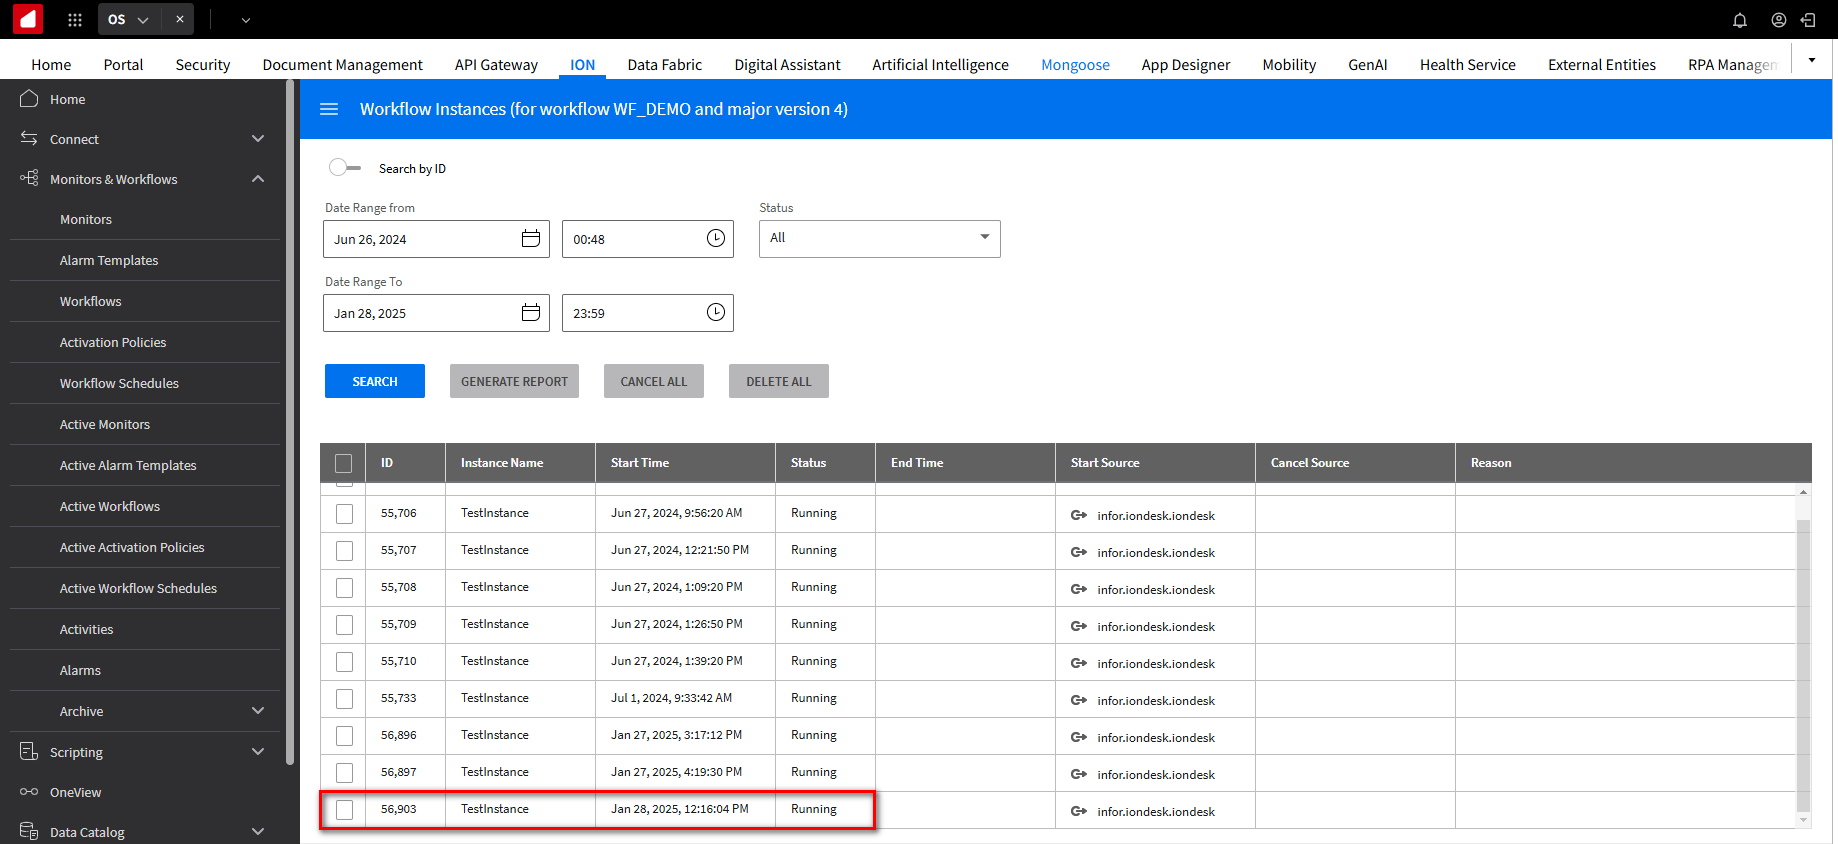
Let’s confirm it’s the one we executed in Postman by clicking on Workflow Instances.
There’s the matching job ID of 56903 we got from Postman.
This Concludes this Tutorial on how to Start a workflow from an API.
Watch the following video to view all the steps that were covered.
Resources
Help Documents and User Guides