How to create an RPA flow using Invoke Workflow to invoke a sub workflow
Overview
In Robotic Process Automation (RPA), invoking a subflow from a main flow is a common way to organize tasks and reuse logic within processes. Subflows act as modular components that can be called within a main flow to perform specific tasks, making the automation workflow more organized and maintainable. For example, you can define the data validation or data entry part of the flow as a subflow to be invoked during the execution of the main flow.
In this tutorial, we will show you how to create a basic flow using Invoke Workflow activity to invoke a subflow part of a different .xaml file in the project folder within the main flow . We will create a flow to pass the variable / argument from the main flow into the subflow and get the arguments from the subflow back to the main RPA Flow.
Components
- RPA
- RPA Management
- RPA Studio
Requirements
- You need to install the latest version of RPA Studio on your machine:
- Download the connection files
- Download RPA Installer from RPA Management. For this tutorial you need to install:
- IDE Studio
- Establish a connection between the RPA Studio and the RPA Management
- You can check the Infor RPA Studio User Guide for the details
Tutorial
Difficulty: Easy
Estimated completion time: 20 Minutes
1. Open RPA Studio
Open RPA Studio on your machine, and sign in, if required.
2. Create a new project
On the Home page of RPA Studio click Create New Project and specify the following properties in the popup window:
- Name: InvokeWorkflow
- ProjectLocation: <default>
- Description: Demonstrates how to invoke a sub flow inside of the main flow
- Language: VB <selected by default>
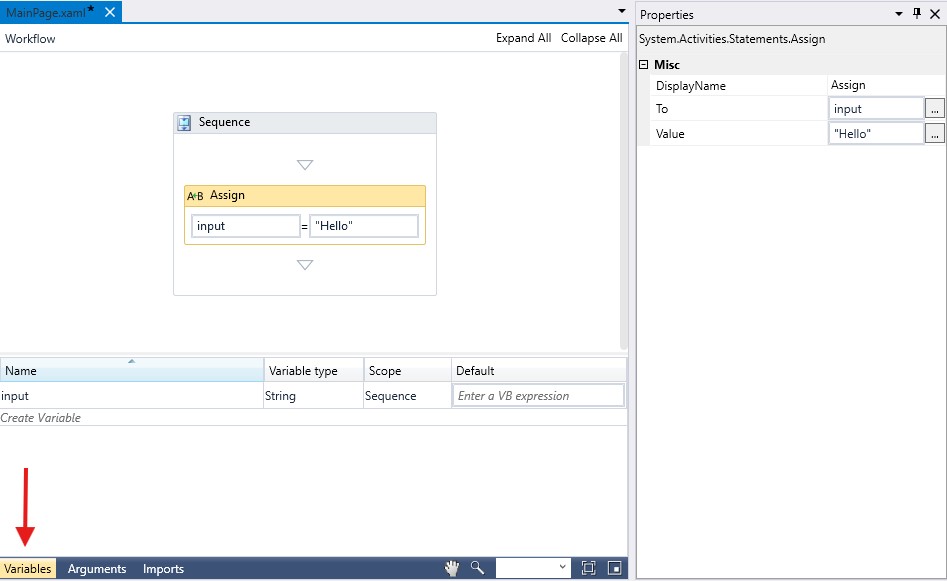
3. Define Assign activity
We will start the flow by adding Assign activity into the canvas. You can find the list of activities by clicking Activities in the left-hand side bar or from the View menu in the top bar. Use search to find the activity you want.
The Assign activity allows us to assign a value to a particular variable. Let’s create a variable that can later be referenced in the activity properties. We will call the new Variable input and it will have the type string and will not have a default value.
- The To Property contains the variable that we will assign the value to.
- For the Value Property, we will simply use the string “Hello”.
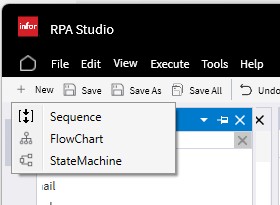
4. Add a SubSequence
We create a new sequence in a different file. Click on +New from the action ribbon and select Sequence.
A popup window will appear to specify the name of the sequence as SubSequence.xaml. Make sure you are saving it under the InvokeWorkflow folder and click Save. A new sequence file will be created and visible in the Project panel and will be open on the main design canvas.
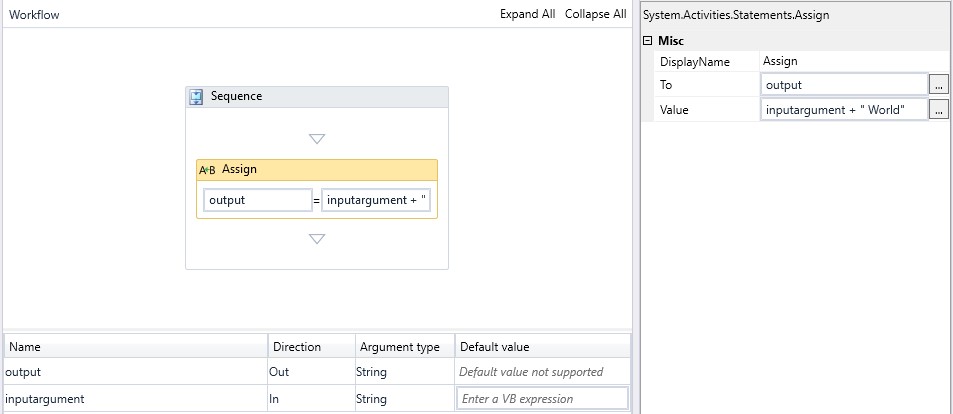
Next add Assign activity into the canvas of the new Subsequence. We will first create arguments which later can be referenced in the activity properties.
Note: Use variables for internal data within a workflow, and arguments to pass data to and from workflows or subflows. This separation ensures clear data handling and keeps workflows modular and reusable.
- For To property create an Argument called output of type: string without default value and direction OUT
- For Value we will create an Argument called inputargument of type string with direction IN
- Click the Assign activity and fill in the To and Value properties:
- To: output
- Inside of the Value property we will specify inputargument + “ World“
- The names of the arguments specified in the subsequence should be remembered, as you will be using them in the “main flow” – the one “Set as Main“ – which name is Bolded as part of the Project panel.
- It is important to specify the direction for the arguments, while IN are the arguments which are coming from Mainpage.xaml and OUT are the ones as output from the Subesequence.xaml; The arguments from the subflows will not be visible in the RPA Management in Process Details to be configured.
5. Add and configure Invoke Workflow
Next we come back to the MainPage.xaml project and add an Invoke Workflow activity. Configure it in the following way:
- For Workflow file property which contains the actual file path of the subsequence .xaml file, create a variable:
- called filepath of type: string with default value of the file path for instance: “C:\Users\nkostuch\AppData\Local\InforRPA\InvokeWorkflowExample\SubSequence.xaml “
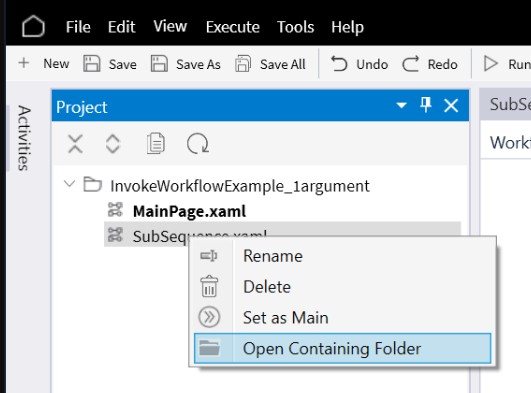
- Note: to get the subsequence file path right click on the Subsequence.xaml file in the Project panel and select Open containing folder. That will open the folder where the .xaml file is stored. Right click on the Subsequence.xaml and select properties there you will find the full file location which has a prefix with “/<filename and extension>” e.g. /Subsequence.xaml.
- Make sure your file is saved within the open project, as only those files will be published when the project is published.
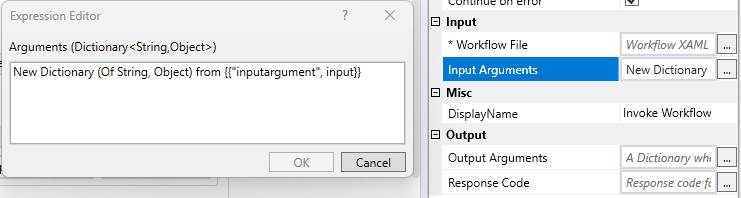
- For Input Argument we will specify the VB expression for the dictionary of the values which should be passed to the subsequence in a following way:
- New Dictionary (Of String, Object) from {{“inputargument”, input}}
- inputargument is the argument from Subsequence.xaml file and input is the variable from the Mainpage.xaml which value will be past to subsequence and assign to inputargument argument in Subsequence.xaml
- New Dictionary (Of String, Object) from {{“inputargument”, input}}
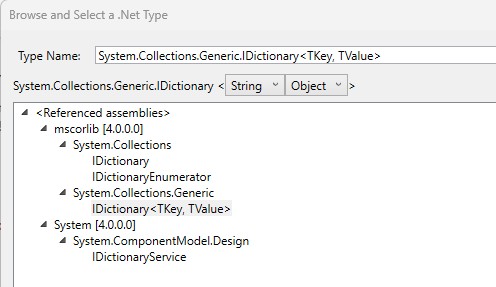
- For Output Argument which will hold the value of the argument passed from the Subsequence.xaml, we need to create a variable with the same name as the one in the Subsequence.xaml, but different data type.
- Let’s create another variable called output, with variable type IDictionary<String, Object> (Variable type/Browse for Types)

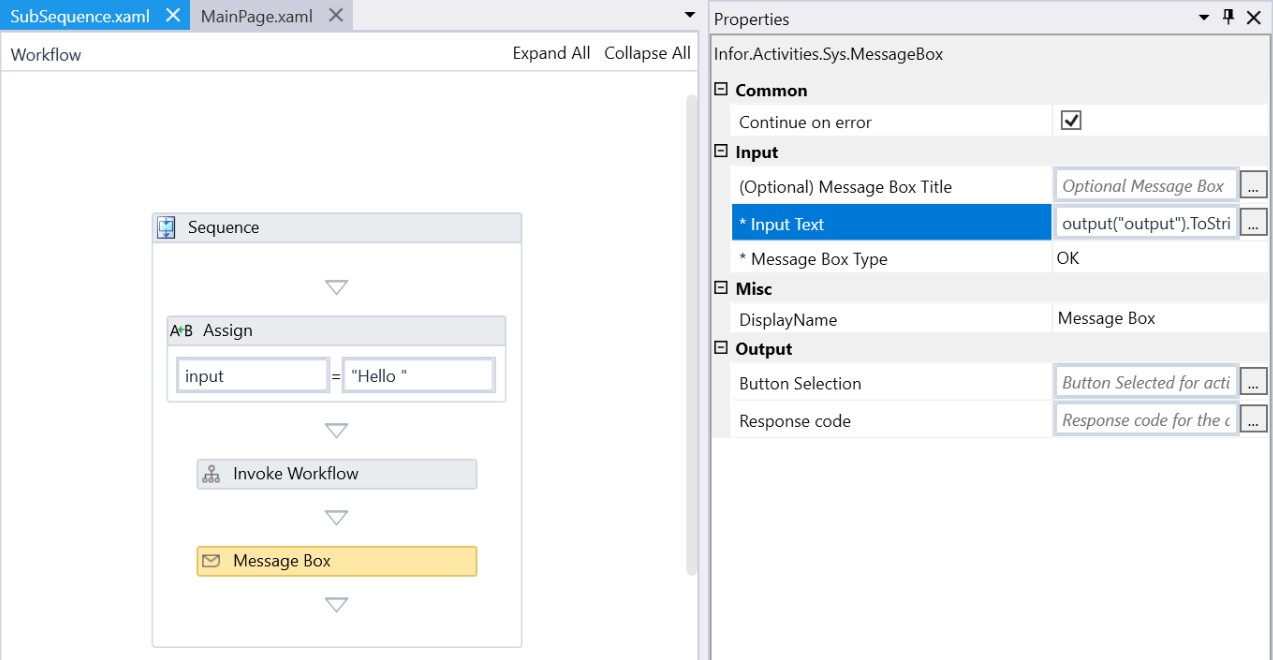
6. Add a Message Box
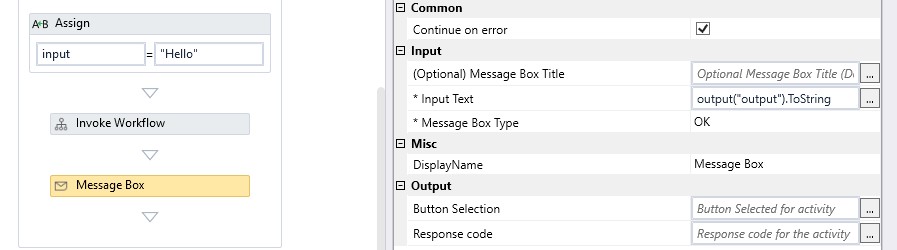
To see if the values were being passed between the Mainpage.xaml and Subsequence.xaml we will add Message Box activity. For Input Text let’s specify the following VB expression to see the value of output variable which was input to the flow:
- output(“output”).ToString
Note: output is a variable of type idictionary so it holds the dictionary of output values from the sub-sequence.
Save the flow and click Run to execute it.
Flow Improvement
In order to output multiple arguments from the sub-sequence, you could:
Inside of the Subsequence.xaml add the next activity Assign and configure it in a following way create a new arguments:
- for To, let’s create the arguments:
- called Output2 of type string and direction Out
- for Value, Let’s just add a random string “extra value“
Next go back to MainPage.xaml and update the Message Box activity by specifying the following expression to the Input Text: output(“output”).ToString +” “+ output(“output2”).toString so we can see all the arguments which were passed from the sub-sequence