Setting up FTP integration with Infor ION
Overview
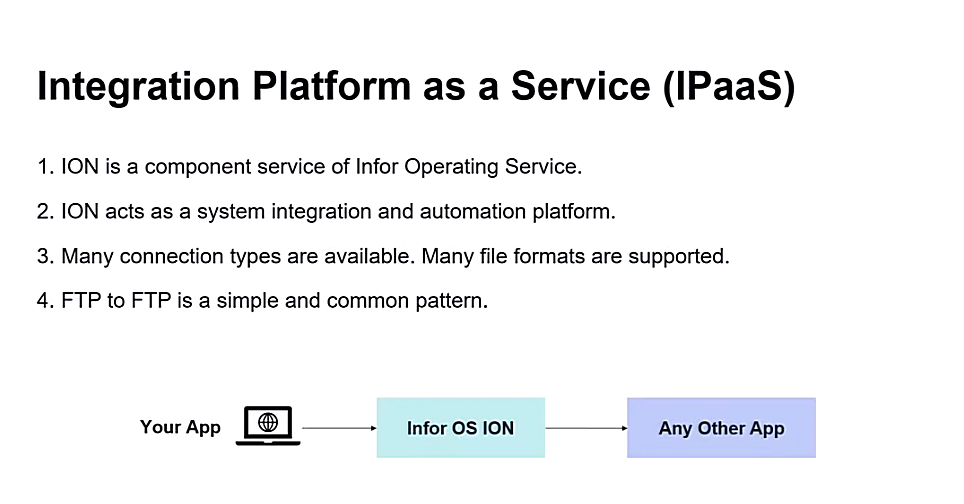
Infor ION (Intelligent Open Network) is a powerful middleware solution that facilitates seamless data integration across diverse systems. In this session, you’ll learn how to leverage Infor ION to integrate systems using the File Transfer Protocol (FTP).
Requirements
- Access to ION
- Security role: IONDeskAdmin
- Infor U courses.
Tutorial
Difficulty: Medium
Estimated completion time: 45 Minutes
In this comprehensive tutorial, we will explore how Infor ION, an iPaaS component within Infor OS Platform, serves as a robust system integration platform that facilitates seamless integration of systems via FTP, providing organizations with a straightforward and effective method to automate and streamline data exchanges across different applications by supporting a variety of connection types and file formats, with particular emphasis on the simplicity and commonality of FTP-to-FTP integration.
Uploading Schema
Log into the OS portal and click on the ION tab or security card.
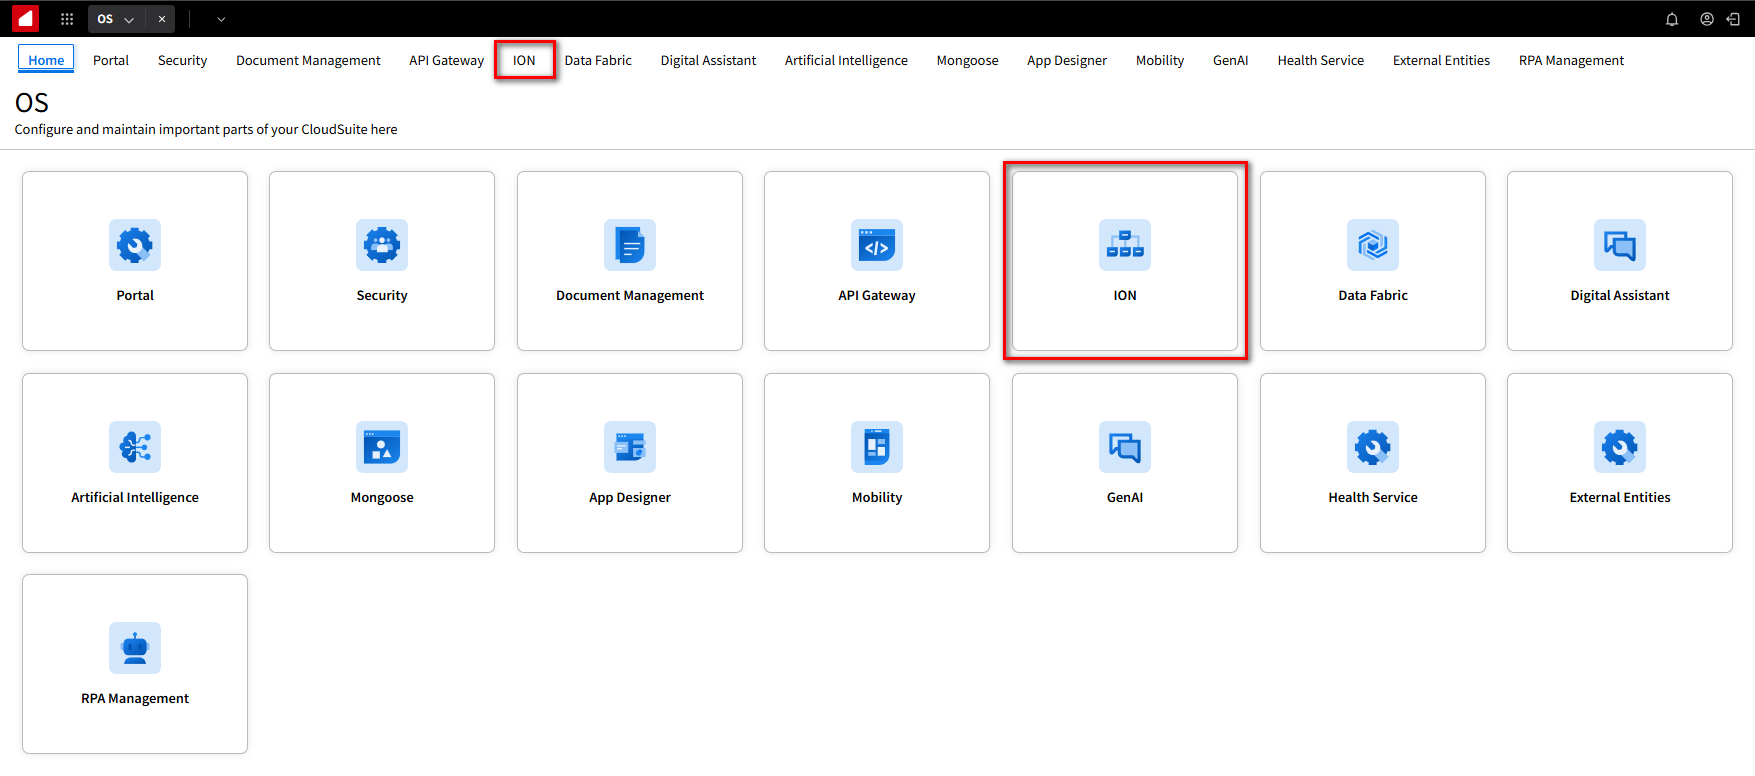
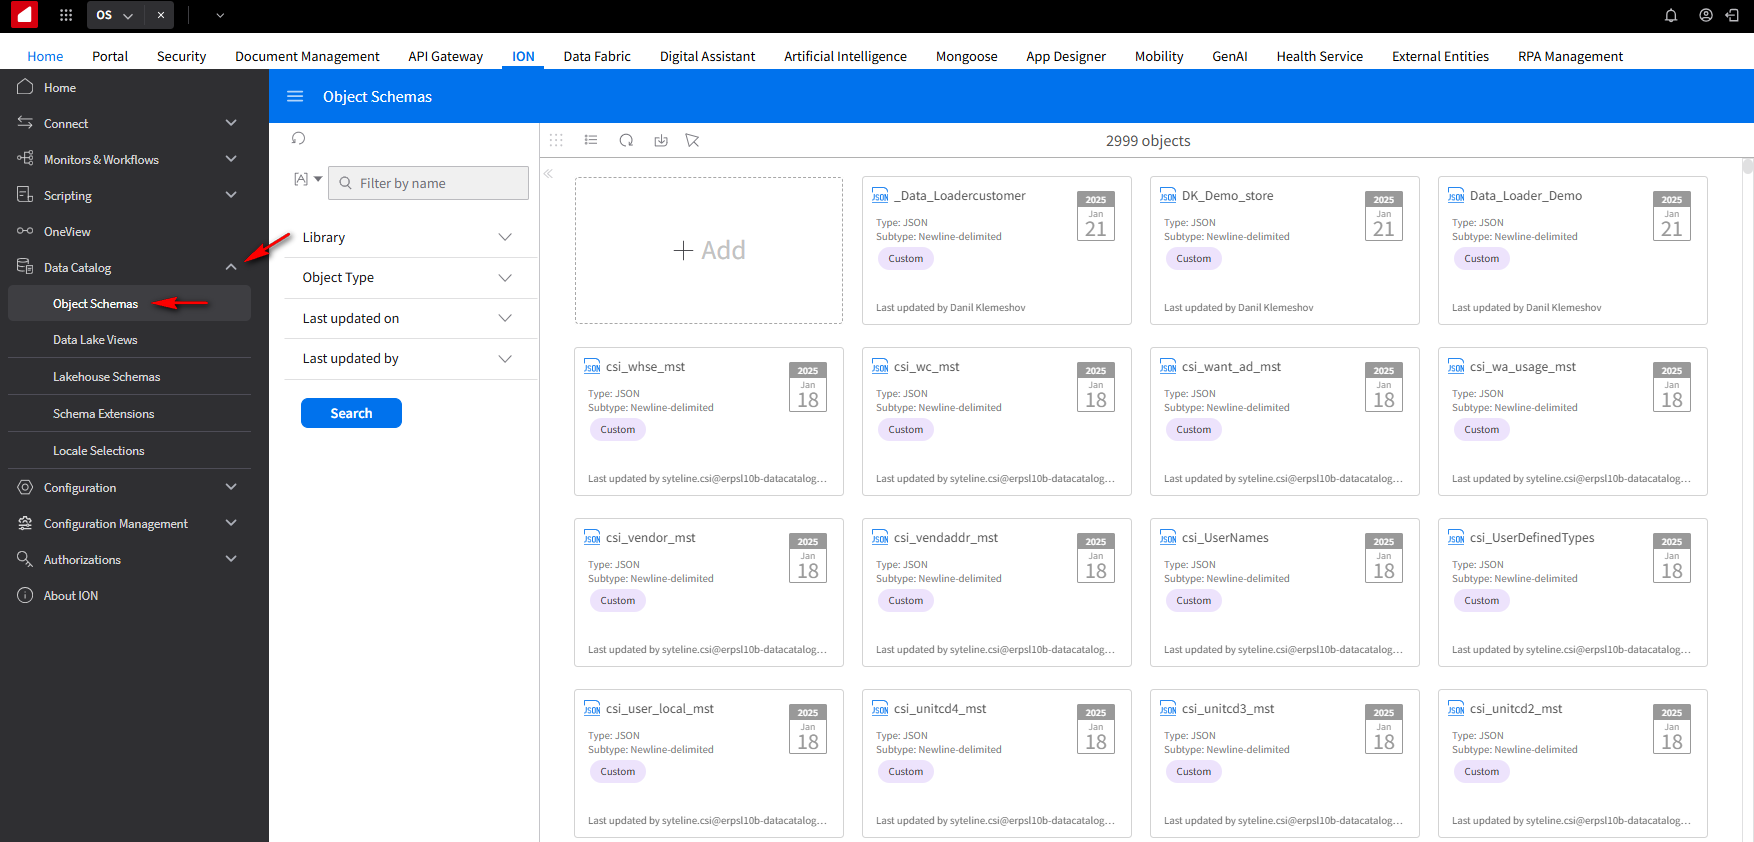
On the navigation menu in the upper left corner, expand Data Catalog and select Object Schemas.
We’ll be transferring two different types of documents via FTP: an OS business object document (BOD) and a CSV file for OS BODs.
Since we’re using a custom CSV file and a BOD, we’ll need to create and upload a schema for the CSV file to use in the object schemas page. We made a DSV.zip file for this tutorial to use.
Download the DSV.zip file from the Resource section at the bottom of the tutorial.
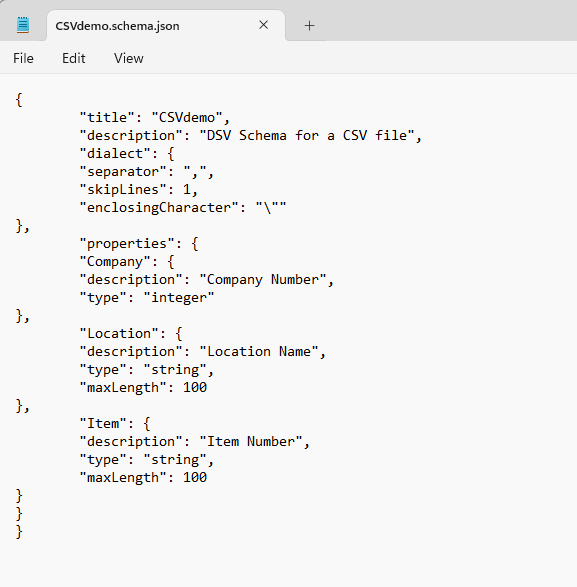
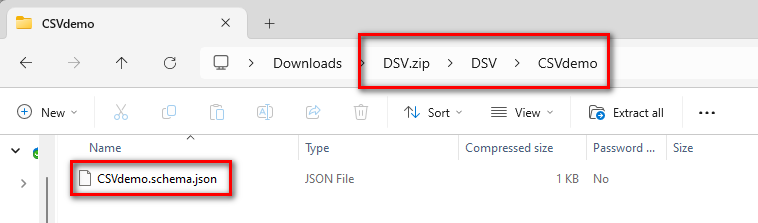
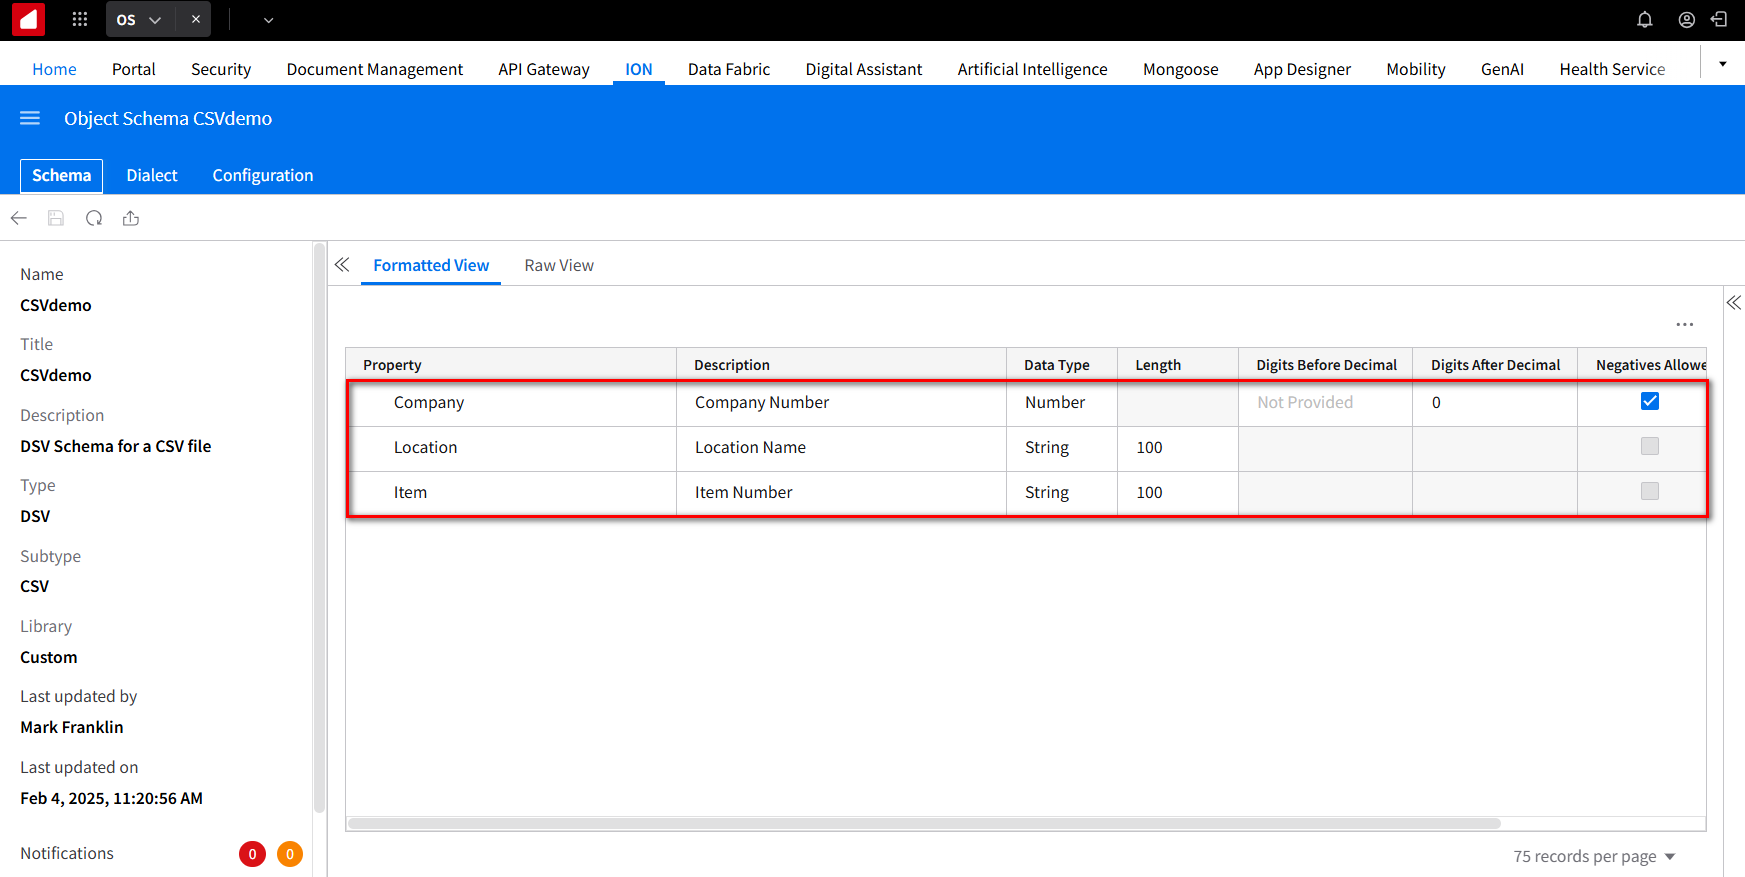
Within the DSV.zip file, we have a CSVdemo.schema.json file sharing the object’s name (CSVdemo), the separator it uses, commas in this case, and a description of the three different fields (Company, Location, and Item).
NOTE: The following folder structure layout is needed for the JSON file import.
DSV/CSVdemo/CSVdemo.schema.json
Here is an example of the zip file folder layout.
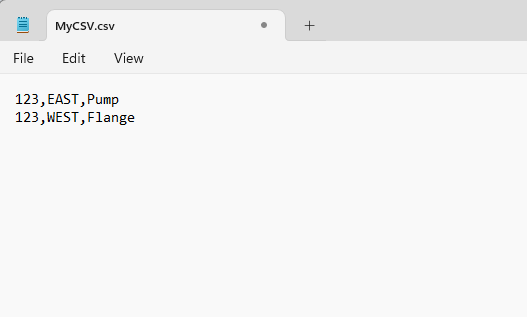
We also created a MyCSV.csv file, which will be used for the FTP transfer. It is also located in the Download section at the bottom of the tutorial. This example is very simple. It only has three fields: the company number, inventory location, and inventory item.
Here is an example of a CSV file with two records.
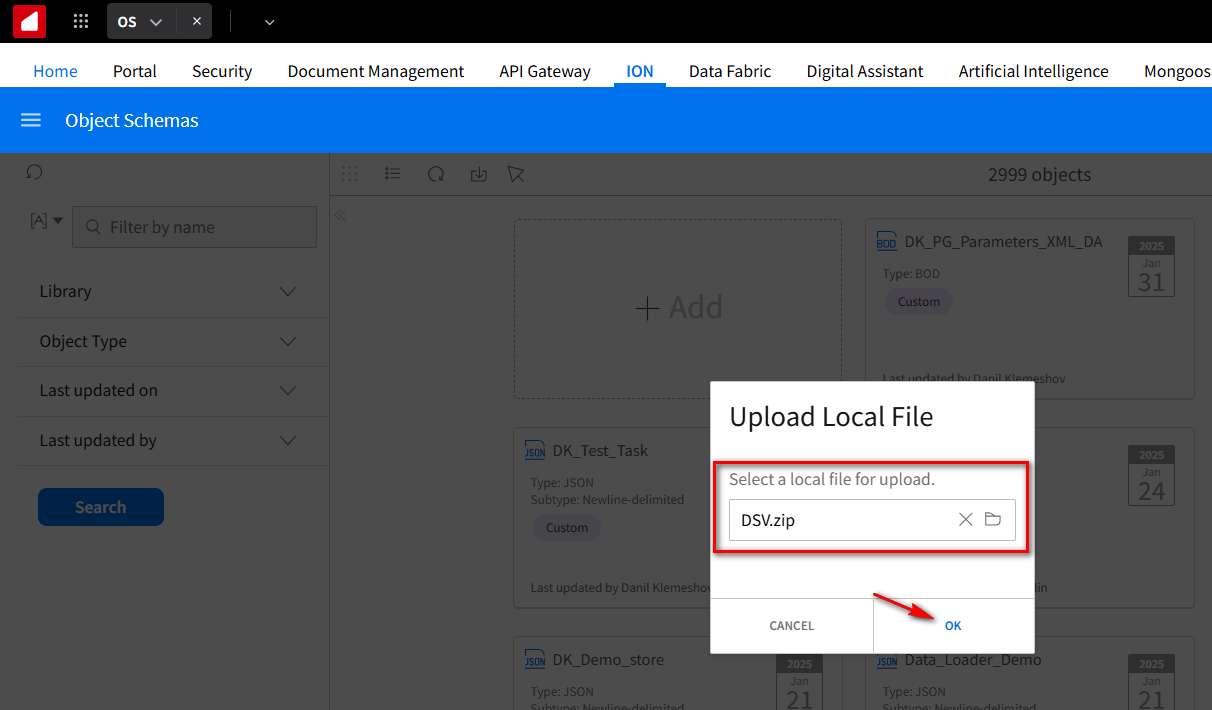
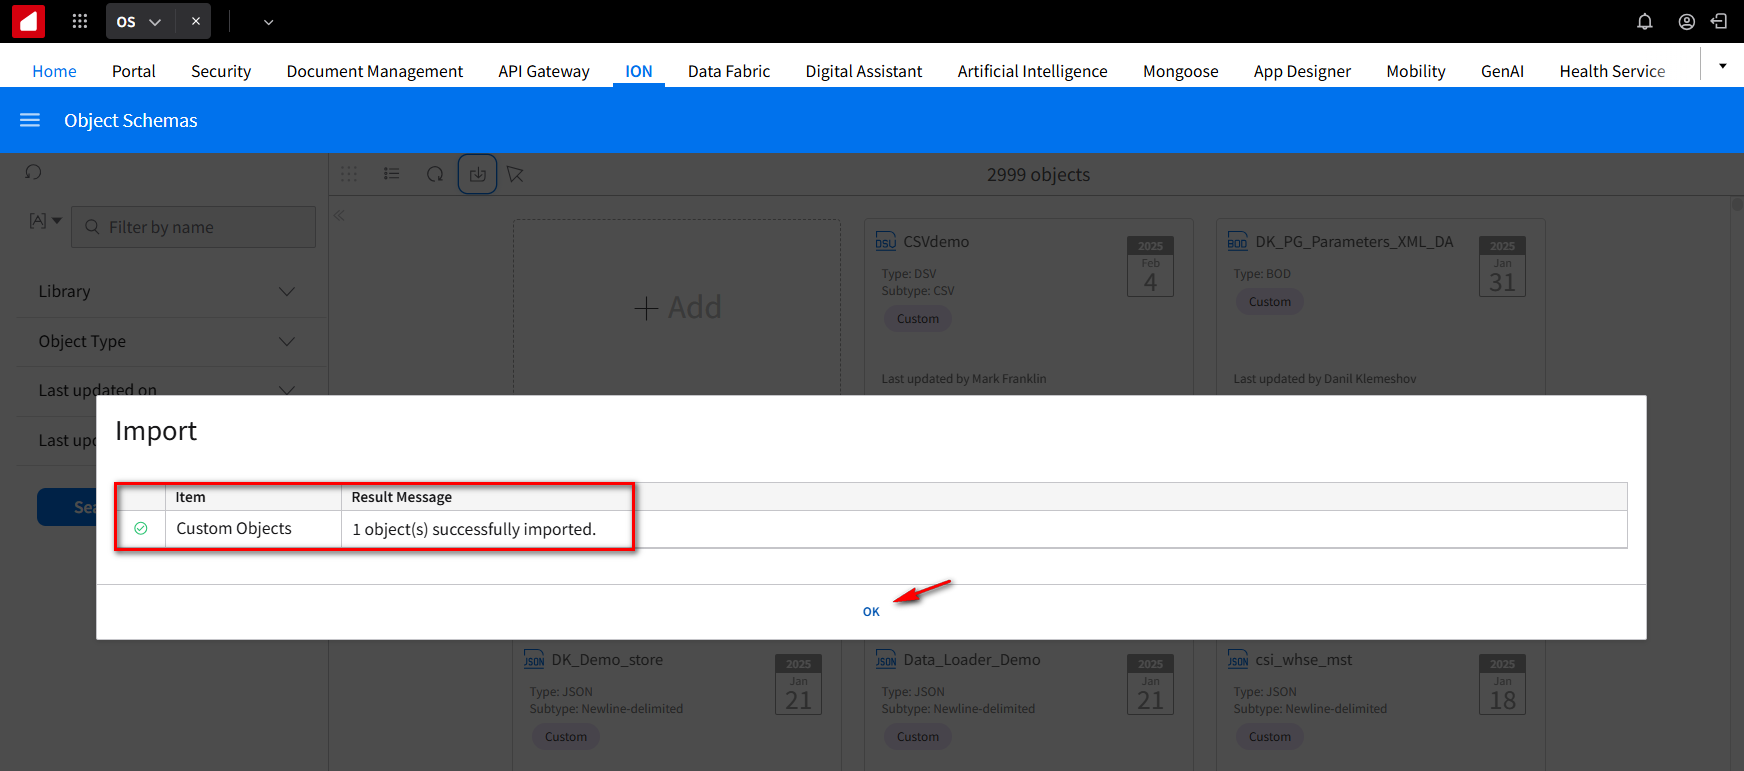
On the Object Schema page, click the Import button.
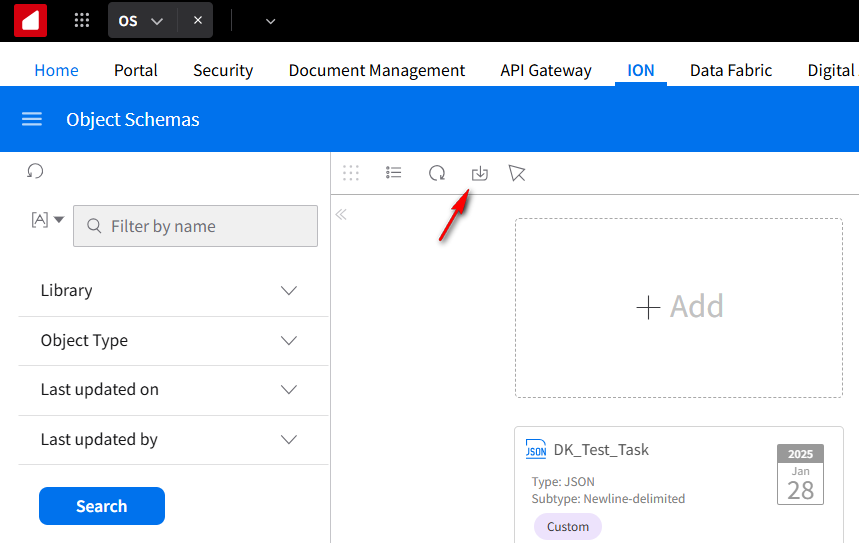
It will ask for a local file to upload. Select the DSV.zip file that contains the JSON schema layout for the CSV file. Click OK.
You will see that it was uploaded successfully. Click OK.
Click the CSVdemo schema that was just uploaded.
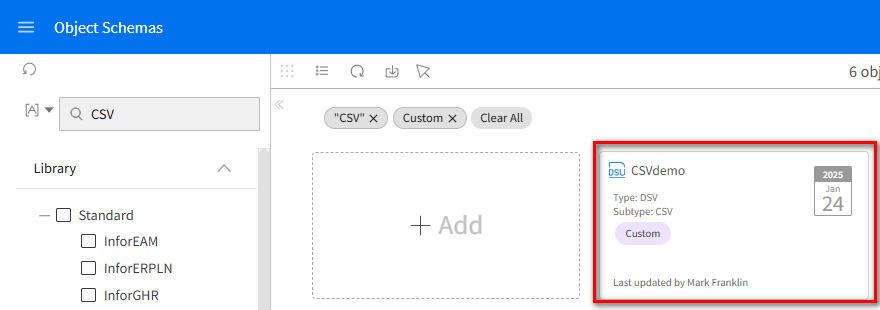
You can see that it imported successfully with three different fields in it.
Connecting to FTP
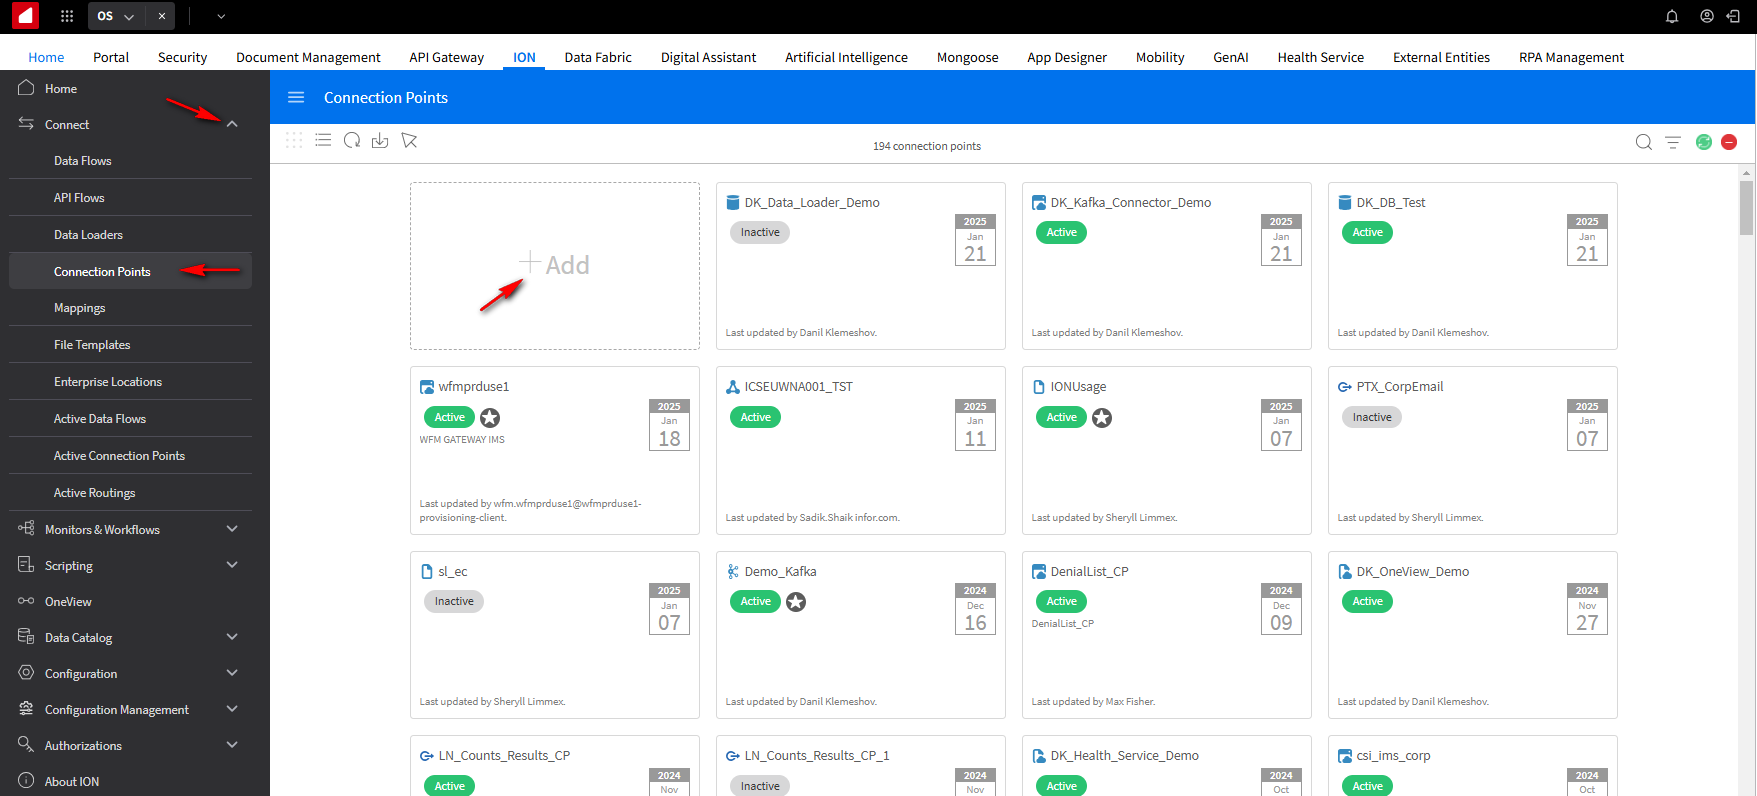
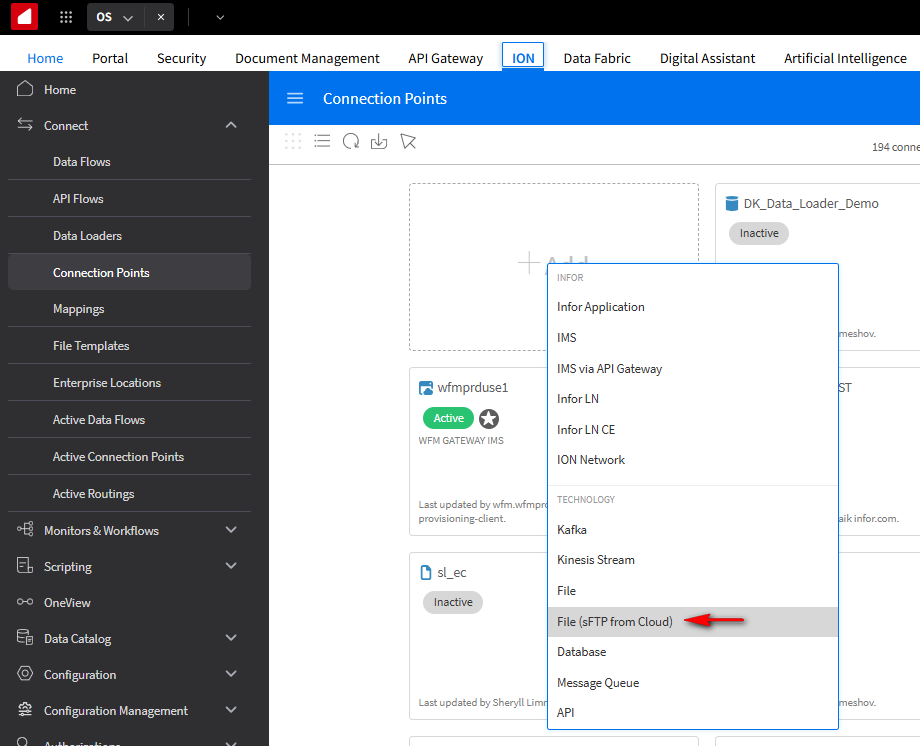
On the navigation menu in the upper left corner, expand Connect and select Connection Points. Click the +Add button.
NOTE: Connection Points are the definitions of how we connect to other systems.
In this tutorial, we will use the File (SFTP from Cloud) connection point, but if you need to communicate with a local FTP server, you can use a File connection point and an Enterprise connector.
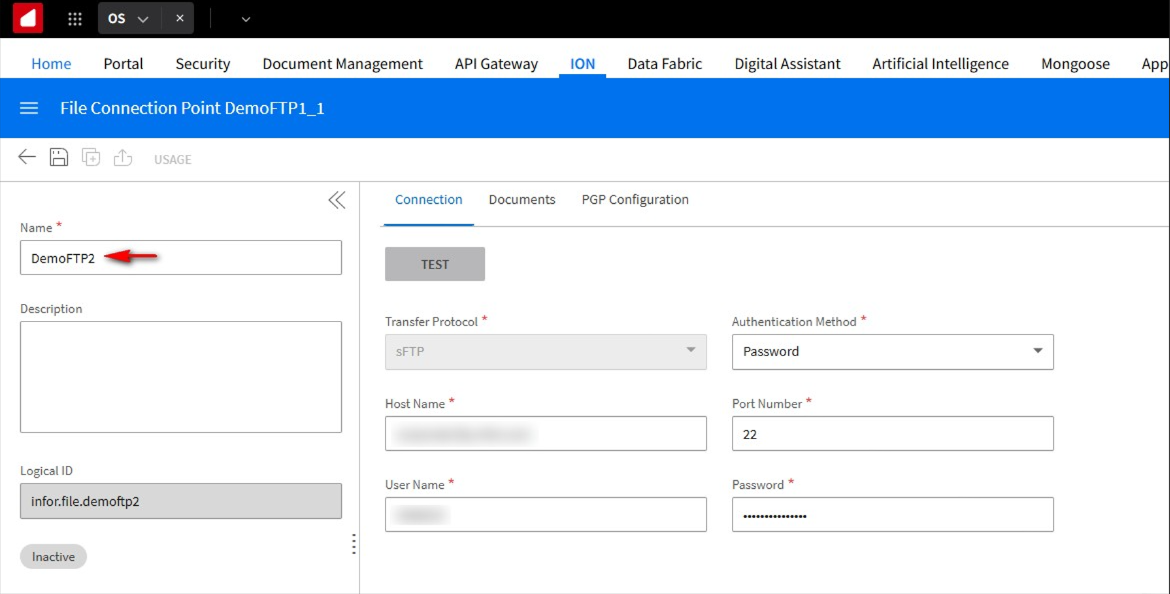
Provide the connection point Name of DemoFTP1 and under the Connection tab enter the Host Name, Port Number, User Name and Password of your FTP server.
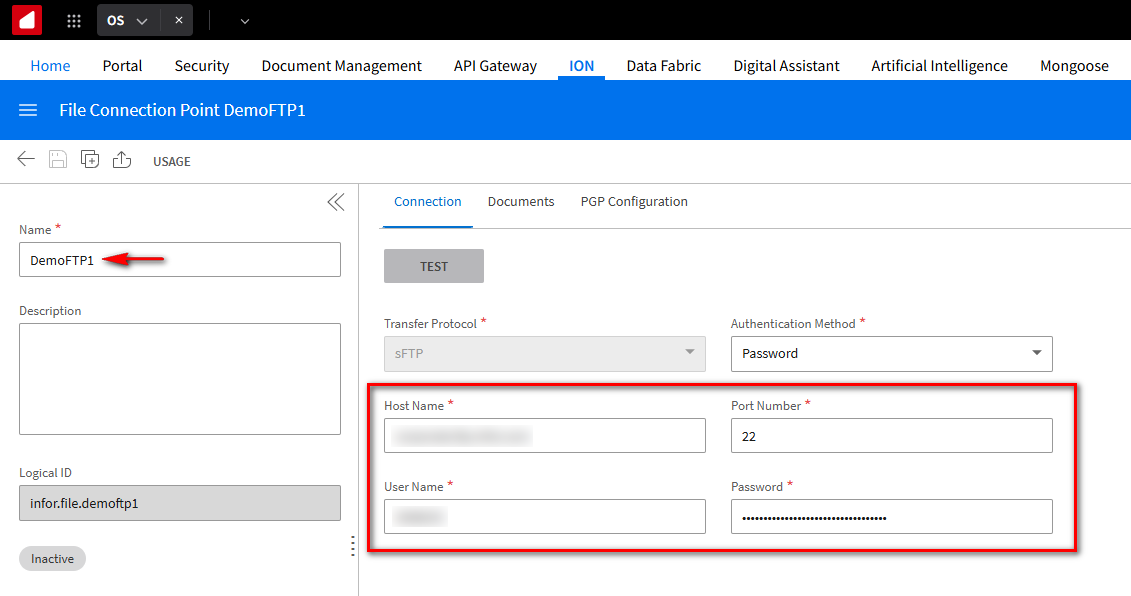
NOTE: ION is not an FTP server; it acts as an FTP client, so the information we place here is the same as in your regular desktop FTP client software.
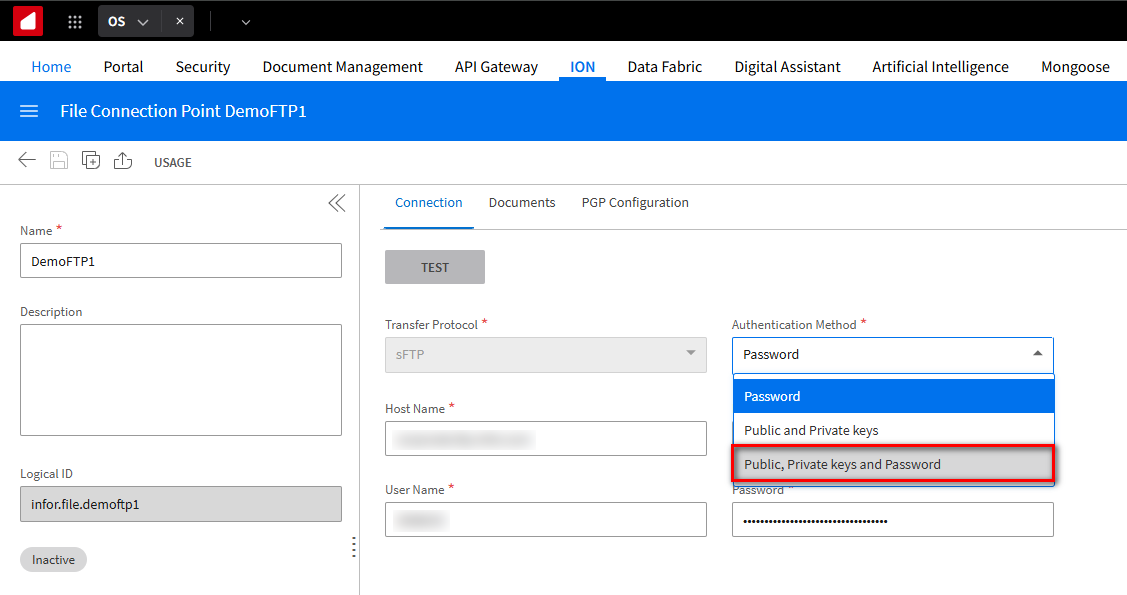
If we were using secure FTP over the internet, we would probably use encryption. In that case, you would check the Authentication Method box and enter your private and public key information, but for the simple demo, we’ll test without it.
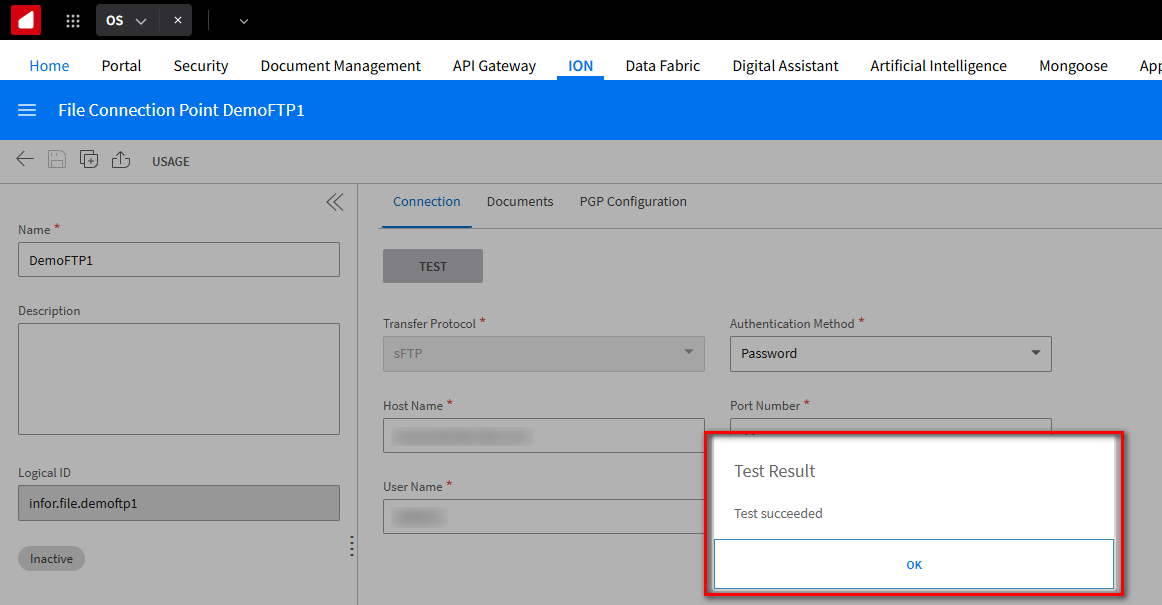
Click the TEST button.
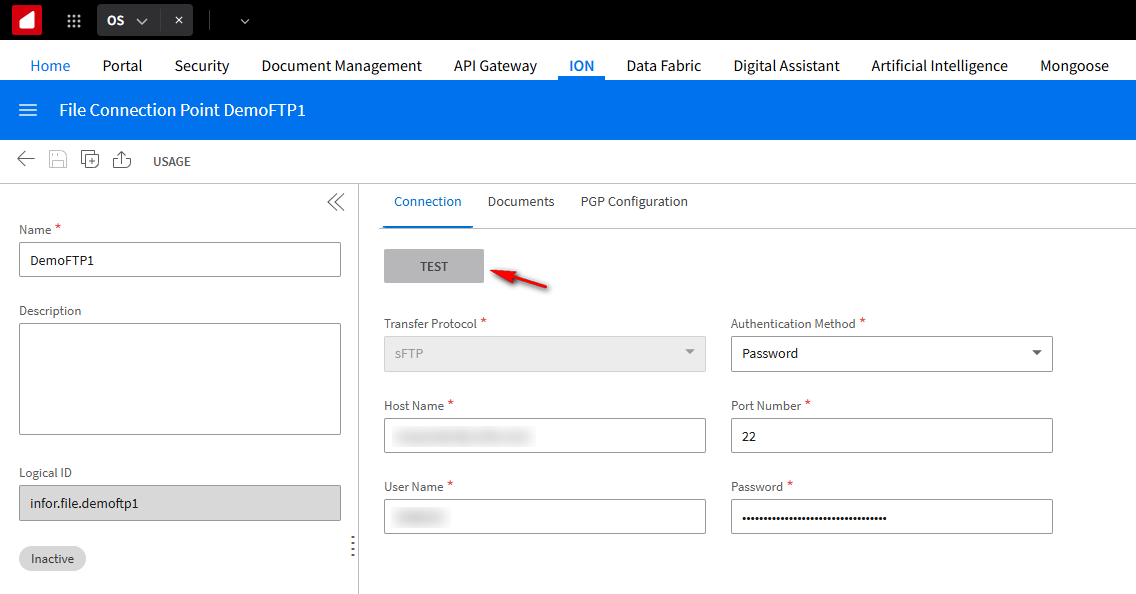
We can see that the connection is successful.
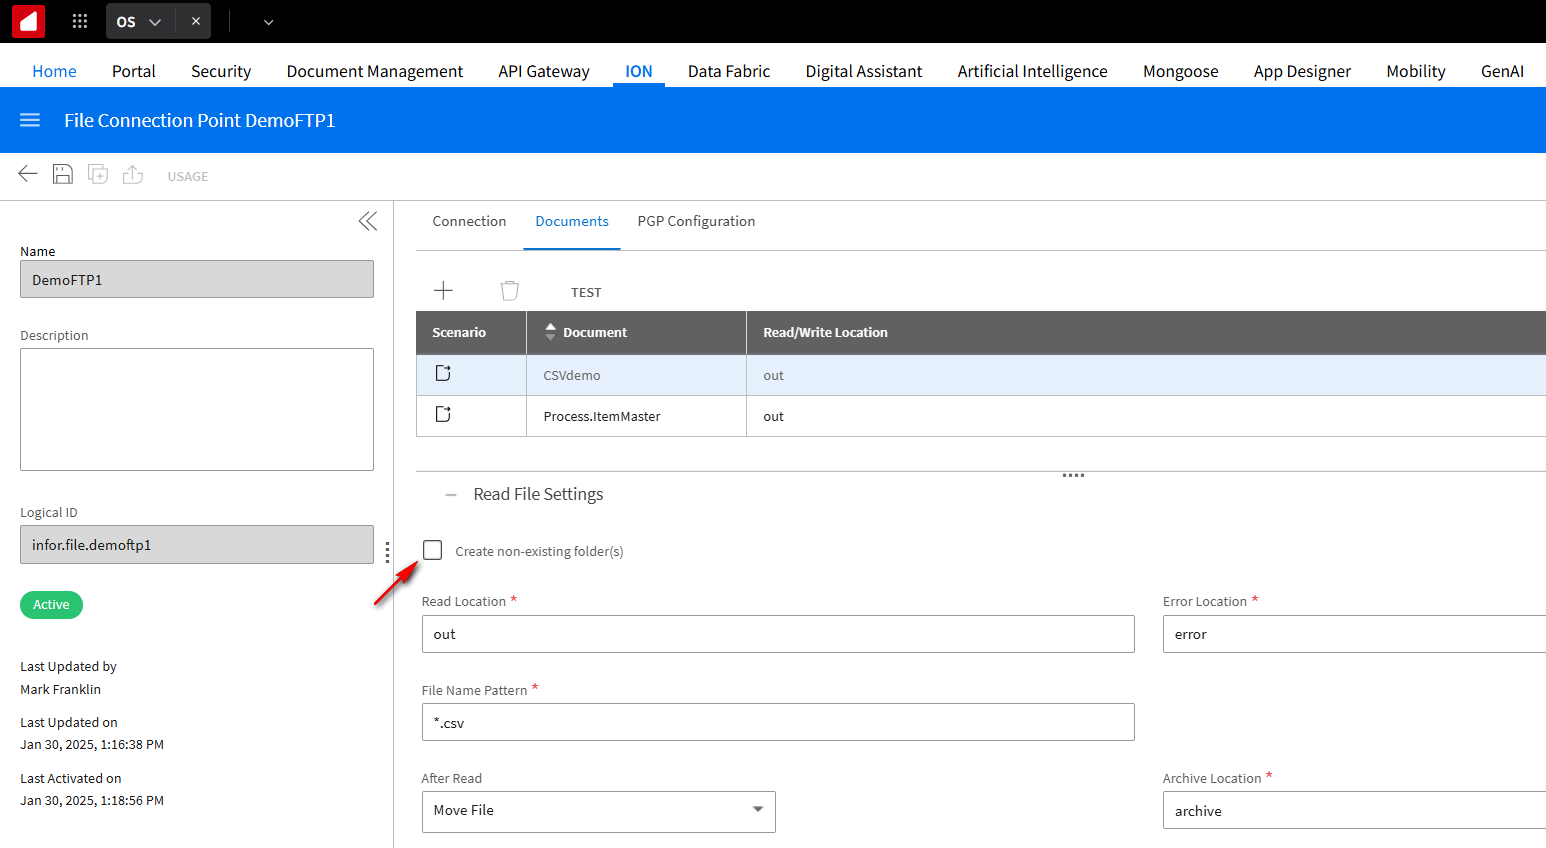
Click on the Documents tab, we’ll tell it what kind of documents we’ll send through this connection. Click the + button.
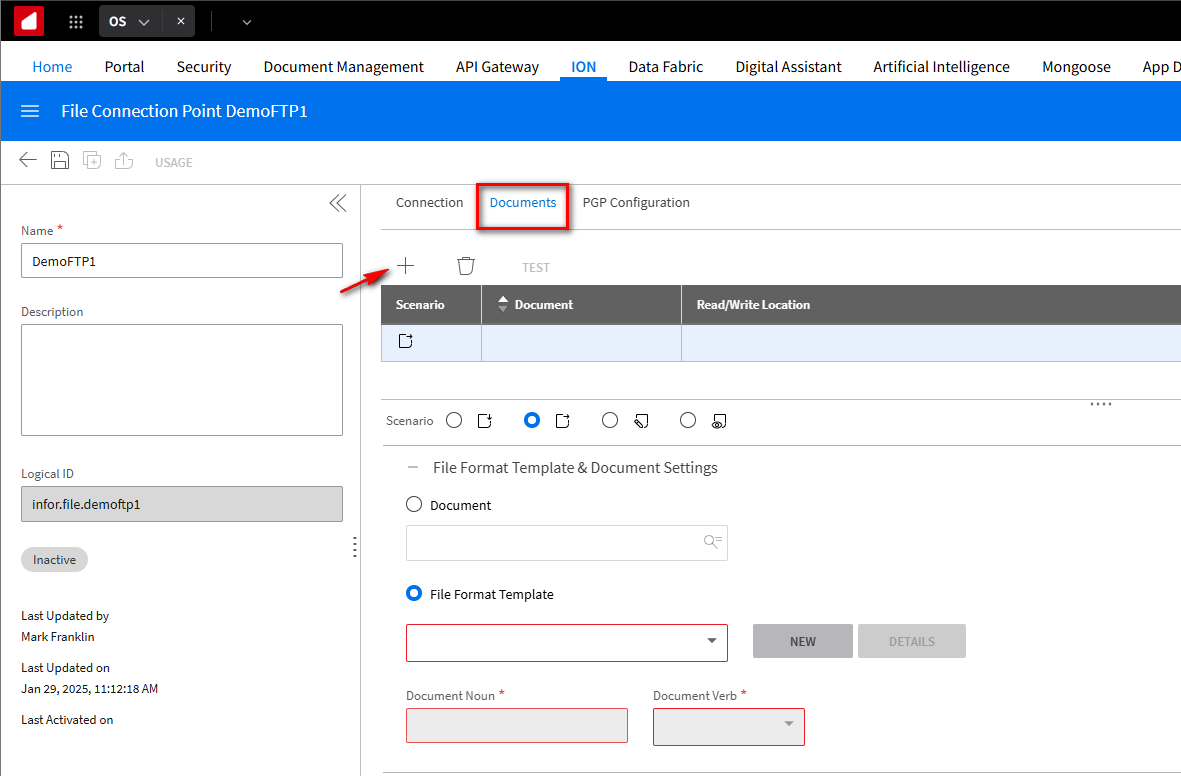
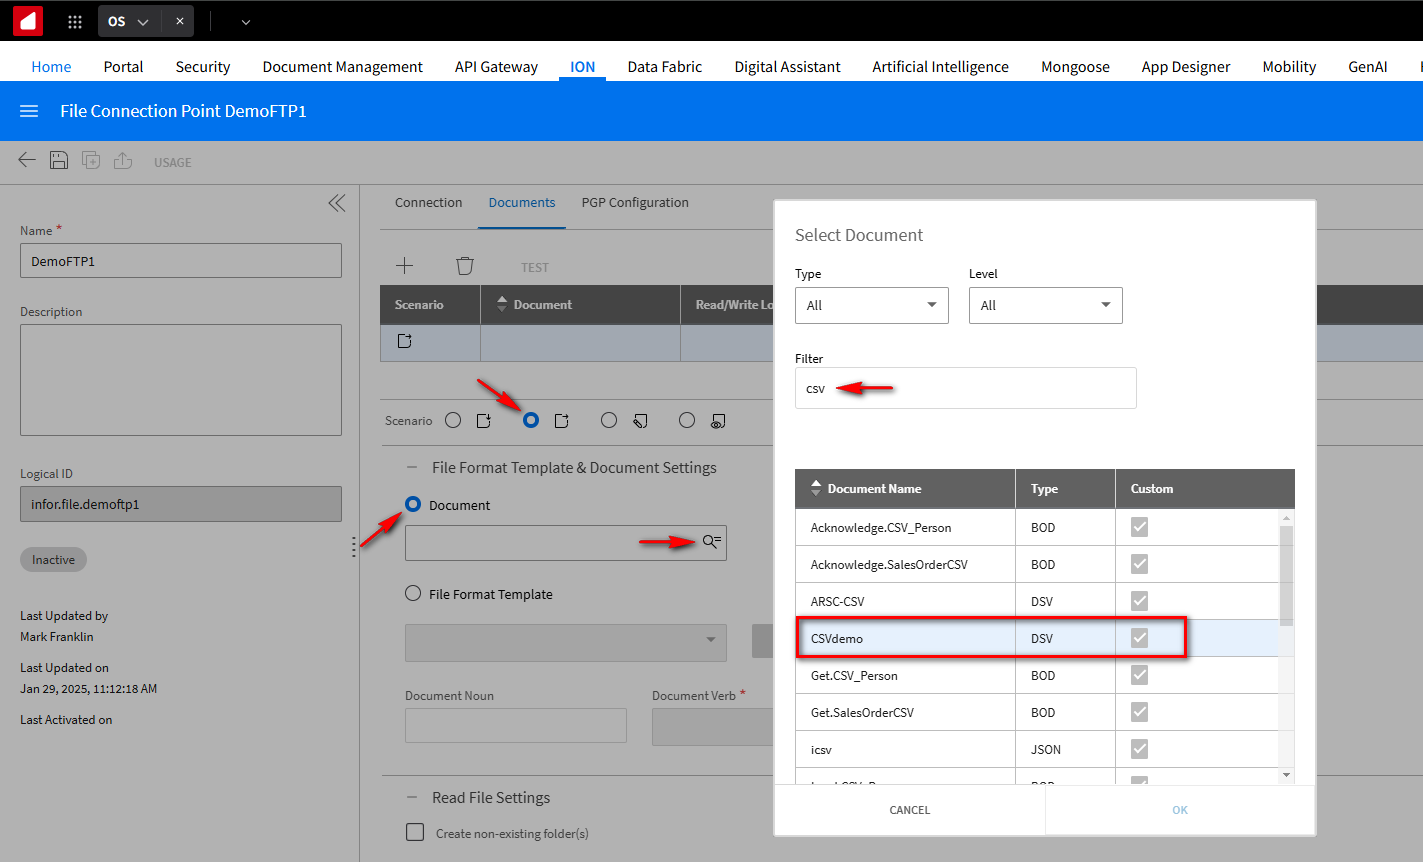
This is the outbound point. We’ll be picking files from a folder in this FTP site. In the Scenario section, select the outbound radio button. Then select the Document radio button and Filter for the defined CSVdemo schema. Select it and click OK.
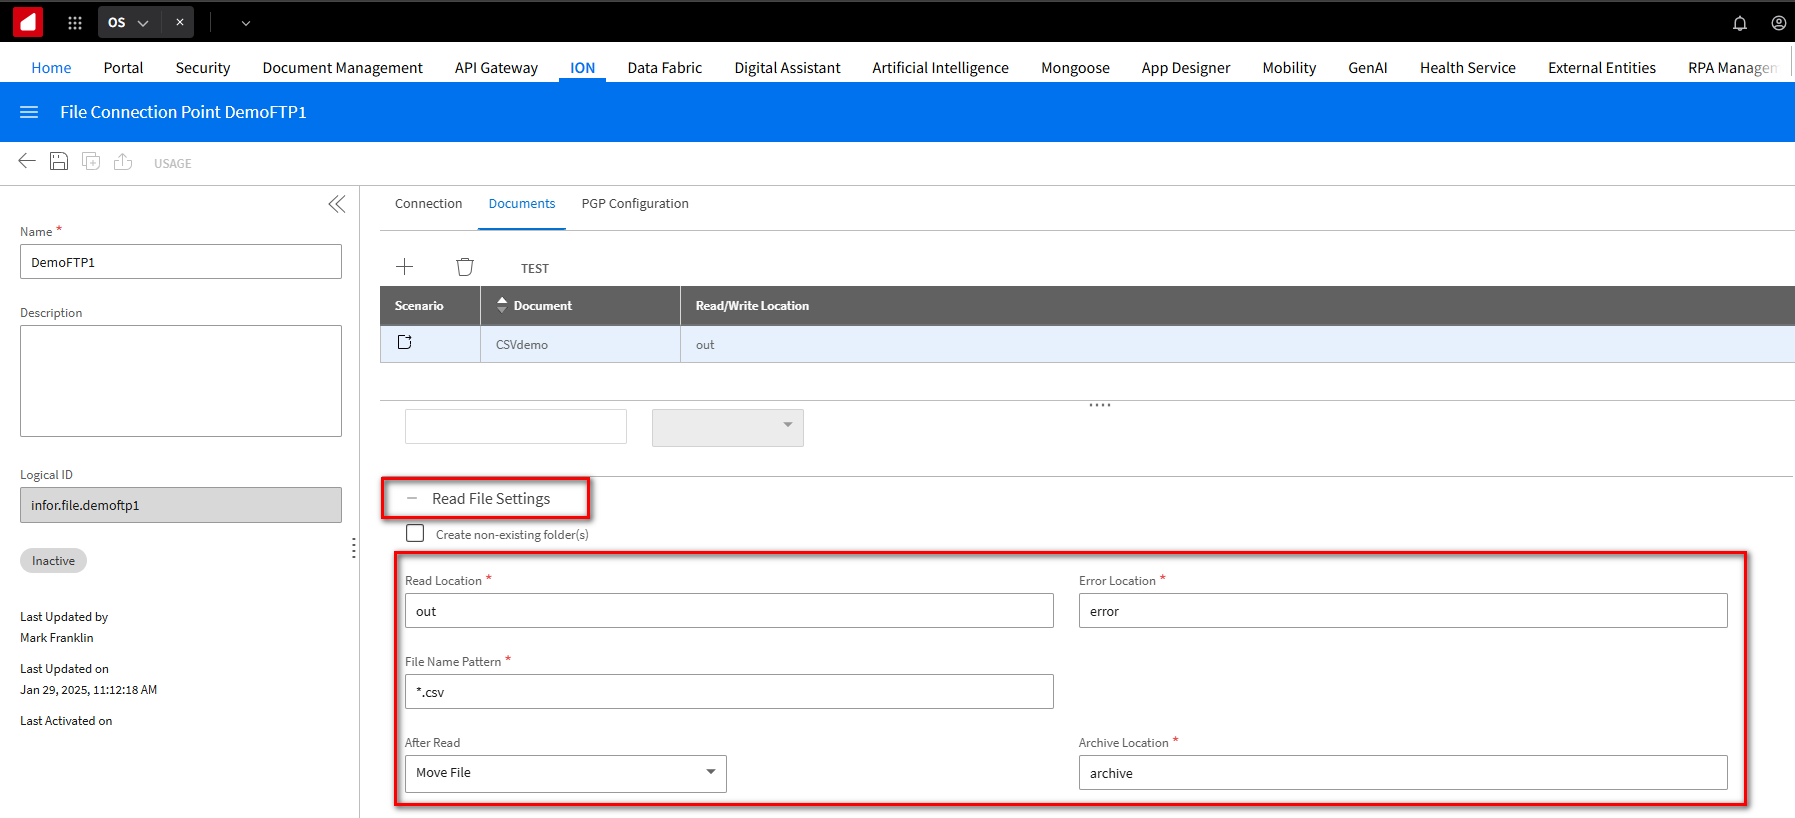
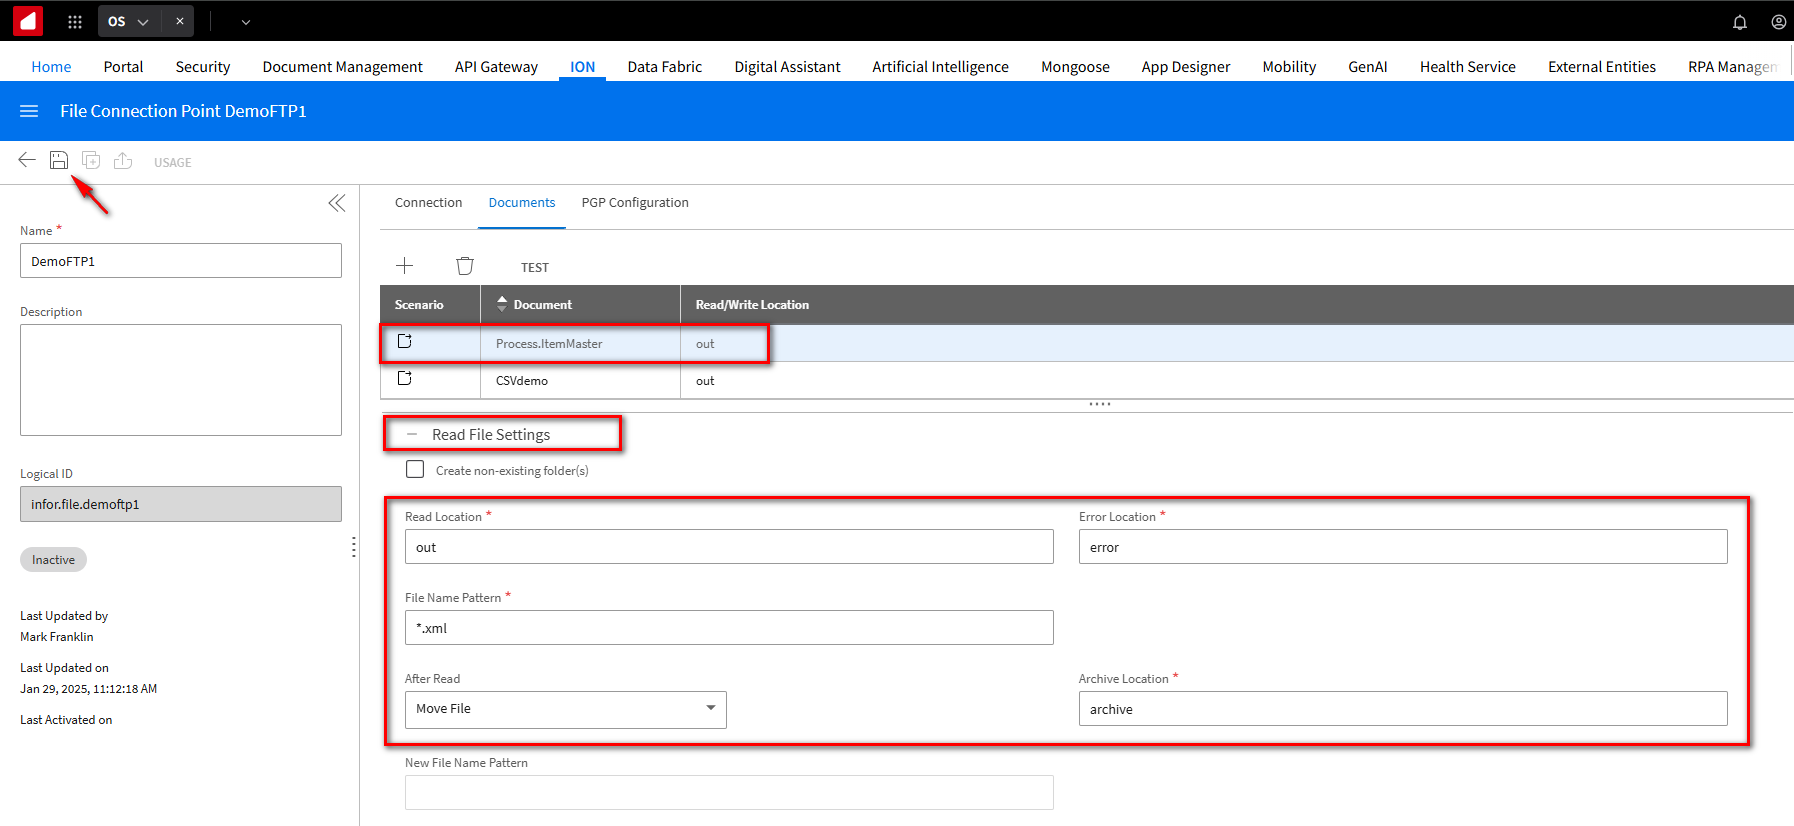
Scroll down to the Read File Settings section. In the Read Location field, provide the folder you want to read from, we will name it out. For any errors in processing that file, in the Error Location field, fill in the folder name of error.
Put *.csv in the File Name Pattern field to pick up any CSV files in the out folder and after it’s read the file. In the After Read field, you can Move the file, Rename it, or Delete it; in this case, we’ll Move it to a folder called archive.
NOTE: You may have to change the values to match the directory structure of your FTP site.
Example: If you want to have the folders located in the local directory on your FTP site, you would use the following values.
local/out
local/error
local/archive
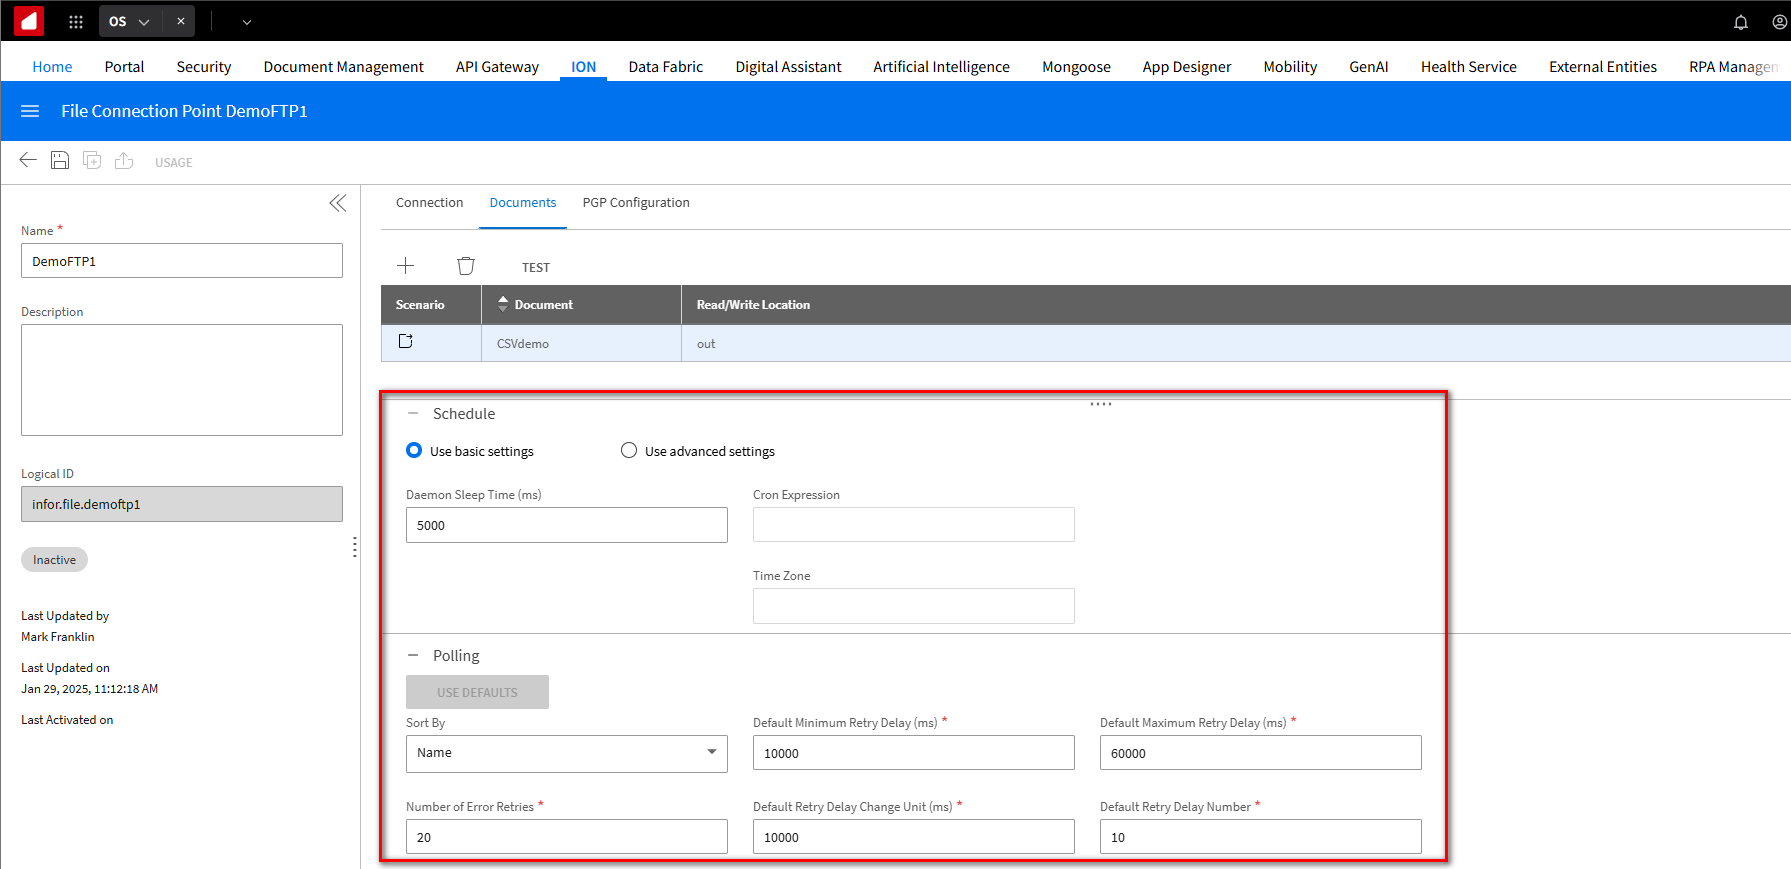
There are also options on how often to pull this FTP location, the default being 5 seconds. We’ll leave the default, but you could define more complex Chron expressions. There are also Polling options to decide what to do for errors between retries, but we’ll keep the default.
We’ll set a second type of BOD file and XML BOD files.
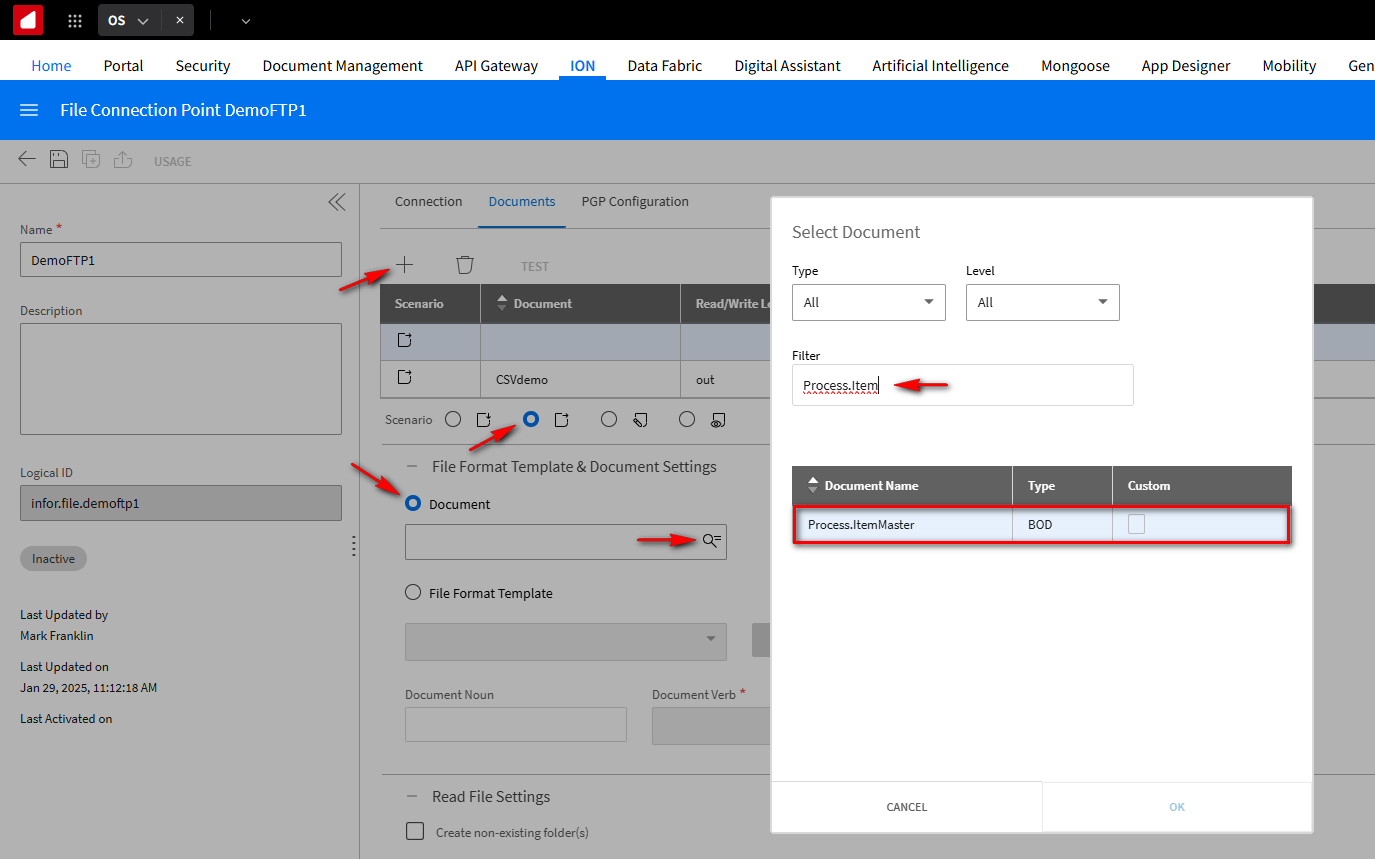
Click the + button again. In the Scenario section, select the outbound radio button and choose the Document radio button.
Select the Search button and Filter for the type of BOD file we want to pick up, which is the Process.ItemMaster BOD for this tutorial. Click OK.
We’ll Define the same options for this document as it might be in a separate folder on this FTP site. In this case, we’ll just put in the same Read Location, Error Location, and Archive Location folder information, setting the File Name Pattern field to *.xml, since this will be an XML file instead of a CSV file. Click Save. This connection point is now ready to use.
NOTE: Again, you may have to change the values to match the directory structure on your FTP site.
Example: If you want to have the folders located in the local directory on your FTP site, you would use the following values.
local/out
local/error
local/archive
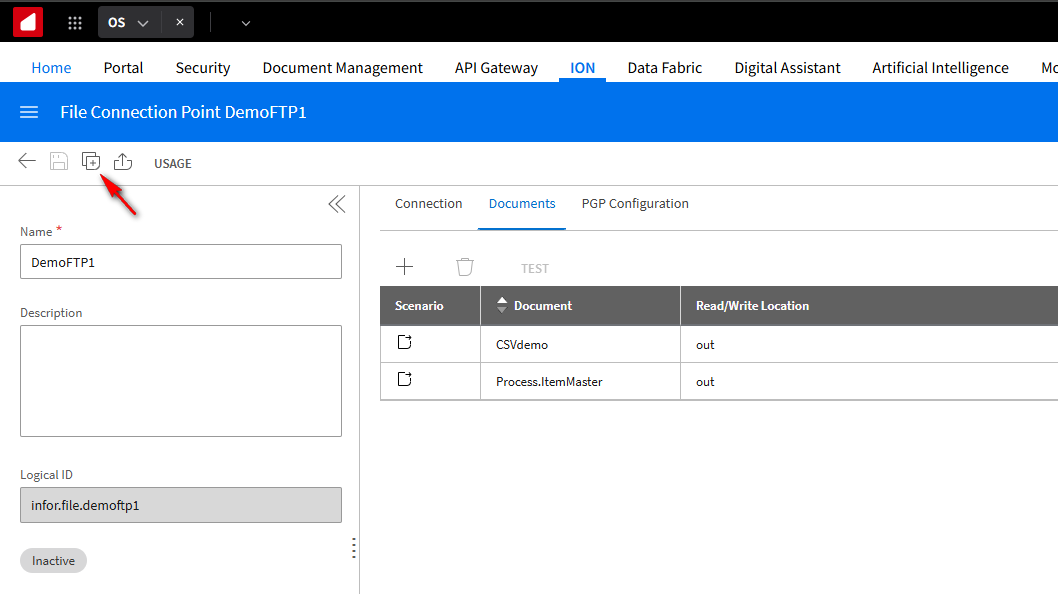
Since we will send these documents from the DemoFTP1 location to another FTP location, we can duplicate the connection point to save some setup time. On the DemoFTP1 Connection Point, click on the Duplicate button.
Rename it to DemoFTP2.
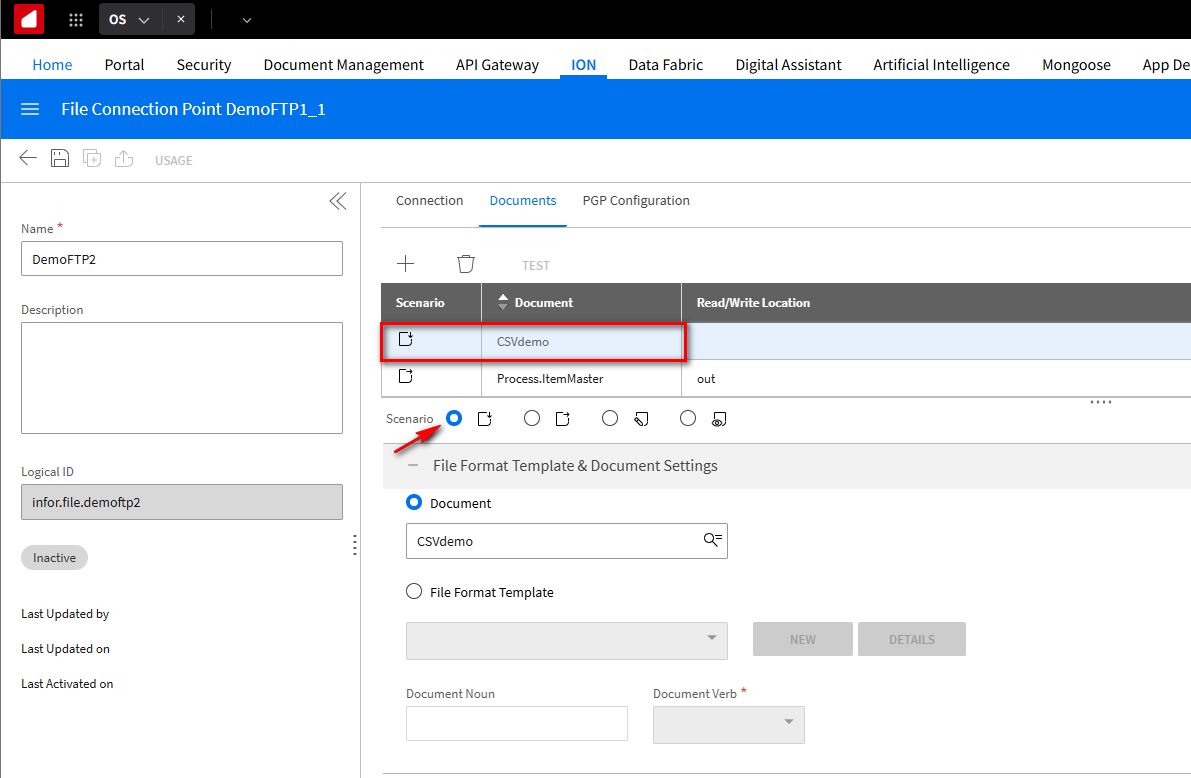
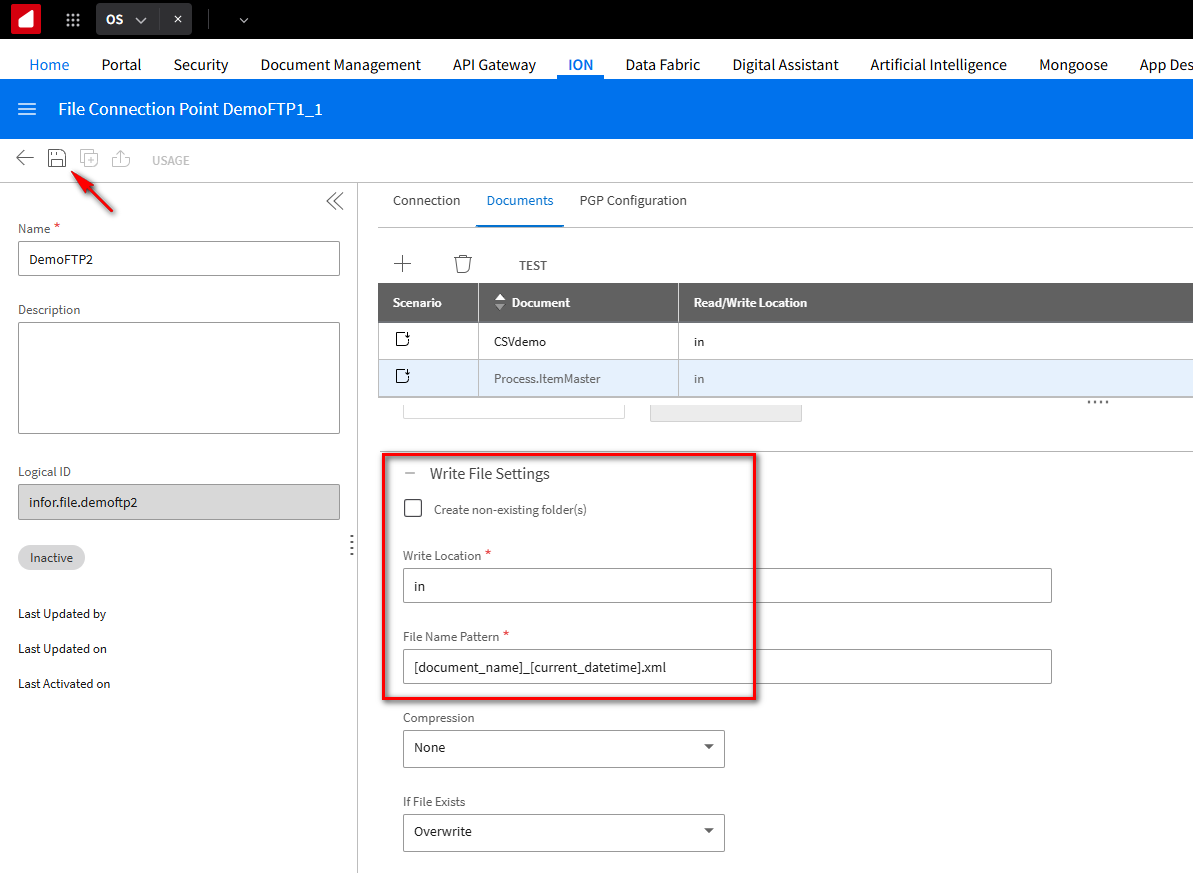
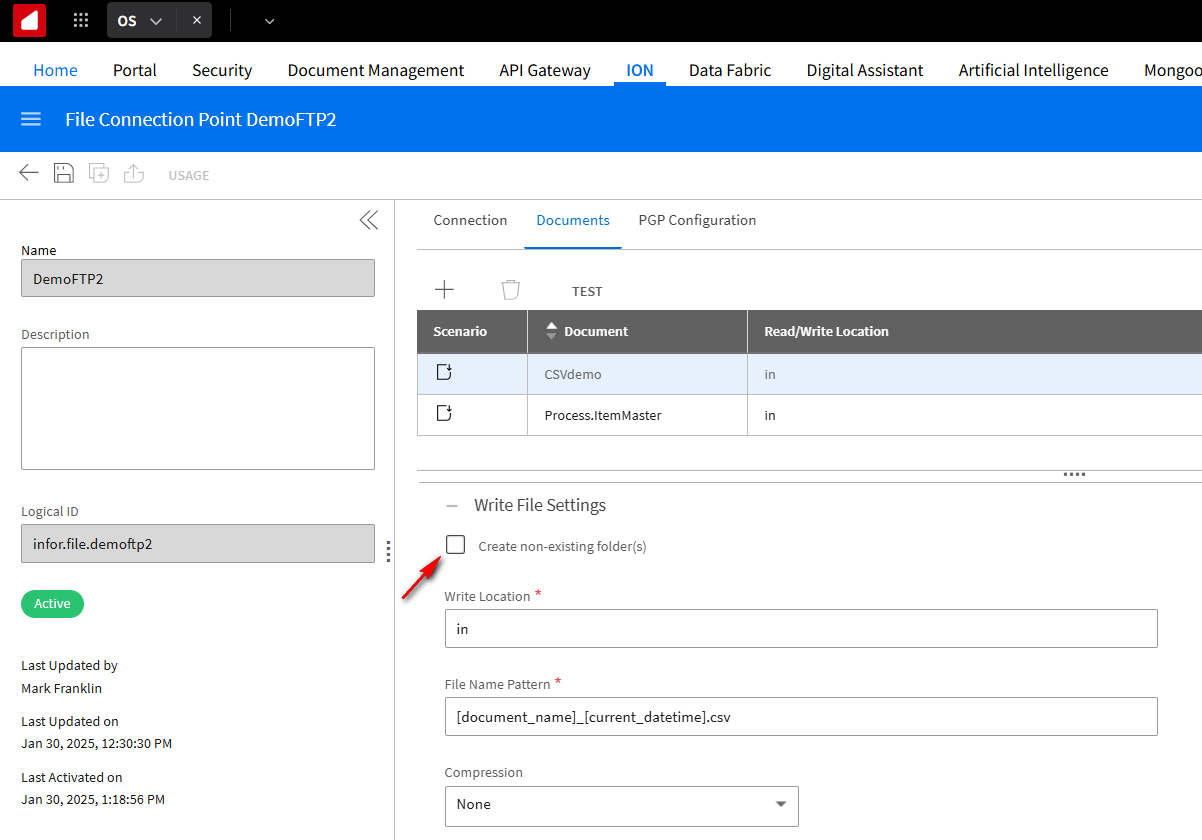
This connection point will support both CSV and XML file documents. But instead of reading out or reading a file from this location, we’ll write to or write a file to this location. Under the Documents tab, select the CSVdemo document and change the radio button Scenario to the Write a File to a folder option.
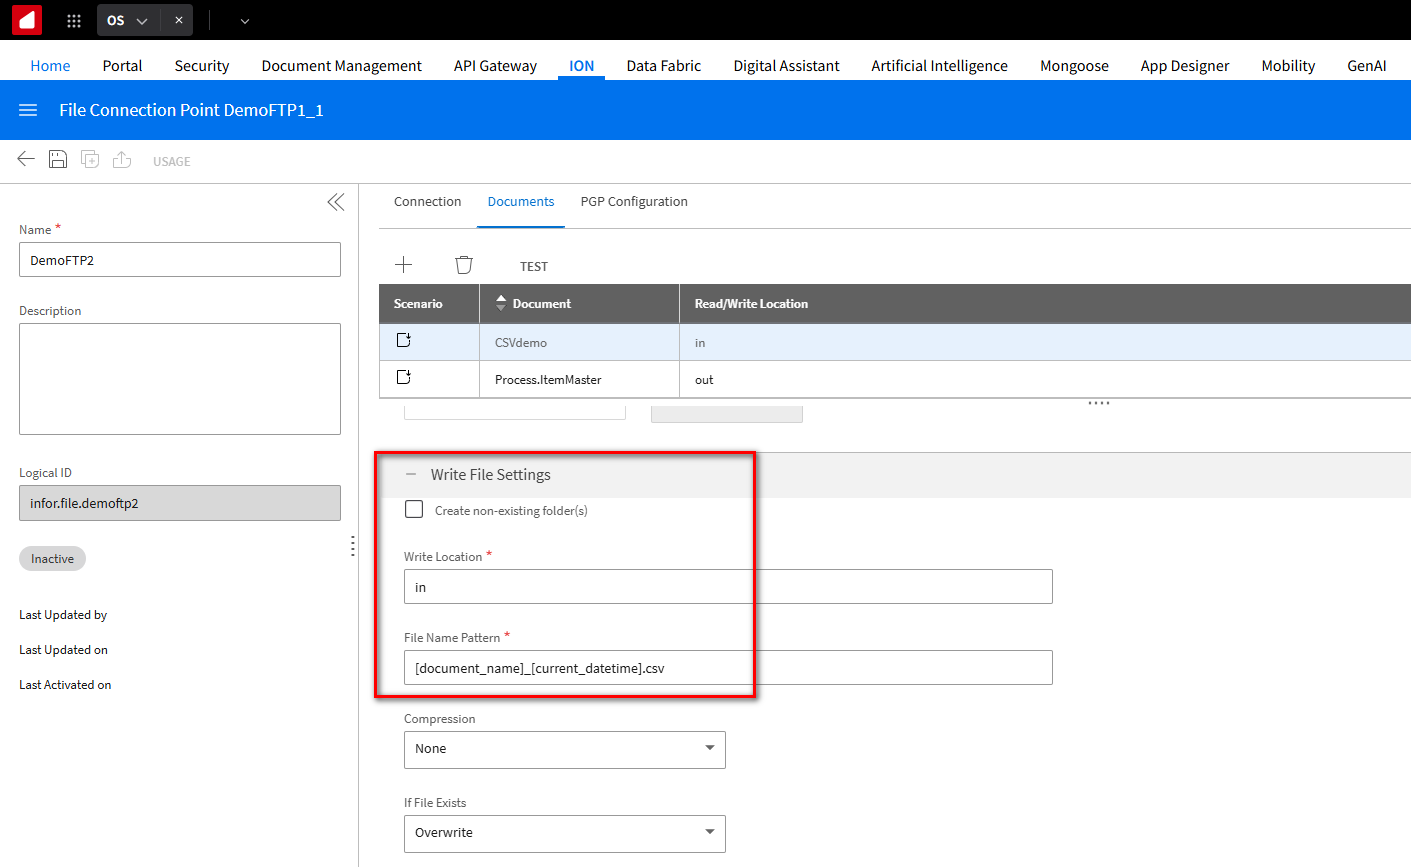
In the Write File Settings section. In the Write Location field, type in and for File Name Pattern to avoid overwrites, press the Ctrl -> spacebar keys and select the document_name listing, type underscore, then press the Ctrl -> spacebar keys again and select the current_datetime listing and add .csv at the end. It should look like this [document_name]_[current_datetime].csv
NOTE: You may have to change the values to match the directory structure on your FTP site.
Example: If you want to have the folders located in the local directory on your FTP site, you would use the following values.
local/in
Select the BOD XML file or Process.ItemMaster document and change the radio button Scenario to the Write a File to a folder option.
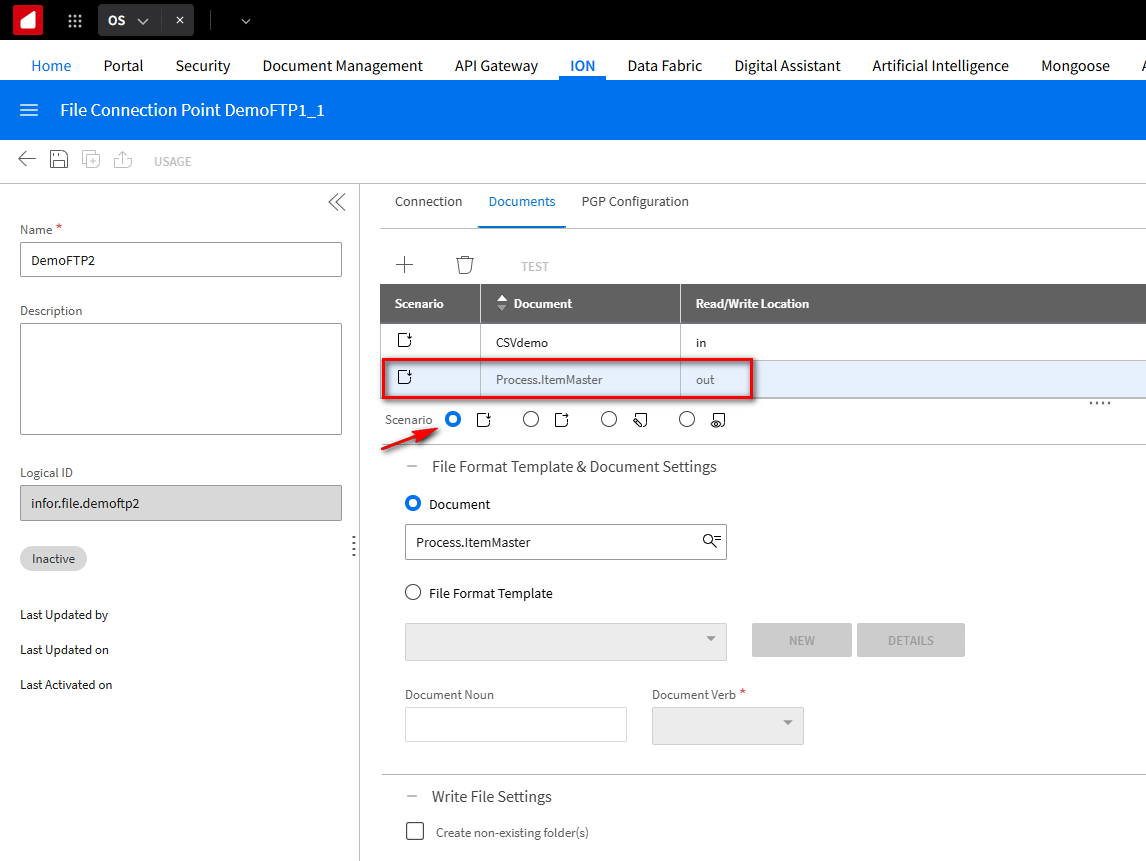
In the Write File Settings section. In the Write Location field, type in and for File Name Pattern to avoid overwrites, press the Ctrl -> spacebar keys and select the document_name listing, type underscore, then press the Ctrl -> spacebar keys again and select the current_datetime listing and add .xml at the end. It should look like this [document_name]_[current_datetime].xml. Click Save.
NOTE: Again, you may have to change the values to match the directory structure on your FTP site.
Example: If you want to have the folders located in the local directory on your FTP site, you would use the following values.
local/in
Building a Document Flow
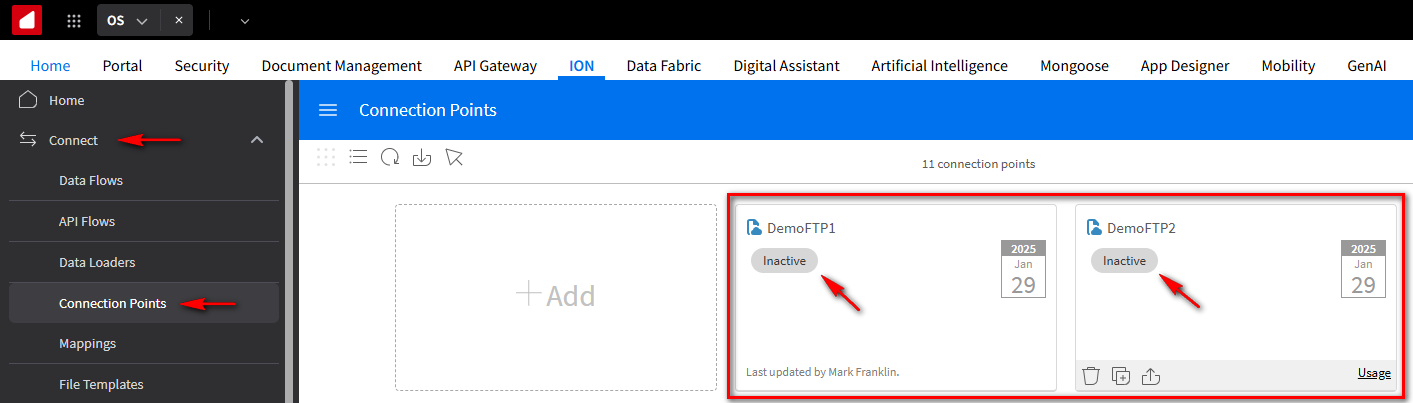
Now we can see that the two Connection Points are defined but Inactive, because we haven’t used them in a document flow yet.
To create a Document Flow, click on Data Flows in the navigation menu, click the + Add button, and select the Add Document Flow option.
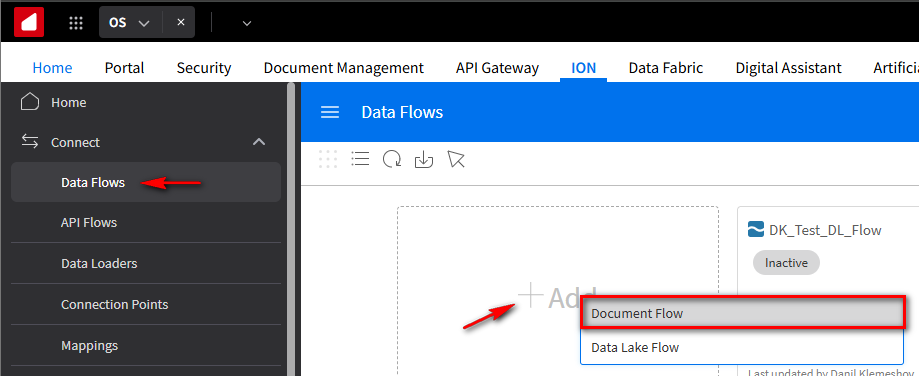
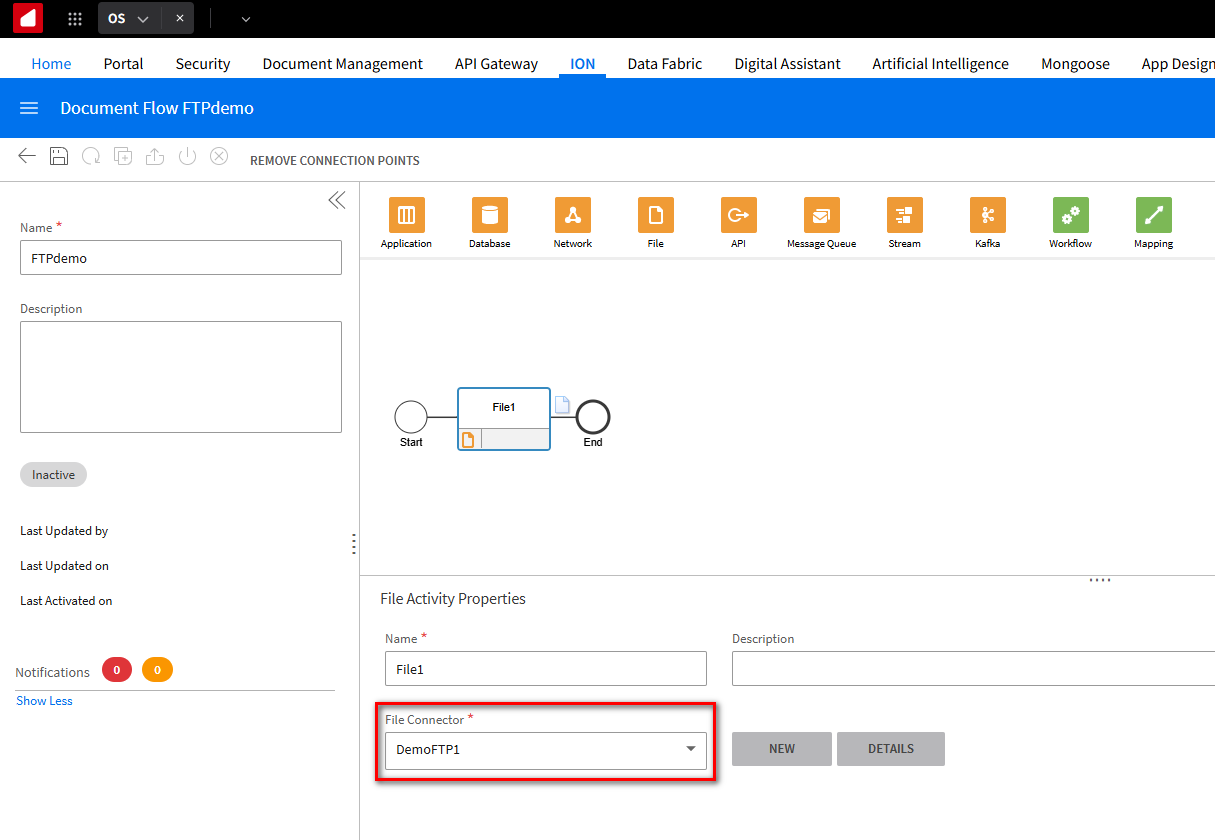
The Document Flow will Define how data moves from system to system. Provide a Name of FTPdemo, and from the top icons, drag the File connector onto the model.
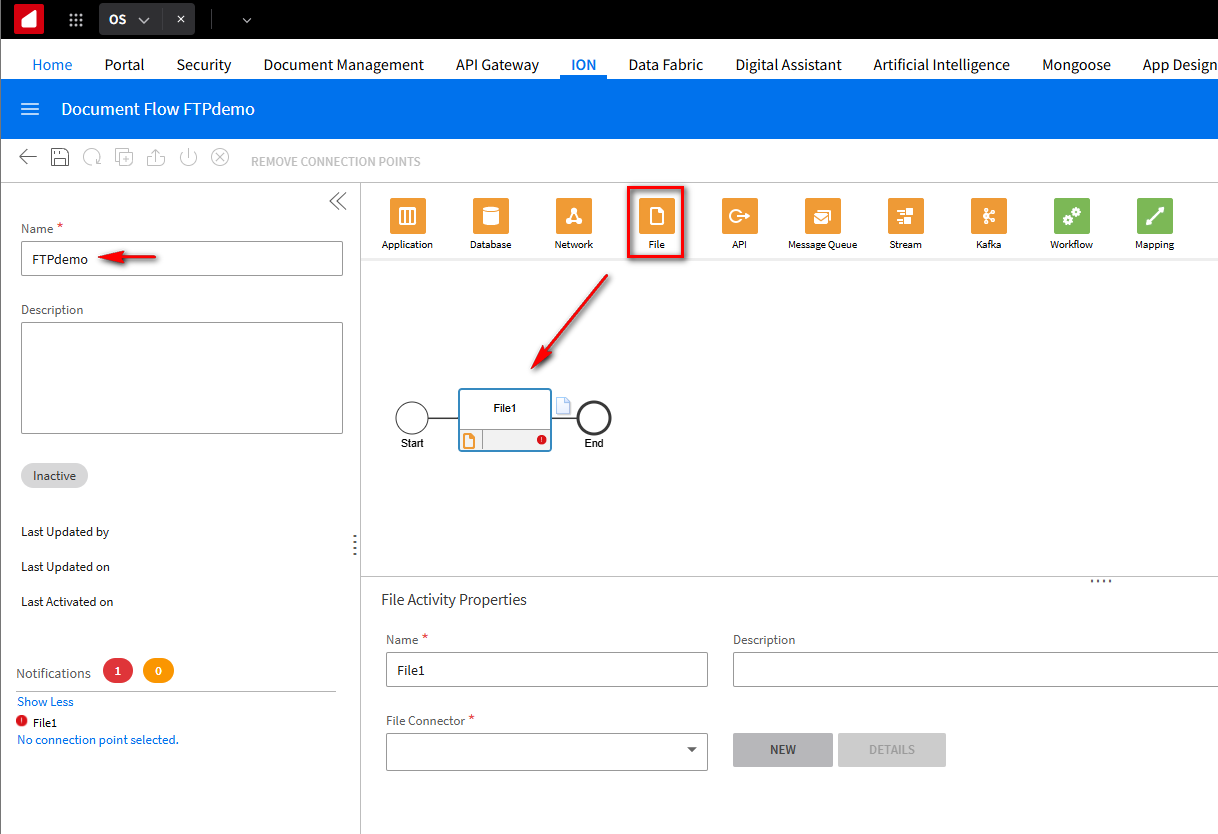
Click on File1 and in the File Connector field, select DemoFTP1.
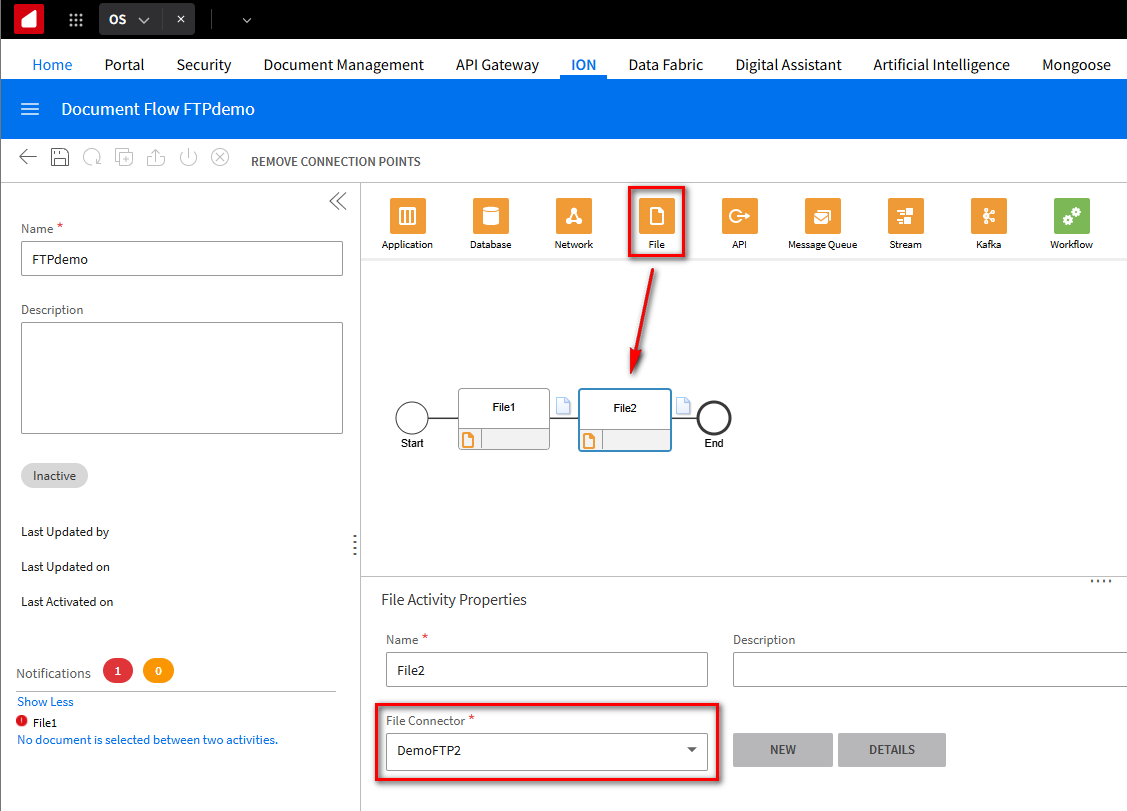
From the top icons, drag a second File connector onto the model. Click on File2 and in the File Connector field, specify DemoFTP2.
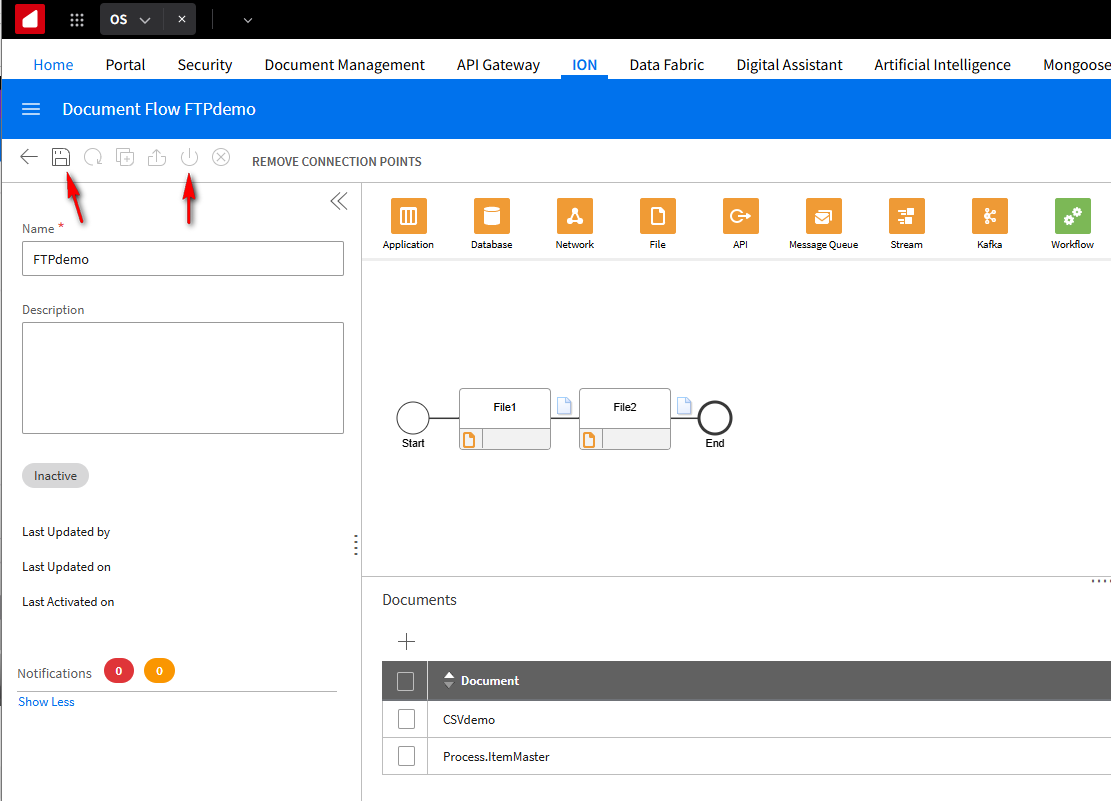
In between these two connection sites we need to tell the model what documents this model will support. Click in between the two file connectors, on the document icon. In the Documents section, click the + sign.

We can choose either of the listed documents, but we will choose both now. We’ve defined a model that says we want to read files from File1 using the connection point DemoFTP1 we defined and transfer both types of files over to DemoFTP2. Click OK.

Save and Activate the model.
Once activated, this ION system will start pulling the DemoFTP1 site to look for files.
The benefit of building this model is as your business processes and system integration grows you can always deactivate the model and quickly add in more options and processes to fulfill that complexity. From there you’d save and reactivate your model.
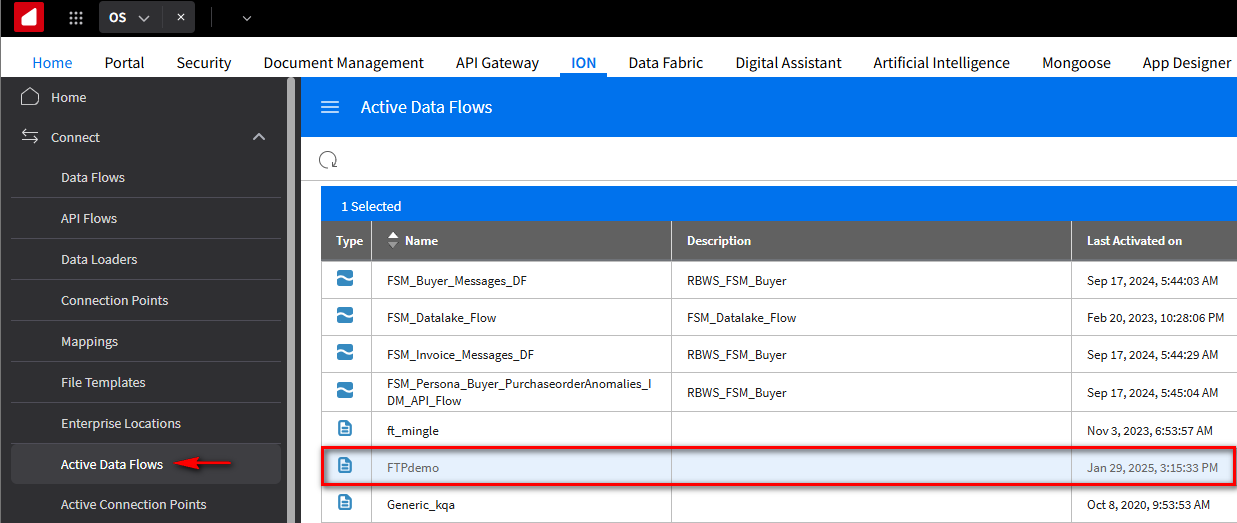
Viewing Active Data Flows
To review your Active Data Flows, go to the navigation menu and click the Active Data Flows tab. You can scroll through and view all active flows within this instance. We can view the FTPdemo flow, its Type, which is indicated as a document flow, the provided Description, and the most recent activation time. You can choose to click on the flow and pull further details from the top right corner, which we’ll see exemplified later.
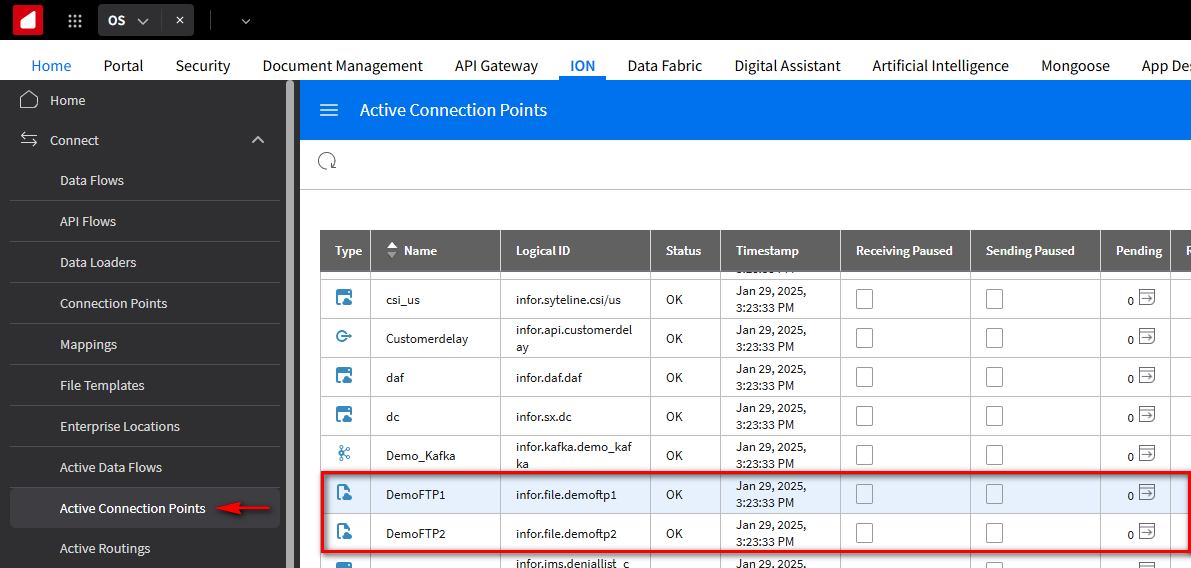
We can also view Active Connection Points. On the navigation menu click the Active Connection Points tab. Here, you can see the two connection points, DemoFTP1 and DemoFTP2, their Type being FTP over Cloud, Logical ID, Status, as well as other details such as the number of pending incoming messages or files.
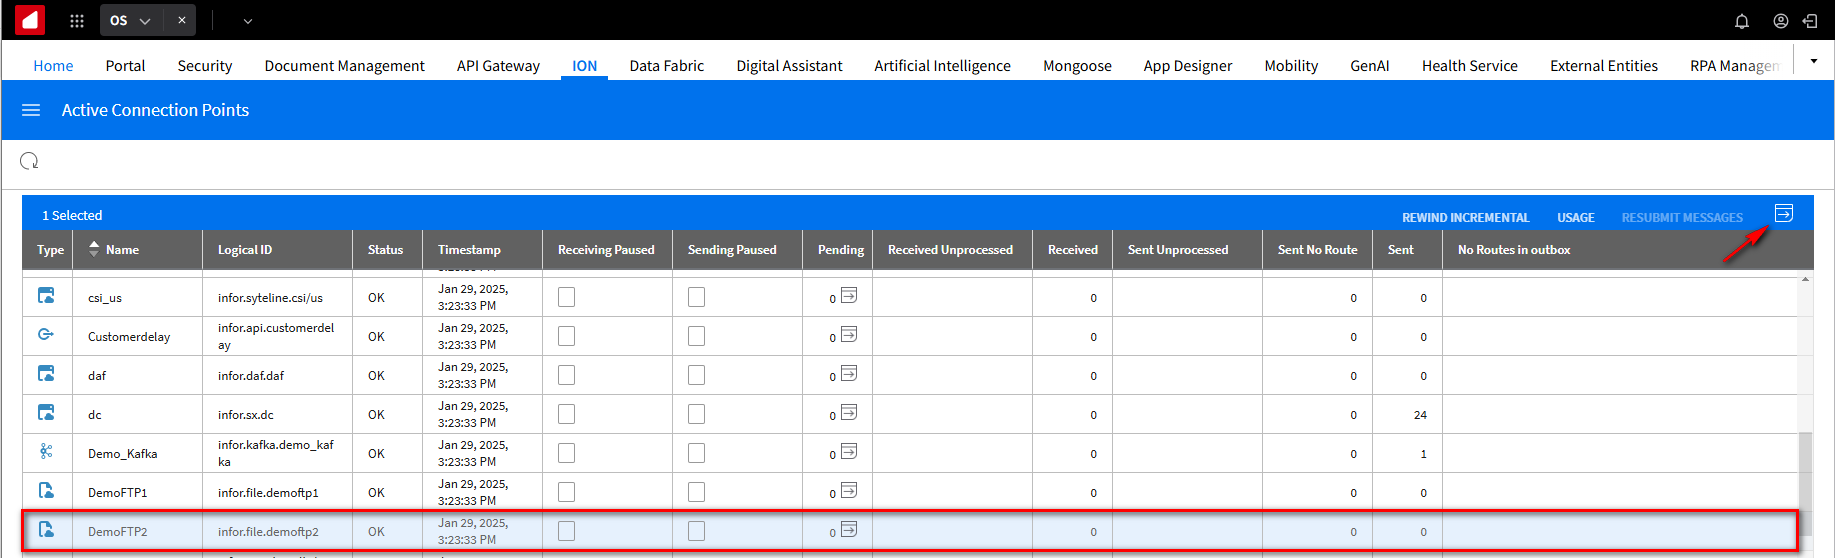
To view the details of a connection point, we can select one of our connections; we will select DemoFTP2. To do so, click the Details button at the top right.
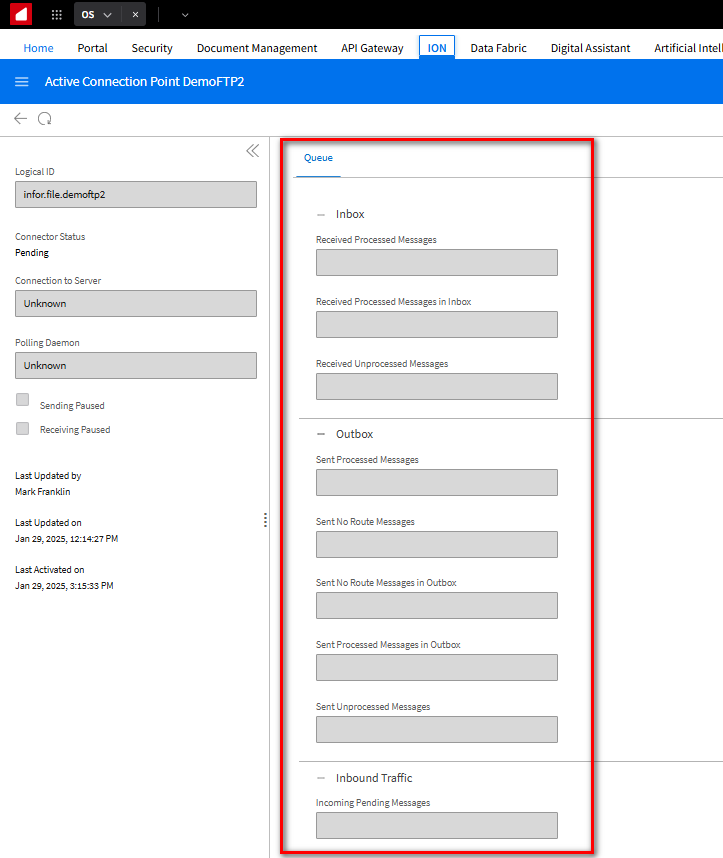
View inbound and outbound traffic and additional properties.
Test the FTP integration
Let’s test the FTP integration with ION. Go to the FTP site, we will use FileZilla.
You can manually create the out, in, error, and archive folders mentioned above on your remote FTP site or use the Create non-existing folder(s) option in the DemoFTP1 and DemoFTP2 connection points located in the Read and Write File Settings section.
Also have the MyCSV.csv and Process_Item_Master.xml files on our local drive.
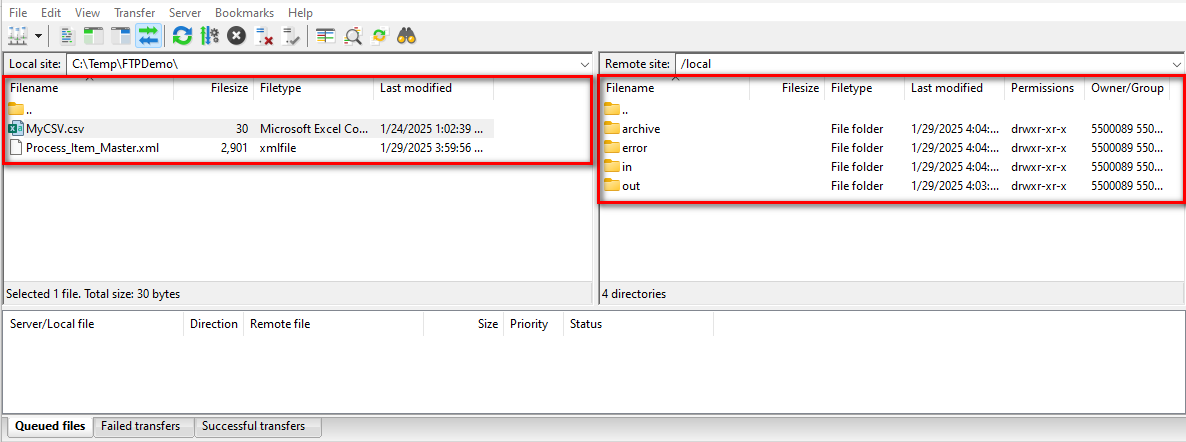
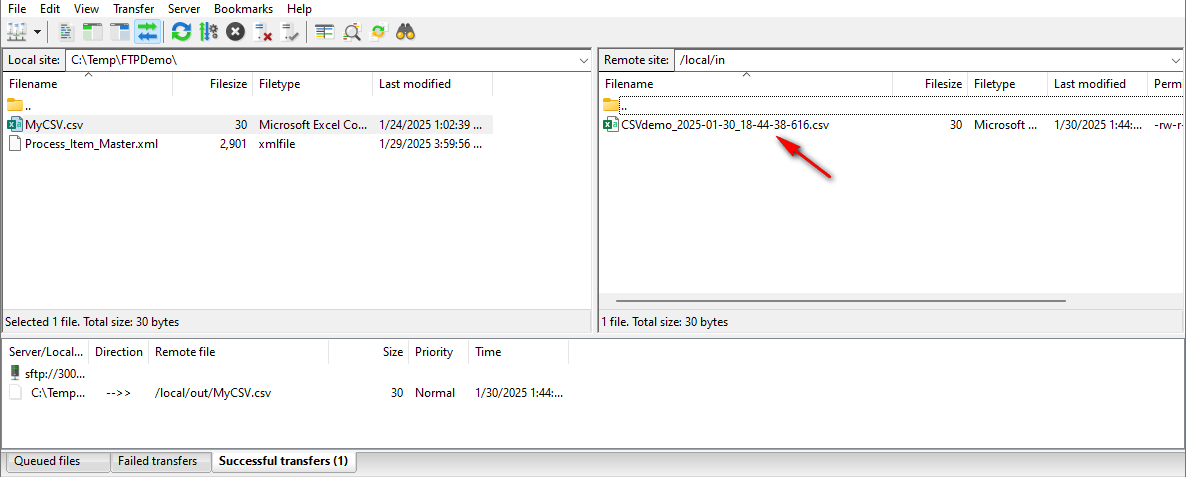
Start by dragging and dropping the MyCSV.csv file into the FTP out folder. After the FTP site processes the transfer we can see that it was successful.
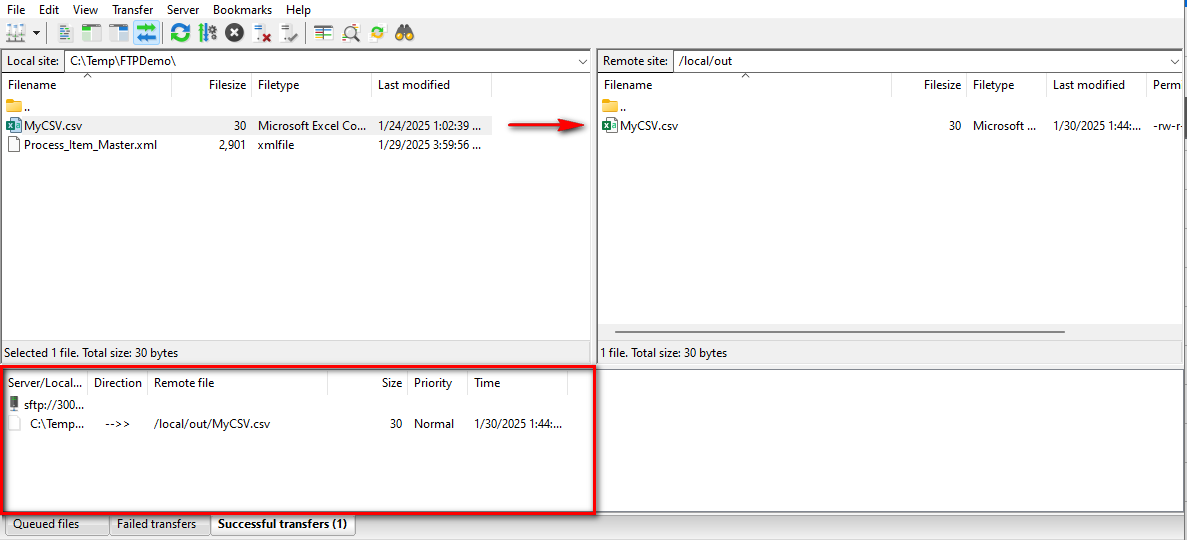
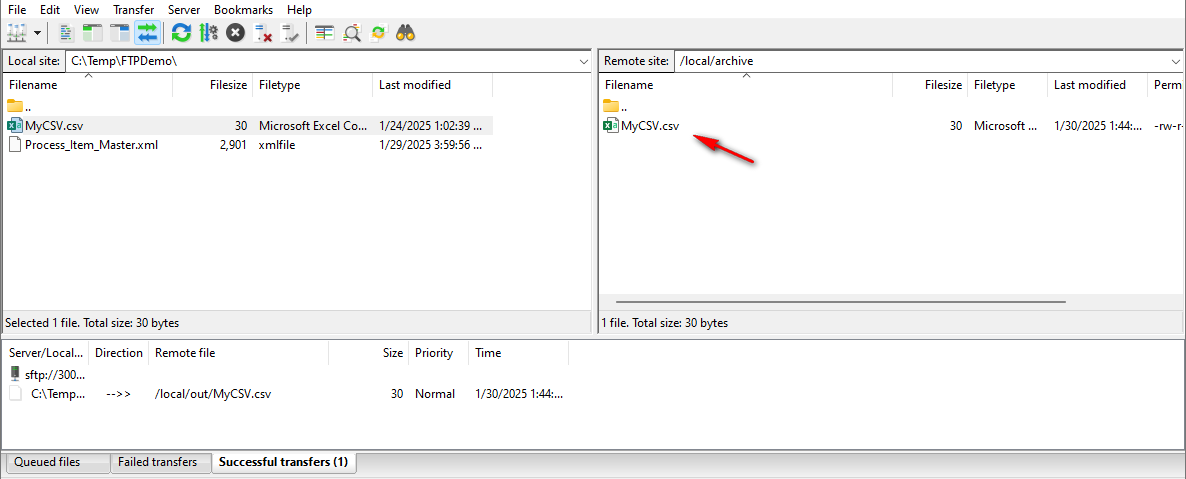
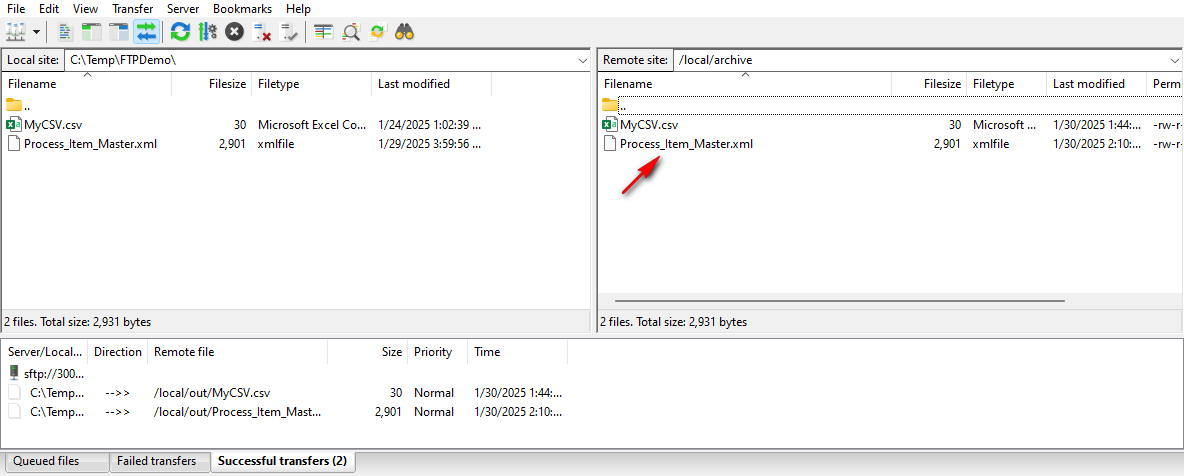
After refreshing the site, we can see that ION picked up the CSV file. If we go to the Archive folder on the FTP site, we can see that ION moved a copy of the CSV file to the archive folder as specified earlier. This can be used for internal auditing purposes, for example.
Now, if we go to the second FTP site or the in folder for this example and look at the inbound folder, we can see that the CSV file was transferred here successfully but was renamed accordingly to the name and Convention we set up earlier, which was CSVdemo_datetime stamp.csv.
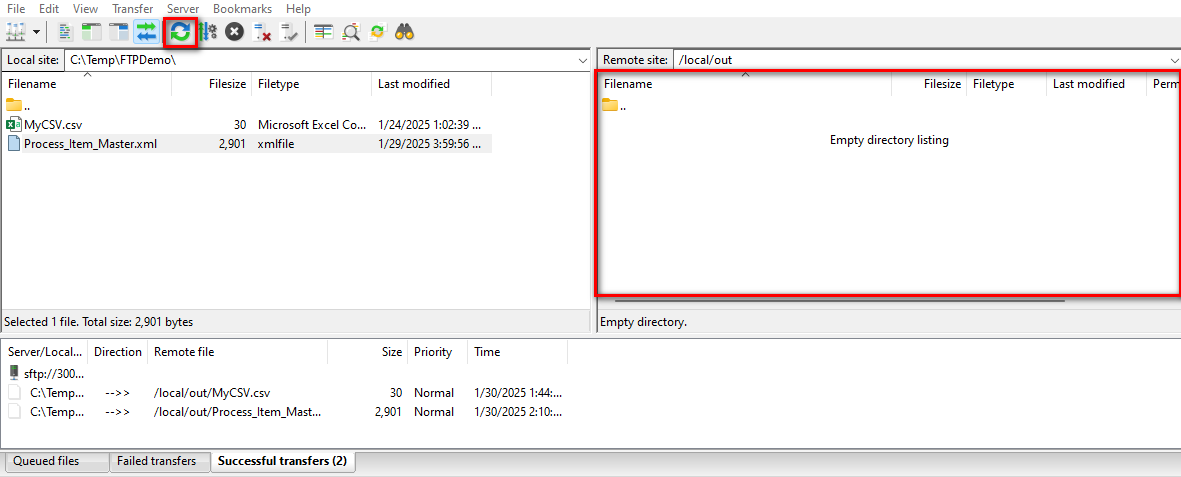
Let’s do this again, with the Process_Item_Master BOD file. We can upload it to the out folder on the first FTP site.

Click the refresh button and notice it has been removed from the out folder. The CSV file would have behaved the same way.
Click the archive folder to view the XML file moved as the CSV file did before.
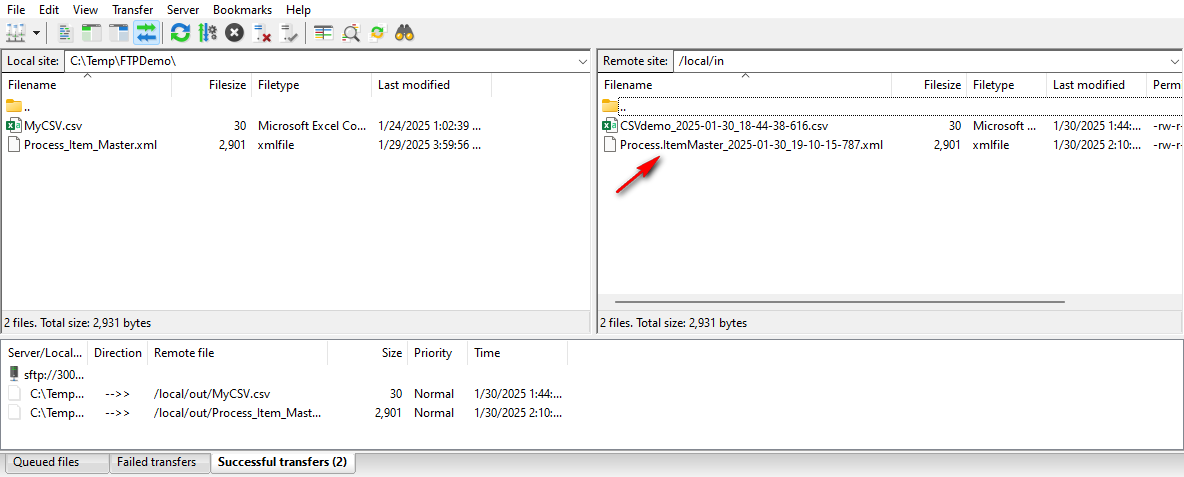
On the second FTP site or the in folder for this example, we can see both the CSV and XML files have been renamed and stored here.
Viewing the Flow Process
For an additional look into the overall flow process, we can quickly go to OneView in ION.
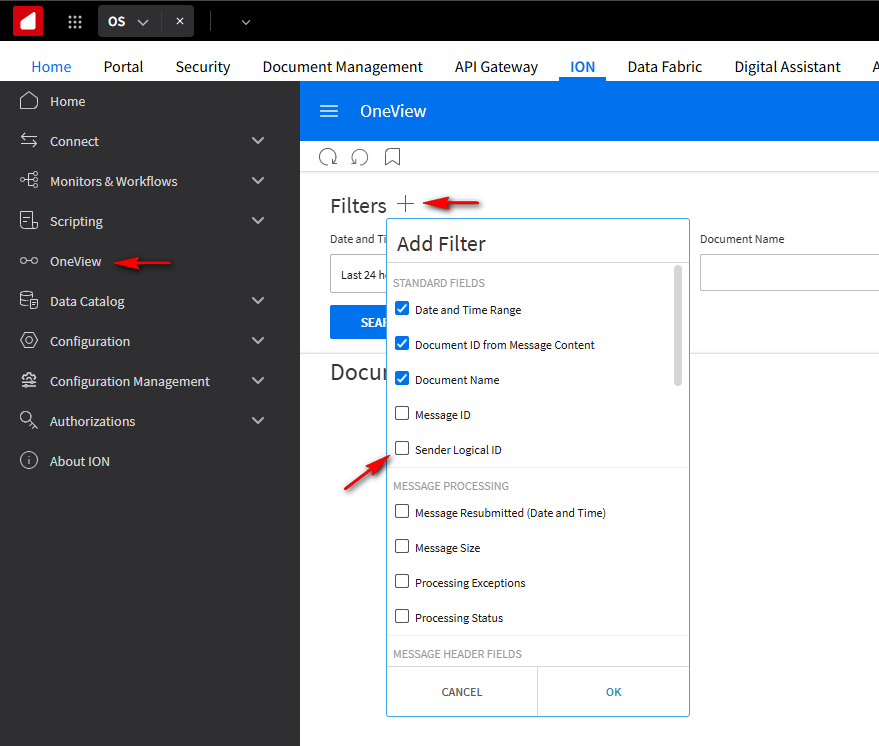
In the navigation menu, select the OneView tab. Next to Filters section, click on the + button and select the Sender Logical ID option. Click OK.
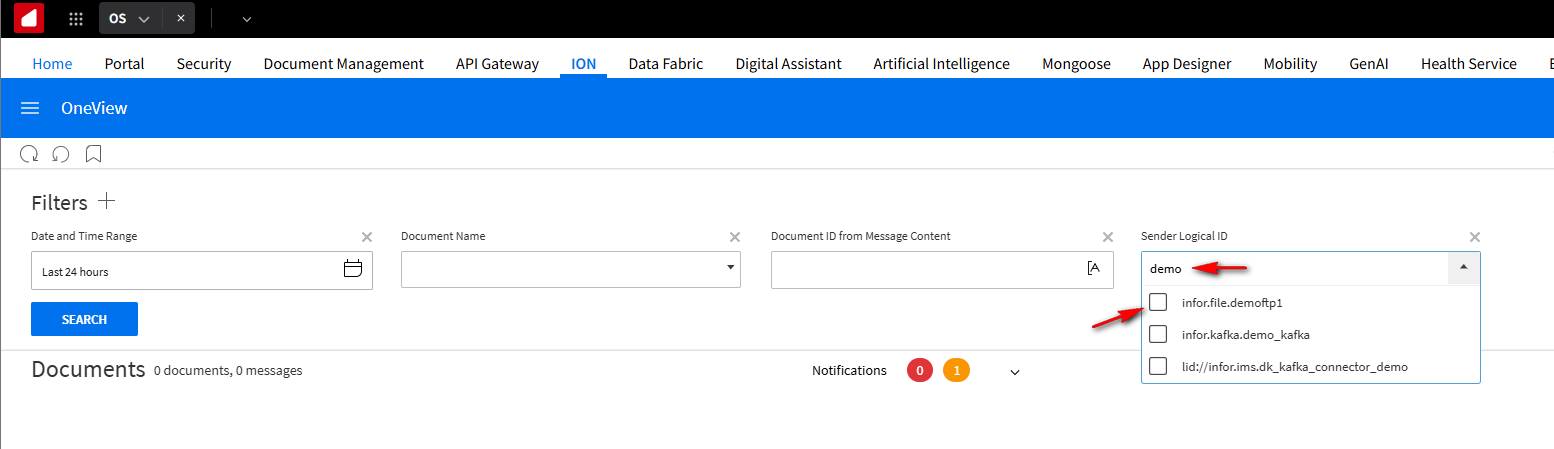
Here we can view the successful document transfers by filtering for the Sender Logical ID. Search on demo and select infor.file.demoftp1. Click Search.
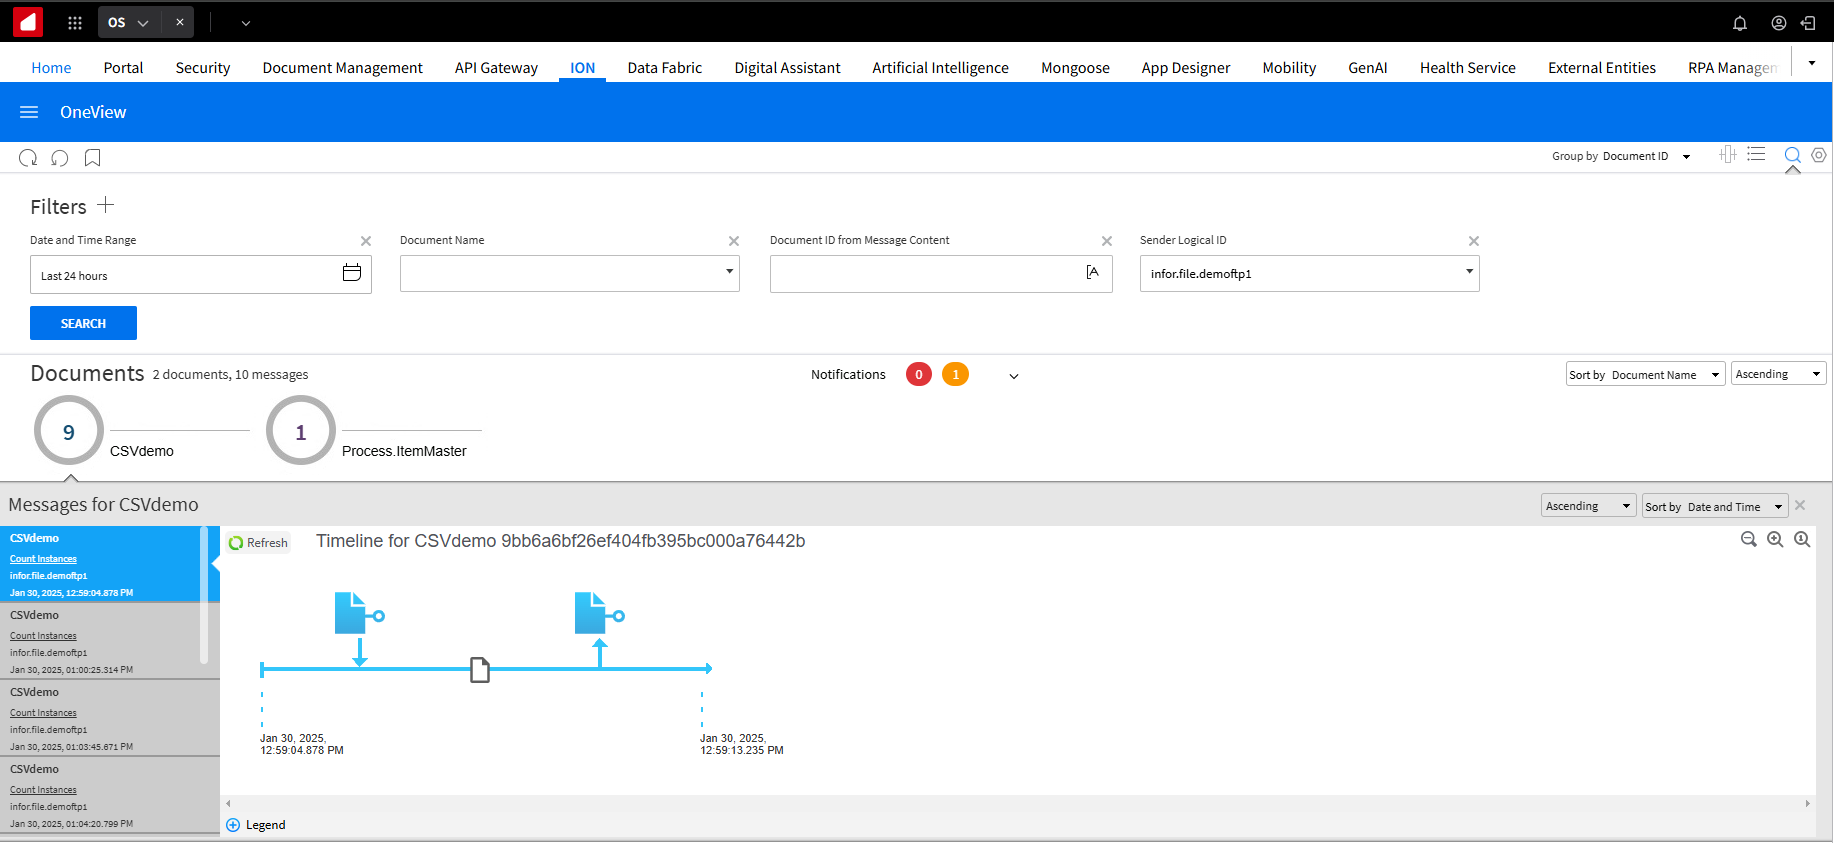
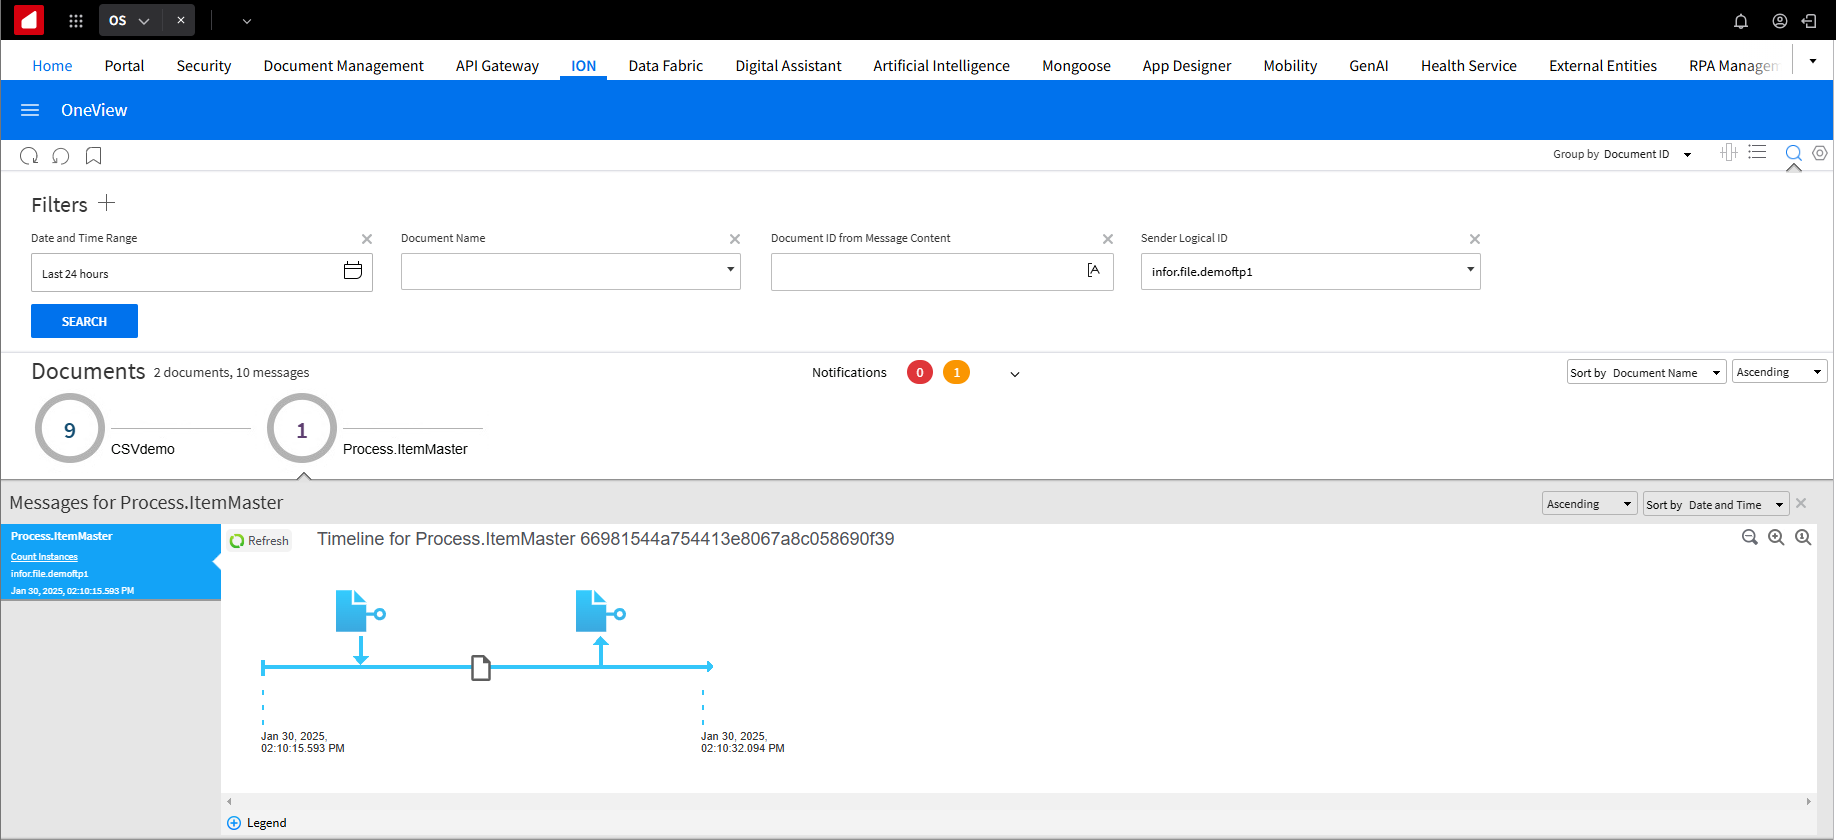
Drill down into each document (CSVdemo and Process.ItemMaster) to view timestamps and additional details regarding each FTP site, such as the underlying tenant instance.
This concludes this tutorial on how to set up a FTP integration with Infor ION.
Watch the following video to view all the steps that were covered.
Downloads
Resources
Help Documents and User Guides